My project - 1965 Beetle full restoration...
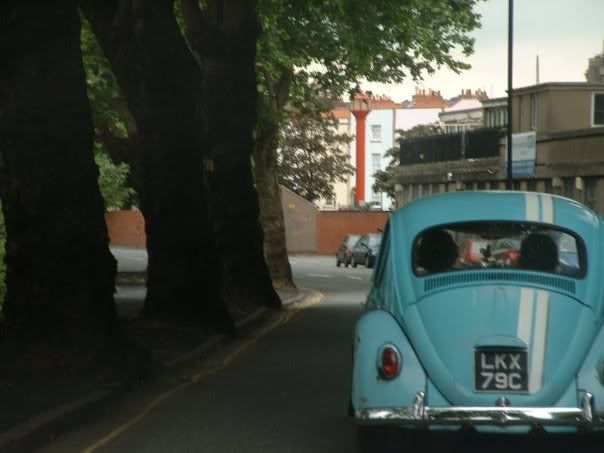
Hi all, this is the story of my VW Beetle restoration.
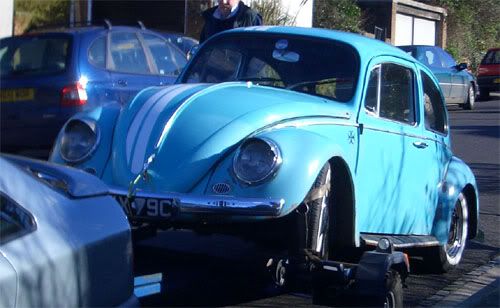
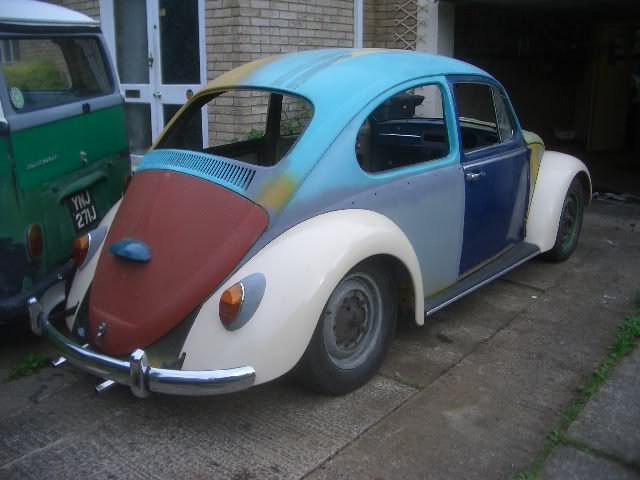
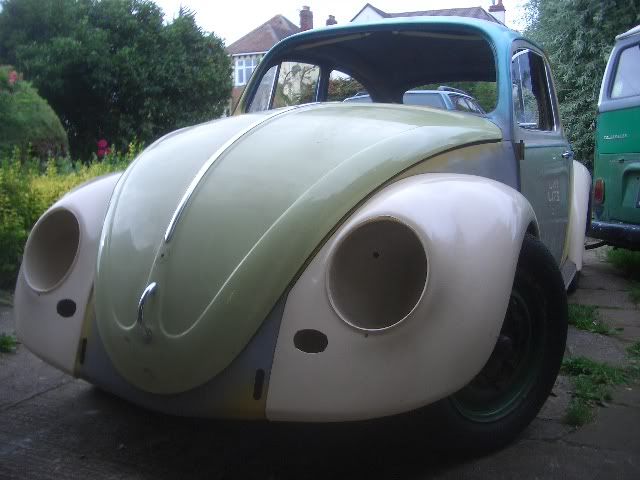
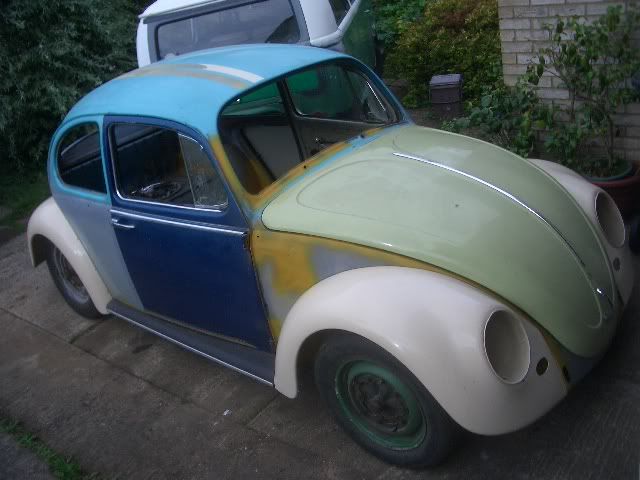
I bought it 4 years ago, on eBay. Before bidding, I went to look at it on a dark, rainy night. And it didn't look that bad...
Anyway, the bloke I bought it from was so desperate to get rid of it that he even delivered it for free...
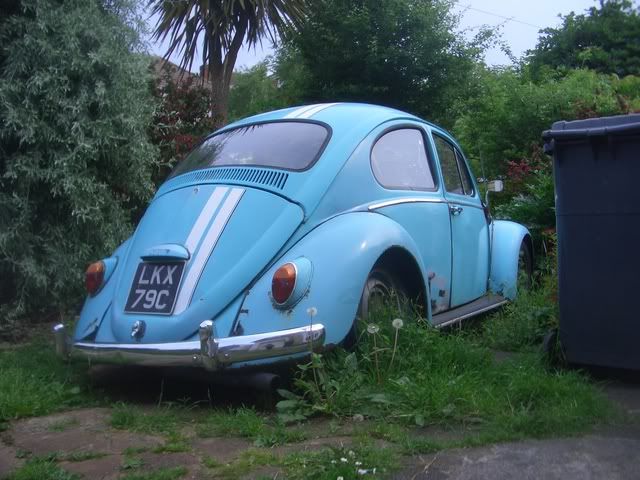
Anyway, I took it for an MOT and it failed spectacularly. The fail sheet was over 2 pages, and the classic VW specialist told me to scrap it. Luckily for the car, I'm quite stubborn, so I got a couple of friends to show me how to weld and so on. I got it on the road for a couple of years, before deciding it wasn't worth trying to push it through any more MOTs when it had next to no structural integrity at all.
Anyway, I came home from uni after my first year exams to find it buried in the weeds.
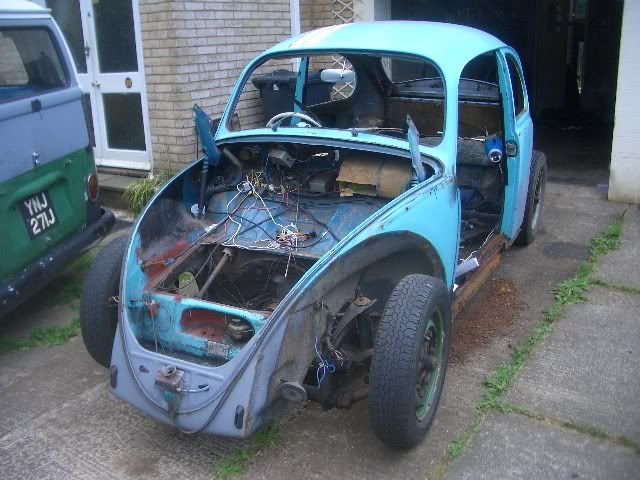
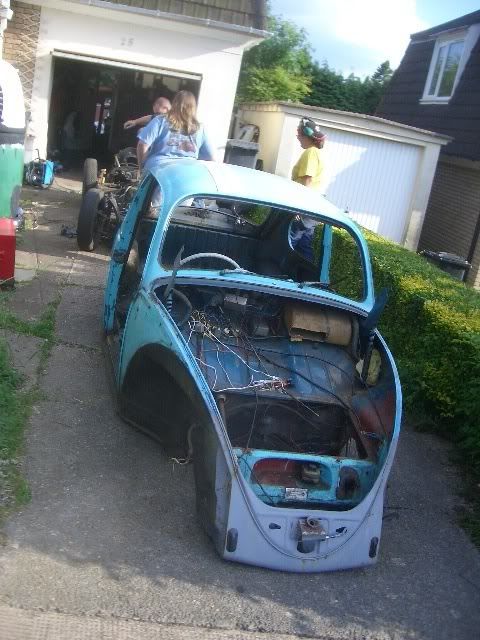
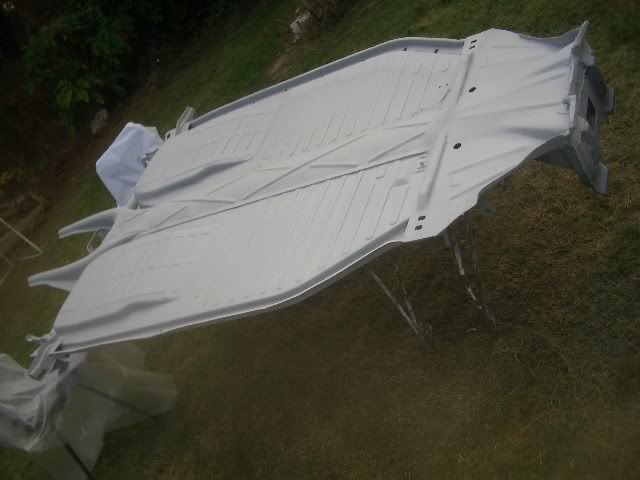
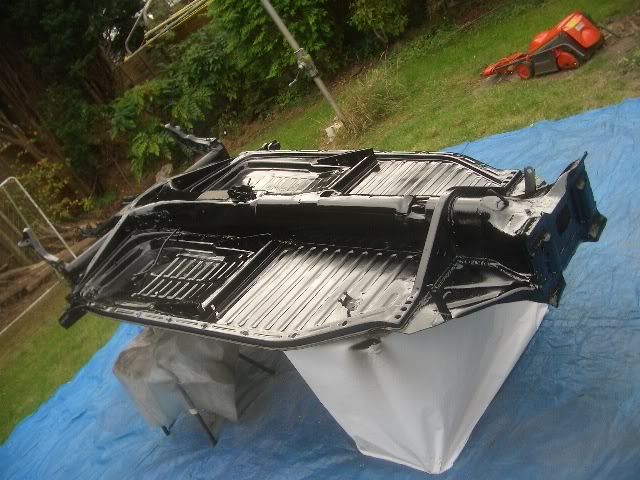
The first thing to do was strip it apart... this took about 2 hours to get it looking like this...
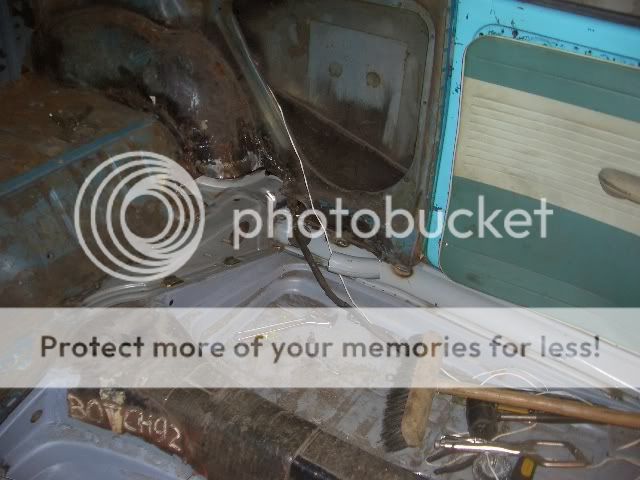
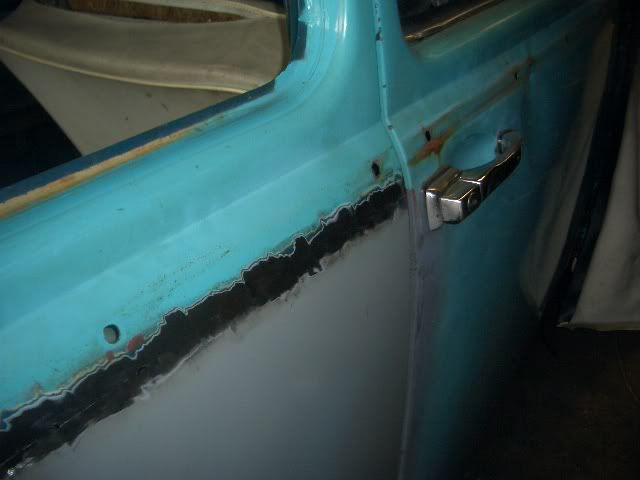
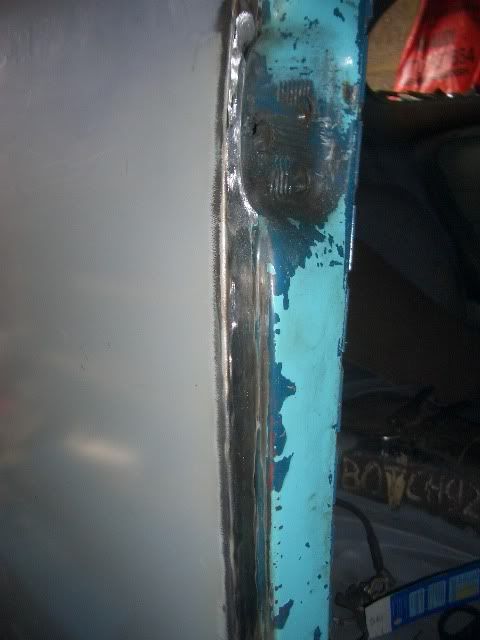
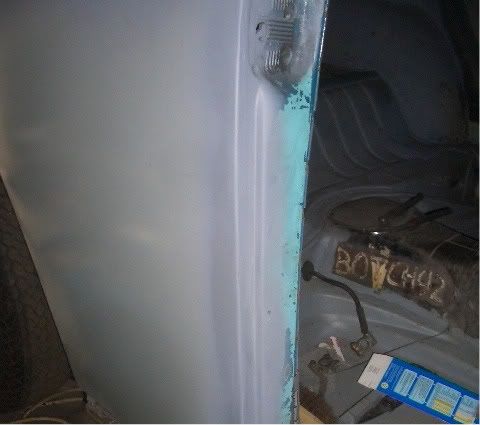
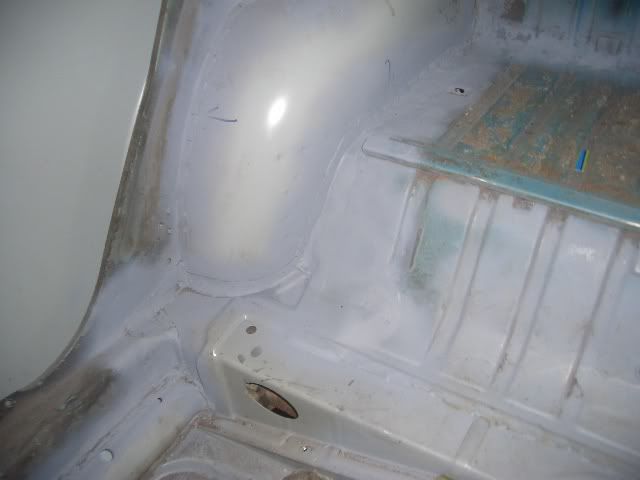
These are the sills...
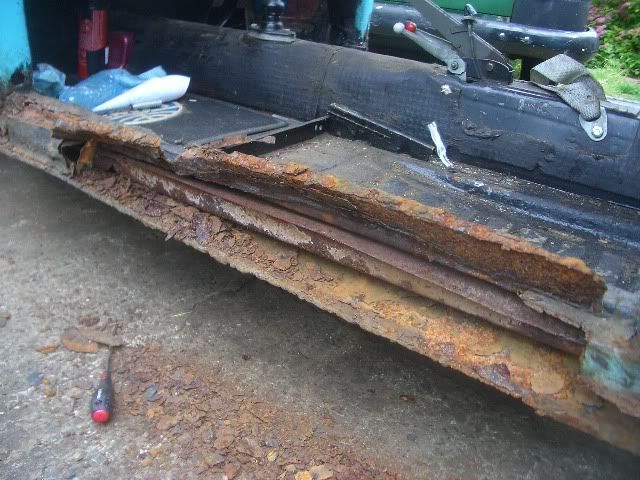
As you can see, they were made of patch upon patch and had no strength whatsoever. That could be why the body flexed enough to open the doors when going round corners...
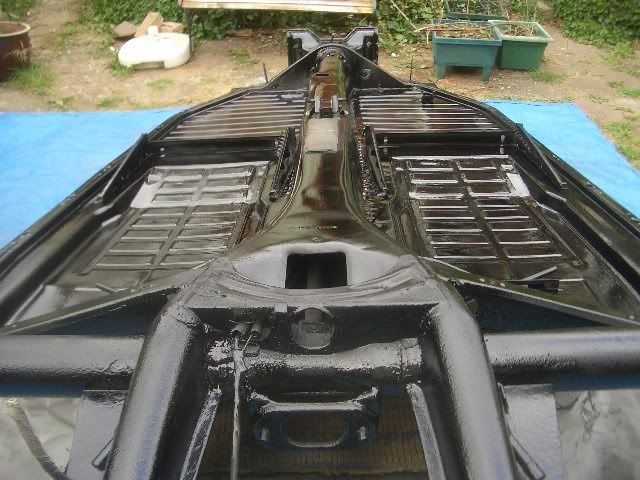
A bit of cutting later, and the body was off.
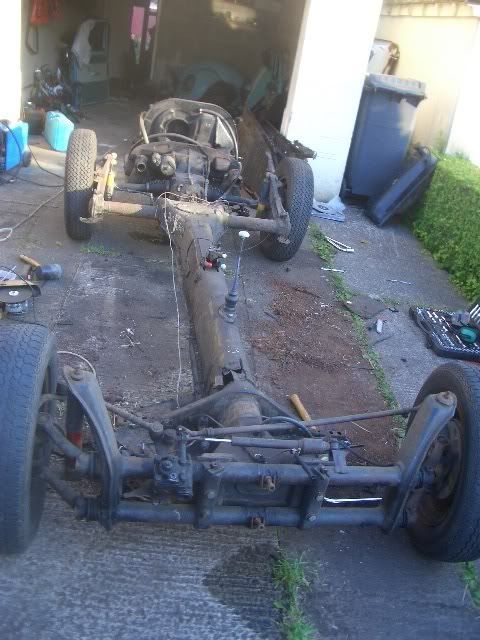
followed by removing the floorpans from the chassis.
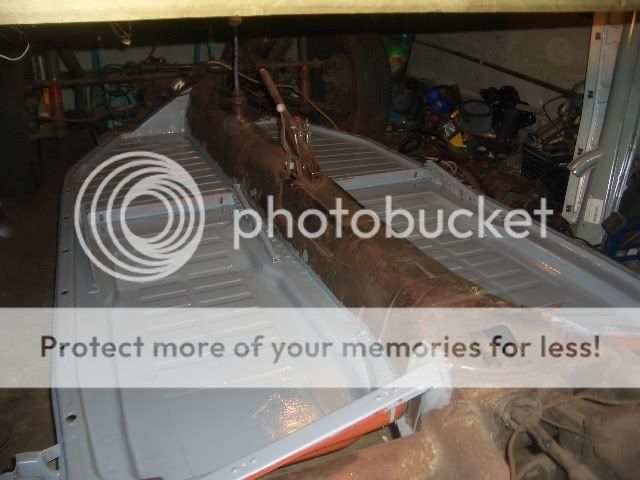
The first thing to do, was weld in a pair of new floorpans.
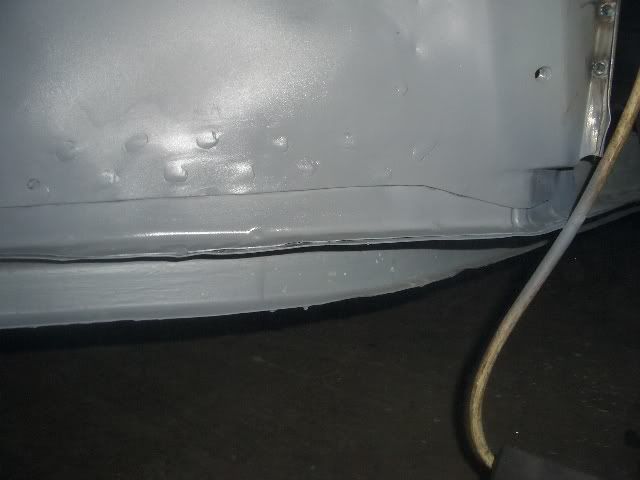
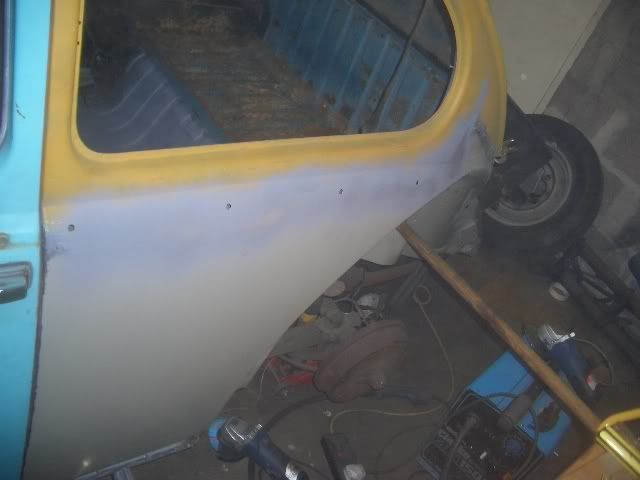
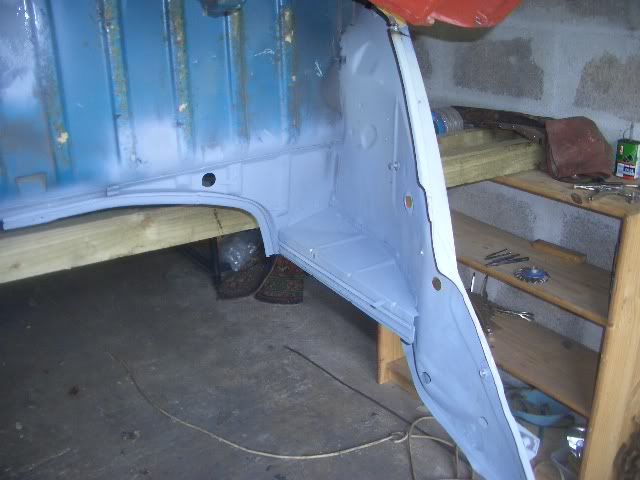
After that, the body went back down to allow me to fit new sills (the structural under-door bits)
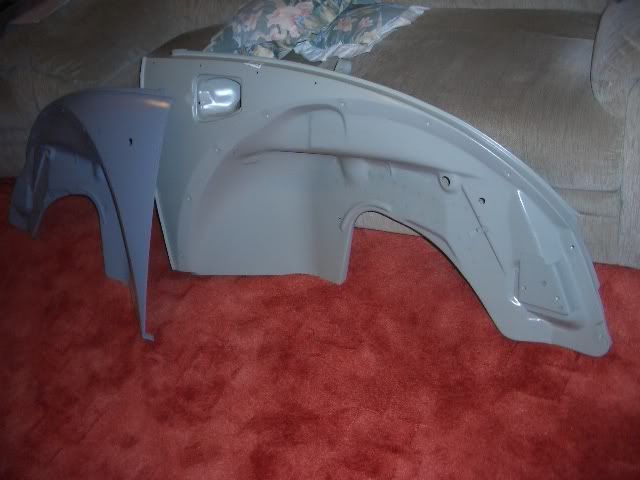
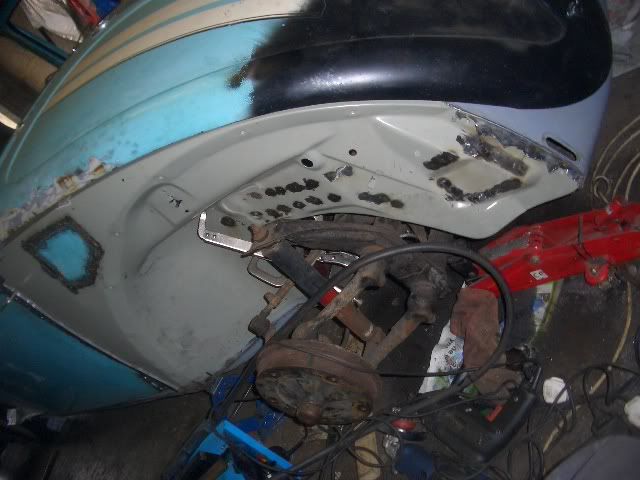
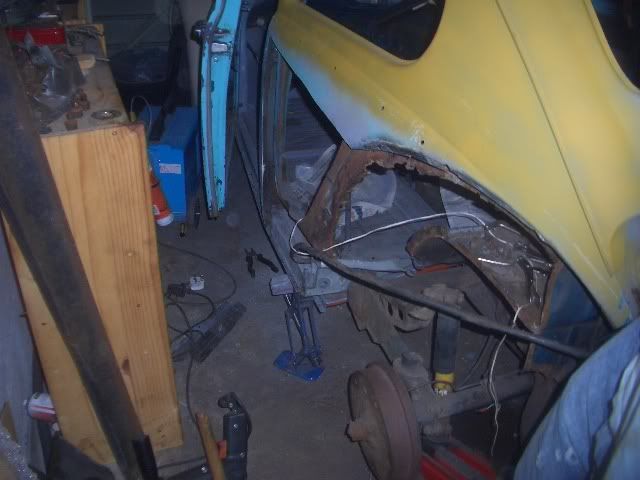
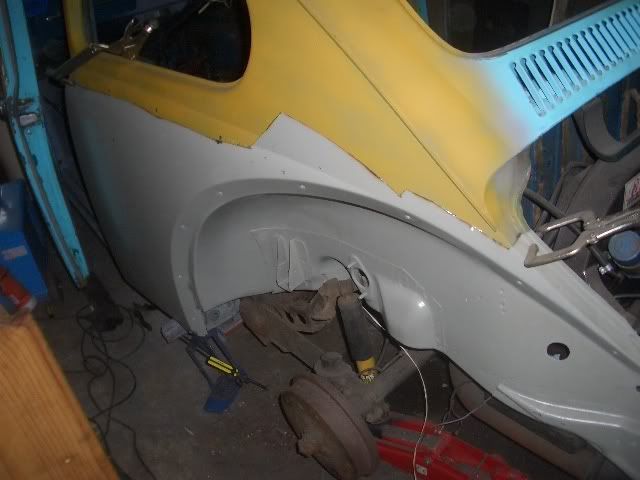
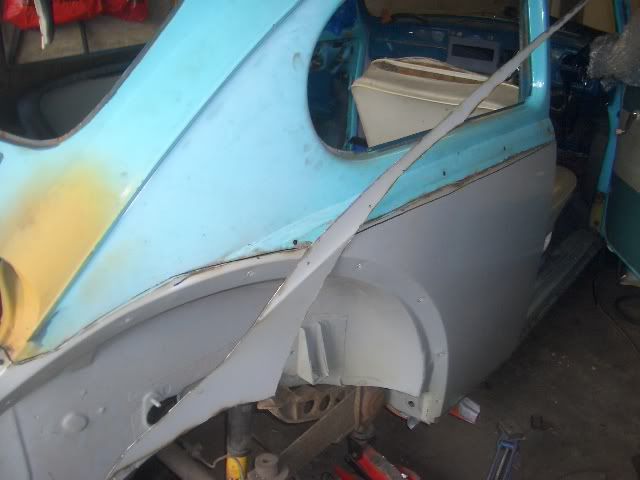
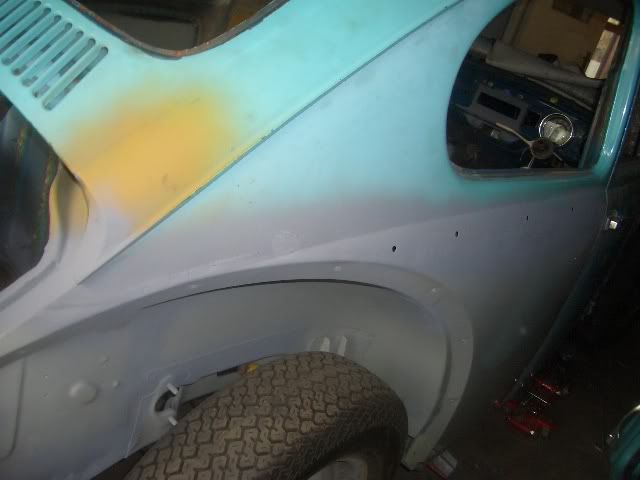
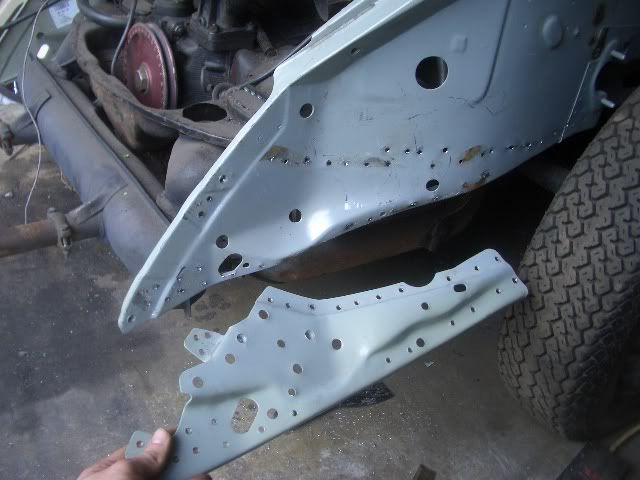
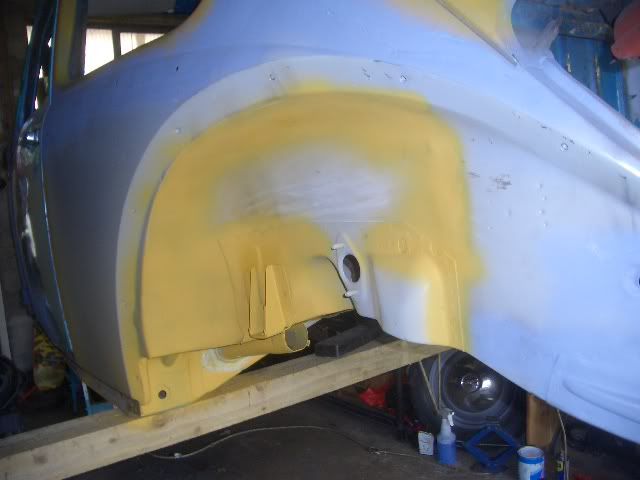
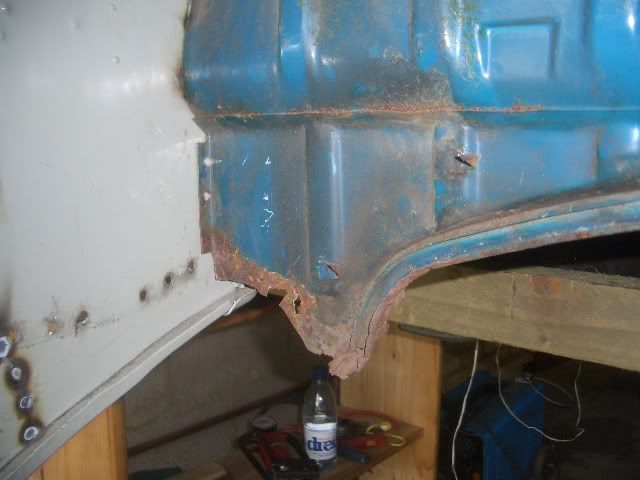
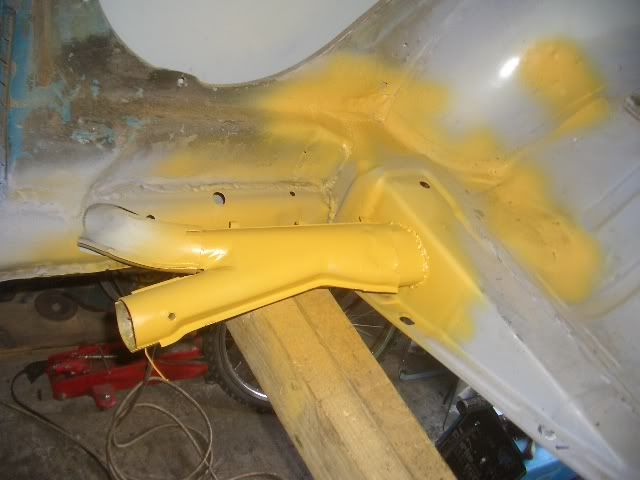
Next up, I cut the entire front 1/4s off. This isn't normally done on Beetles, but mine was rotten as hell and needed doing.

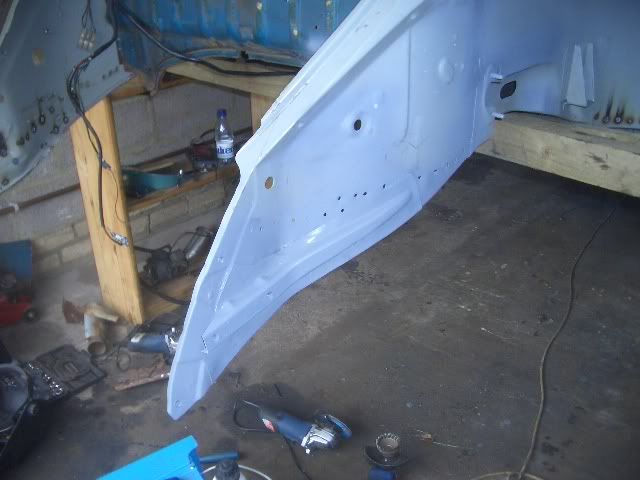
Luckily I had new ones
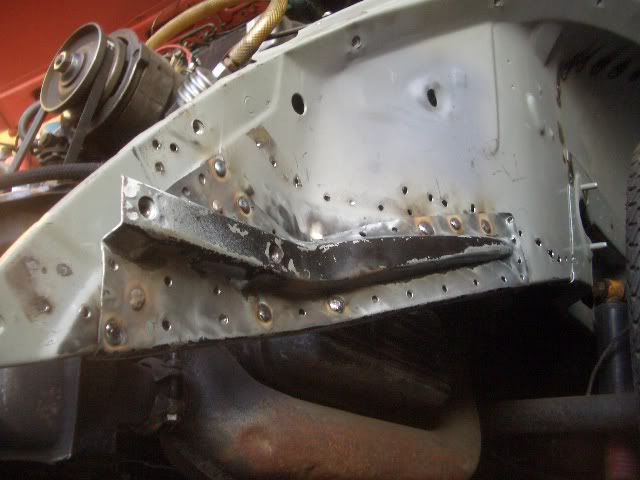
The new one was clamped into place
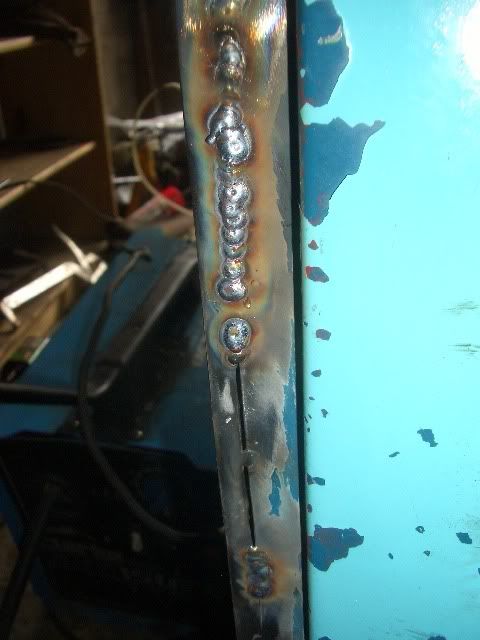
And then (plug) welded in, before being given a bit of primer to stop the rust.
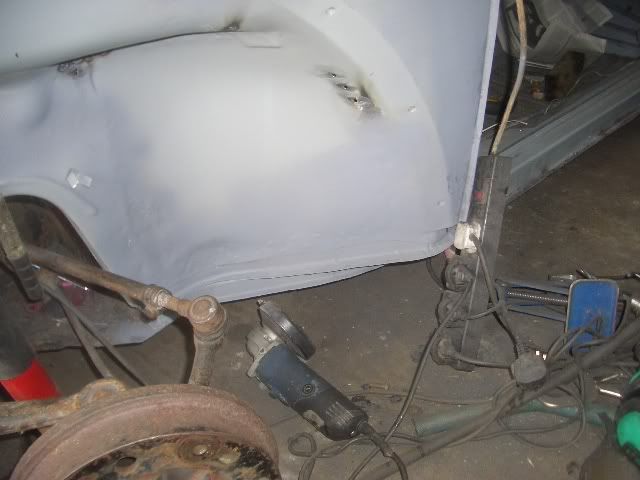
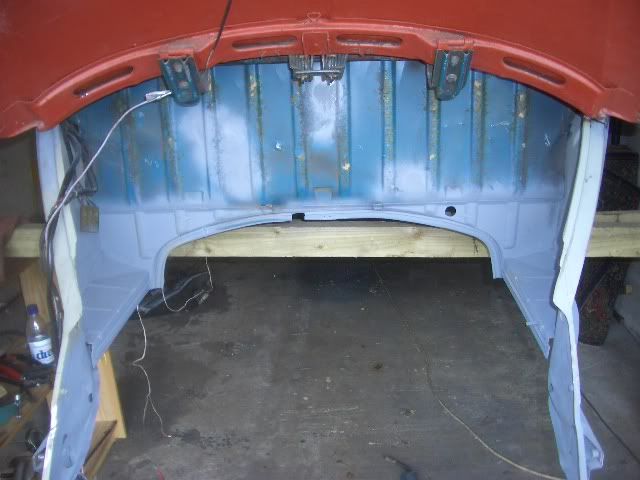
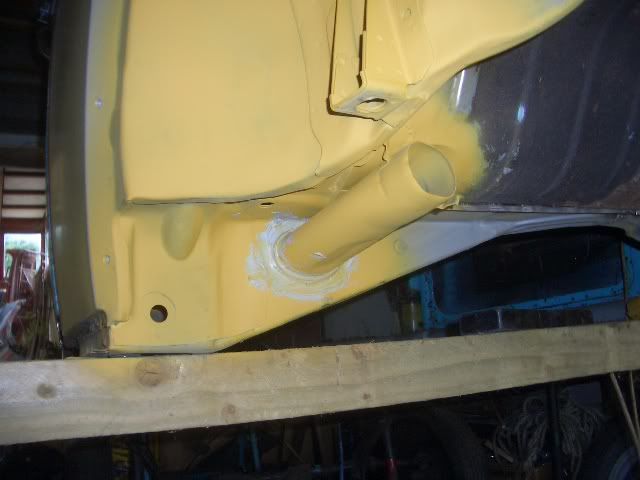
This was then followed by the other side, which was done in much the same way.
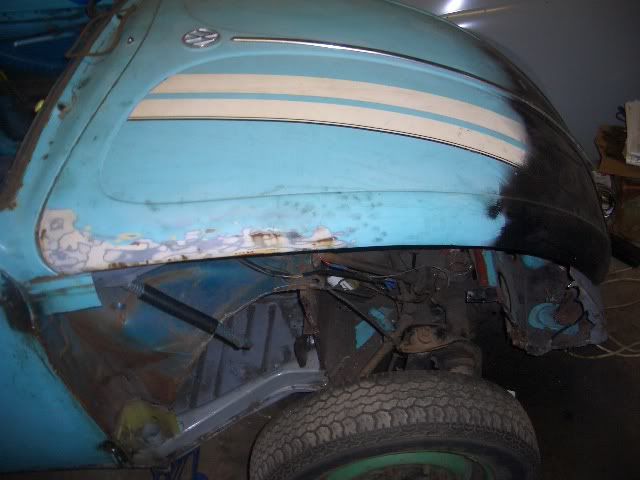
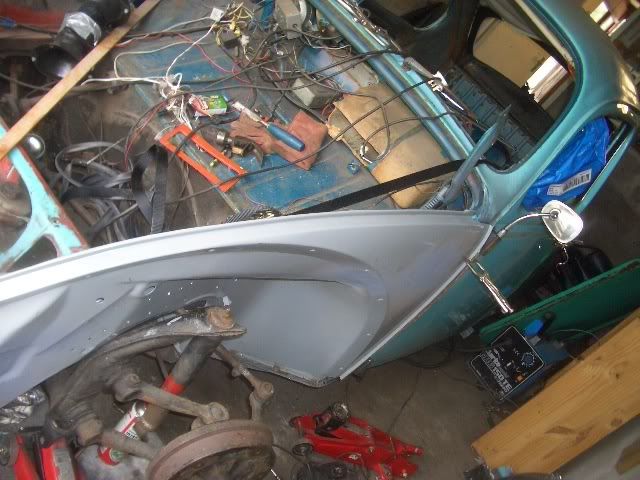
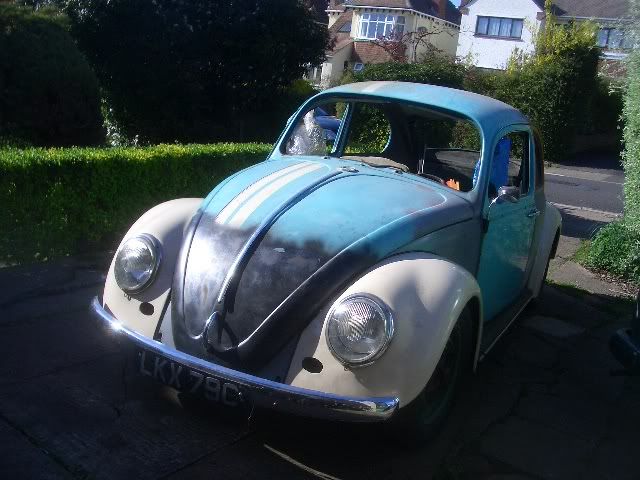
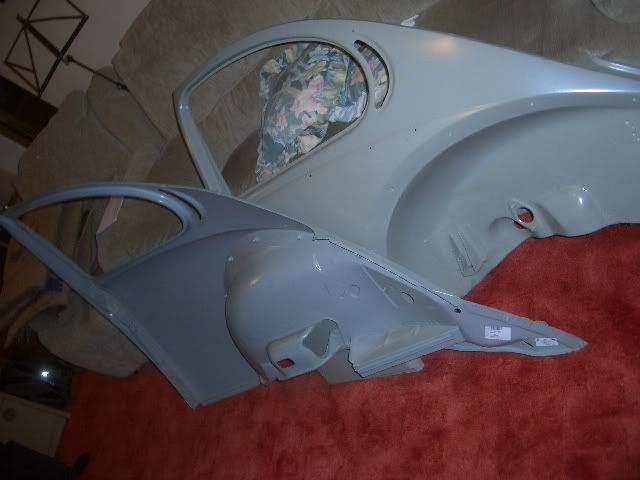
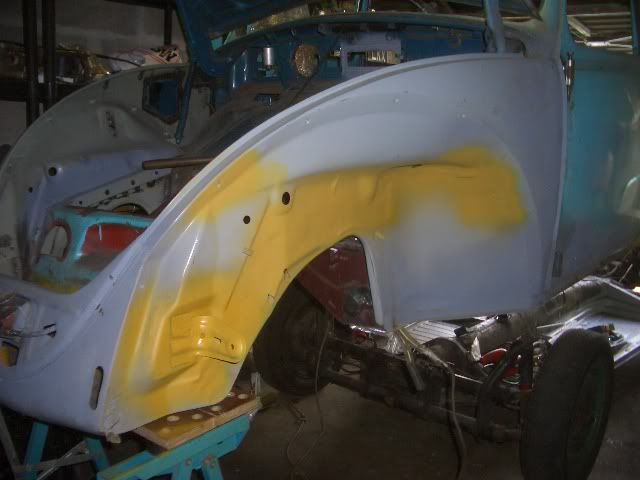
I then did a trial fit with the (bolt on) outer wings and bumper, to check everything lined up ok...
More of my work to come when my internet is working a little better...
I bought it 4 years ago, on eBay. Before bidding, I went to look at it on a dark, rainy night. And it didn't look that bad...
Anyway, the bloke I bought it from was so desperate to get rid of it that he even delivered it for free...
Anyway, I took it for an MOT and it failed spectacularly. The fail sheet was over 2 pages, and the classic VW specialist told me to scrap it. Luckily for the car, I'm quite stubborn, so I got a couple of friends to show me how to weld and so on. I got it on the road for a couple of years, before deciding it wasn't worth trying to push it through any more MOTs when it had next to no structural integrity at all.
Anyway, I came home from uni after my first year exams to find it buried in the weeds.
The first thing to do was strip it apart... this took about 2 hours to get it looking like this...
These are the sills...
As you can see, they were made of patch upon patch and had no strength whatsoever. That could be why the body flexed enough to open the doors when going round corners...
A bit of cutting later, and the body was off.
followed by removing the floorpans from the chassis.
The first thing to do, was weld in a pair of new floorpans.
After that, the body went back down to allow me to fit new sills (the structural under-door bits)
Next up, I cut the entire front 1/4s off. This isn't normally done on Beetles, but mine was rotten as hell and needed doing.
Luckily I had new ones
The new one was clamped into place
And then (plug) welded in, before being given a bit of primer to stop the rust.
This was then followed by the other side, which was done in much the same way.
I then did a trial fit with the (bolt on) outer wings and bumper, to check everything lined up ok...
More of my work to come when my internet is working a little better...
Scroll to see replies
gbduo
Wow! That is a lot of bodywork, and I hate bodywork!
What is plug welding? Is that like spot welding? Never heard of that before?
Cheers!
What is plug welding? Is that like spot welding? Never heard of that before?
Cheers!
I hate bodywork too
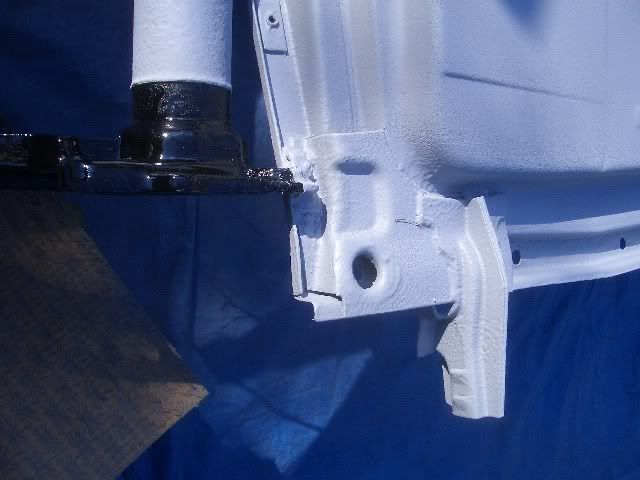
Plug welding is where you drill hole in the top layer of the sheet steel, and 'plug' the hole with weld, which penetrates into the second layer. It is a DIY MIG welding alternative/replacement for spot welding. I wish I had a proper spotwelder, but they cost silly money for a good one
See here: http://www.mig-welding.co.uk/plug-weld.htm
It can then be tidied back to give a very neat, original looking finish. My car has a relatively factory-appearance to seams and joins where they were when it was built originally, rather than ugly patches.
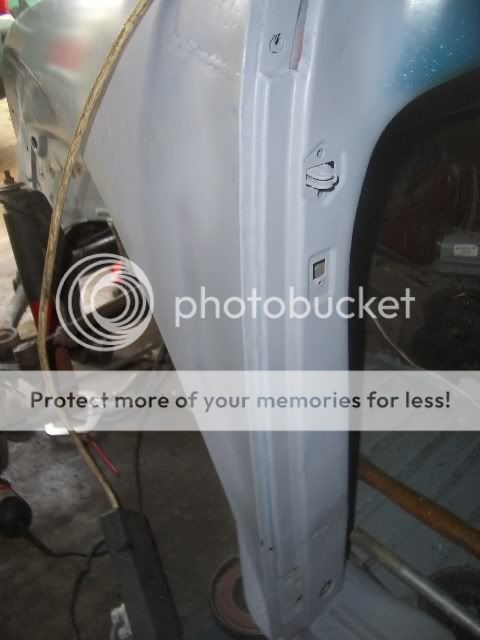
I also fitted new A pillar bottoms each side, which meant it was very important to get the door alignment perfect when reassembling the car.
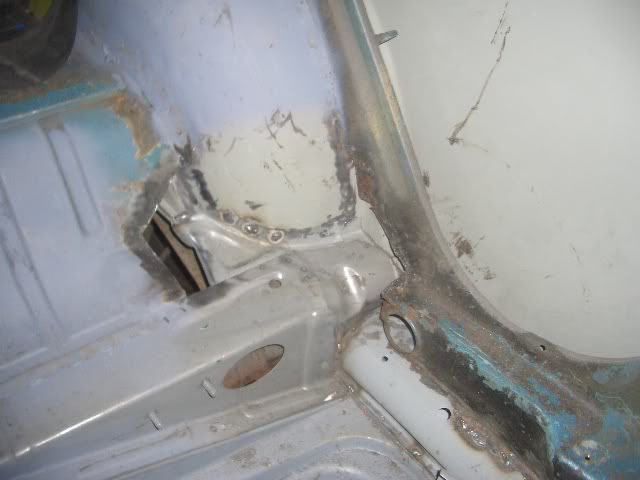
Moving on to the back, I found significant amounts of crap hidden there too.
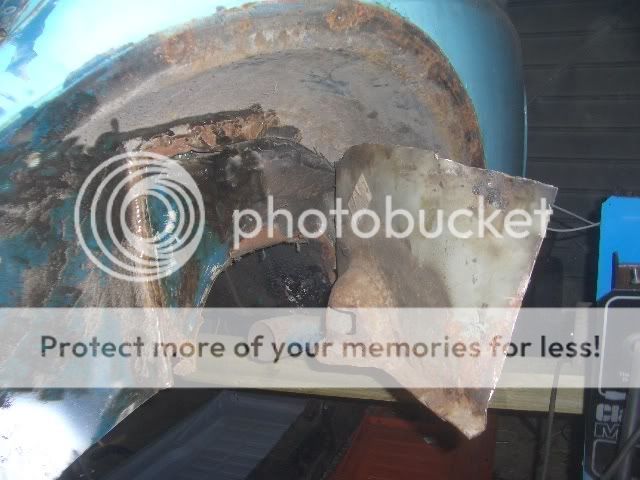
Luckily, I managed to get hold of these.
They are not availiable at all now without paying ridiculous prices - I got some of the very last ones into the country
All the crap was cut out, not leaving me with much to work with...
The new panel was cut to shape...
and then fitted
The above picture shows it without body filler, just a thin layer of primer to stop the metal rusting...
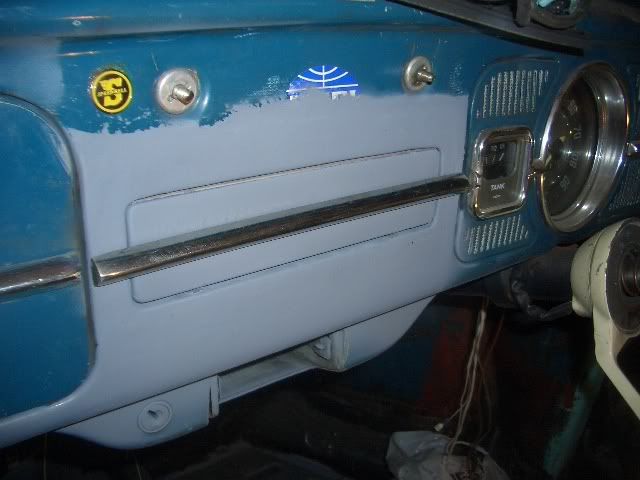
Before moving to the other side, I took a moment to weld up the radio hole. Someone had hacked it to fit a modern (large) radio, and I wanted to have an original blanking plate, rather than any sound system...
Before...

Welded up, with only a layer of primer (no filler)

and with the blanking plate fitted. The chrome line runs across the dash from one side of the car to the other, and now lines up better than in the pic...
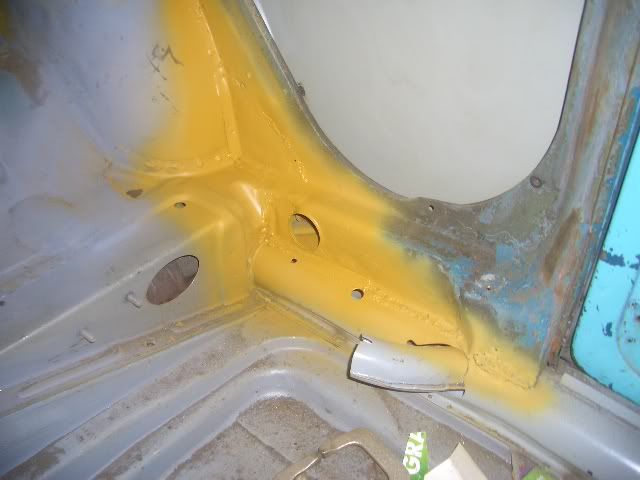
Moving to the other side...
I cut the old rear panel off to find someone had bodged large amounts of newspaper and filler in there

Trial fitting the (cut down) new panel...
Welded on, with the welds ground down...
and finished
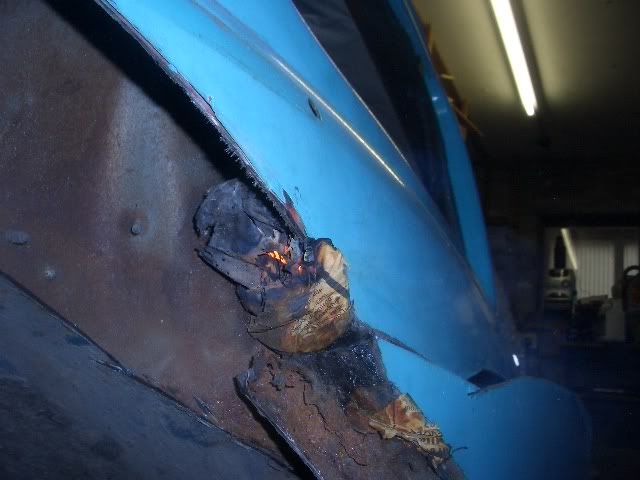
And on the A pillar...
To get a reasonable finish, I had to be careful not to overheat and warp the panels. To do this, I used a series of tack welds, allowing the panel to cool between each one...
ground flat...
and given a layer of primer
I also swapped the bumper mounts each side, for earlier style ones.
New style ones removed...
and older ones fitted...
A bit of fettling later, and the inner wings look like this...
More welding was required inside...
And done...
The other side was similar.

to...
More to come
You are absolutely mental.
When they told you to scrap it, you should've spared yourself the movie style 'underdog story' and taken it as a hint. They weren't trying to thwart you after the MOT, they were telling you what any sane person would tell you!
That is a piece of worthless rusted crap. Dispose of. Now.
When they told you to scrap it, you should've spared yourself the movie style 'underdog story' and taken it as a hint. They weren't trying to thwart you after the MOT, they were telling you what any sane person would tell you!
That is a piece of worthless rusted crap. Dispose of. Now.
screwyouguysimgoinghome
That is a piece of worthless rusted crap. Dispose of. Now.
That is a piece of worthless rusted crap. Dispose of. Now.
It was that, it isn't now. Did you even look at the pics tofufi posted? He's sorted most of the problems.
Great work, man, keep the pics coming.
Awesome job, looking foward to watching it progress.
screwyouguysimgoinghome
You are absolutely mental.
When they told you to scrap it, you should've spared yourself the movie style 'underdog story' and taken it as a hint. They weren't trying to thwart you after the MOT, they were telling you what any sane person would tell you!
That is a piece of worthless rusted crap. Dispose of. Now.
When they told you to scrap it, you should've spared yourself the movie style 'underdog story' and taken it as a hint. They weren't trying to thwart you after the MOT, they were telling you what any sane person would tell you!
That is a piece of worthless rusted crap. Dispose of. Now.
Thats the difference between an educated person trying to sort a problem out rather than a stupid person walking away and letting yet another peice of history getting scrapped?
Cheers all
Aye, I still see a few bugs being scrapped needlessly, but mine is one of the older models and worth a bit more. Still shouldn't have been saved really, but as it was my first car and so on I had a bit of sentimental attachment
Yup...
There isn't any rust in it any more - and it'll be worth more than I've spent on it including buying it. So, Meh.
Any mechanical parts which need replacing will be done now, and any difficult to replace parts such as the rear wheel bearings too. I can't afford to replace the engine, but that was replaced with a twin carb 1600 (originally my car had a 40bhp single carb 1300 engine) only a year or two ago. The engine will be given some paint and so on before re-fitting. The gearbox is being replaced for a longer ratio gearbox from a VW Karmann Ghia coupe.
As it happens, before including labour costs, I'll probably be just better than breaking even. But that won't really matter compared to having the skills and ability to do something like this and come out with a car at the end of it
Just a few more pics...
The engine bay has side trays to prevent hot air rising into the cooling system.
Mine were rotten, so they were removed...
and I replaced them with new
both sides done...
I also welded back in the heater connections each side...
I also finished tidying up the front inner wings, too.
I then bought a rust-free bonnet

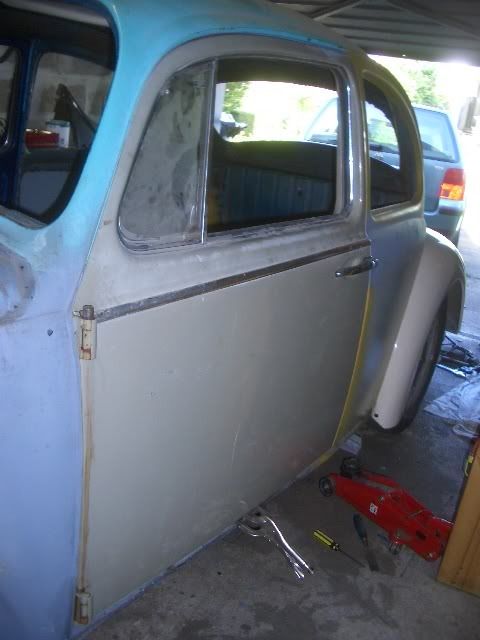
and doors imported from Arizona (nice warm dry climate, so no rust). I tried repairing mine first, but they were beyond repair.
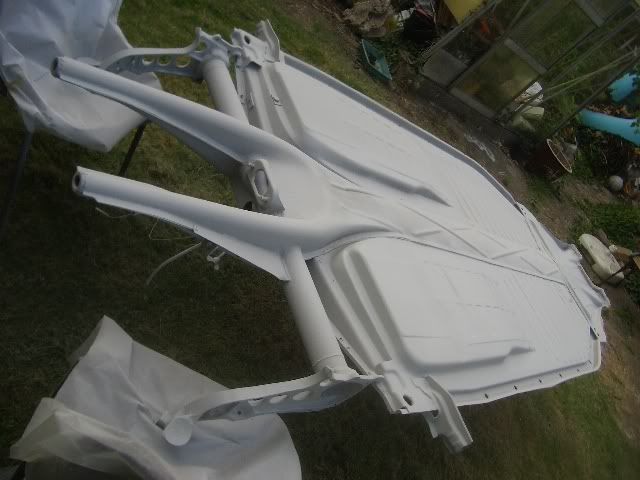
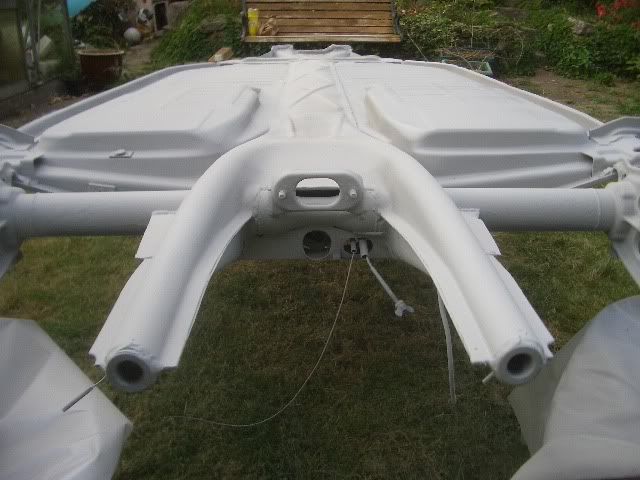
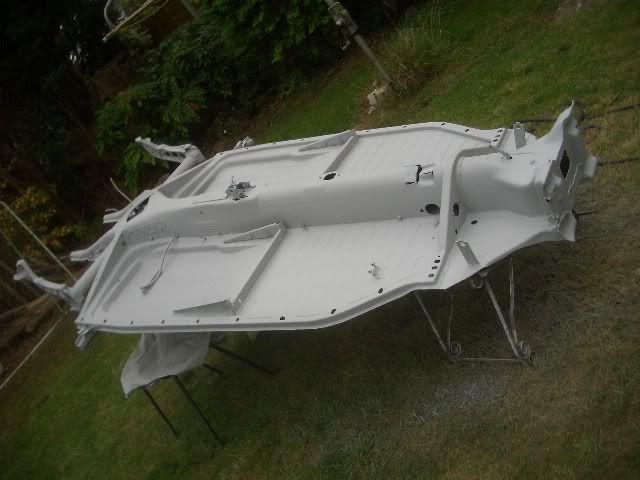
Finally, with all the panels trial fitted it was ready for paint...
cRaig
Very impressive I wish alot of the 205/309 owners would take example from this, rather than scrapping cars unnecessarily, still i guess it pushes up values at the end of the day.
All credit to your perseverance,and your welding looks very good
I wish alot of the 205/309 owners would take example from this, rather than scrapping cars unnecessarily, still i guess it pushes up values at the end of the day.All credit to your perseverance,and your welding looks very good
Aye, I still see a few bugs being scrapped needlessly, but mine is one of the older models and worth a bit more. Still shouldn't have been saved really, but as it was my first car and so on I had a bit of sentimental attachment
screwyouguysimgoinghome
You are absolutely mental.
Yup...
screwyouguysimgoinghome
That is a piece of worthless rusted crap. Dispose of. Now.
That is a piece of worthless rusted crap. Dispose of. Now.
There isn't any rust in it any more
- and it'll be worth more than I've spent on it including buying it. So, Meh. gbduo
Bloody hell! You must have replaced nearly every body panel! Long and tedious work I suppose but when you have finished, it will be immaculate and worth a fortune in the future. Are you rebuilding the engine/mechanicals as well?
Basically make it a zero mileage car?
Basically make it a zero mileage car?
Any mechanical parts which need replacing will be done now, and any difficult to replace parts such as the rear wheel bearings too. I can't afford to replace the engine, but that was replaced with a twin carb 1600 (originally my car had a 40bhp single carb 1300 engine) only a year or two ago. The engine will be given some paint and so on before re-fitting. The gearbox is being replaced for a longer ratio gearbox from a VW Karmann Ghia coupe.
cRaig
Its not stupid at all. Hes going to end up with a mint car, with a huge sense of attachment to it and satisfaction, knowing full well all jobs have been done properly and learnt how to basically fully rebuild a car along the way.
Sounds like a great hobby to me.
Somethings in life are more important than doing what is sensible, or the most economically viable thing to do..
Sounds like a great hobby to me.
Somethings in life are more important than doing what is sensible, or the most economically viable thing to do..
As it happens, before including labour costs, I'll probably be just better than breaking even. But that won't really matter compared to having the skills and ability to do something like this and come out with a car at the end of it
Just a few more pics...
The engine bay has side trays to prevent hot air rising into the cooling system.
Mine were rotten, so they were removed...
and I replaced them with new
both sides done...
I also welded back in the heater connections each side...
I also finished tidying up the front inner wings, too.
I then bought a rust-free bonnet
and doors imported from Arizona (nice warm dry climate, so no rust). I tried repairing mine first, but they were beyond repair.
Finally, with all the panels trial fitted it was ready for paint...
cRaig
Mm. thats awesome.
Unfortunately due to the costs of two full sprays and a fair few genuine panels, my rebuild is way, way beyond being economically viable lol.
Well done tho
Unfortunately due to the costs of two full sprays and a fair few genuine panels, my rebuild is way, way beyond being economically viable lol.
Well done tho
gbduo
Bloody hell! It is a car! What an awesome thread.
Almost a car
Minardi
Awesome thread, give us the rest as and when you can
Thanks all.
This is the next (and most up to date) step. Beginning the painting
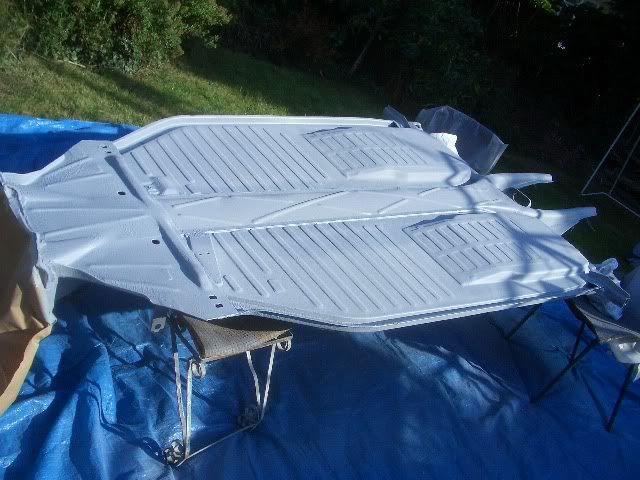
Floorpan... bottom half into primer. This is the first time I've ever sprayed anything, and I borrowed a friends compressor to do it. I'll be painting all the bodywork inside, to get a perfect finish.

Top half in Primer...
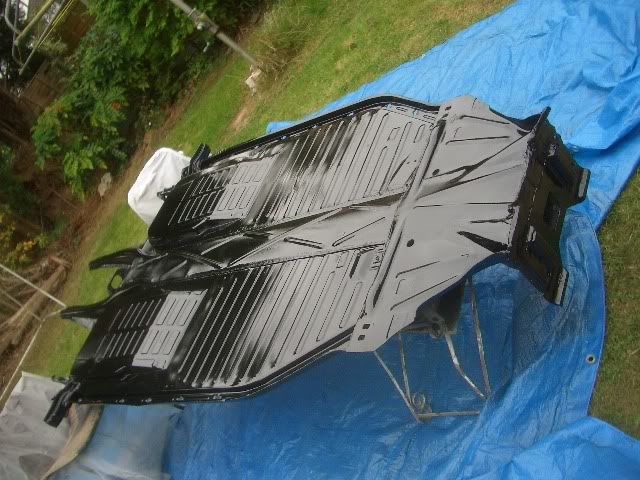
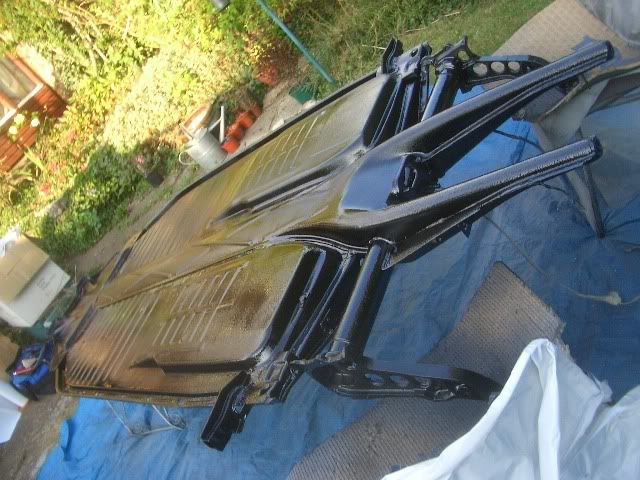
Black paint...
Grey stonechip
And black again on top of the stonechip

And the other side..
Got the other side done now, too
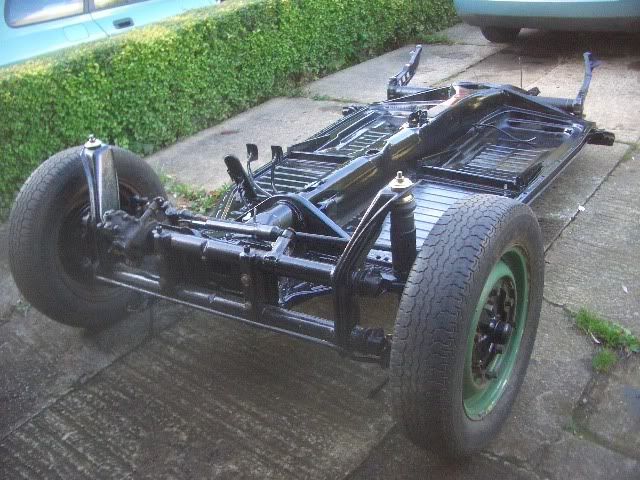
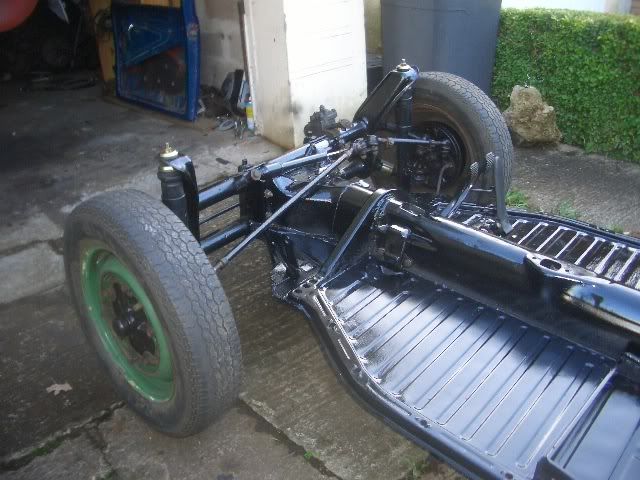
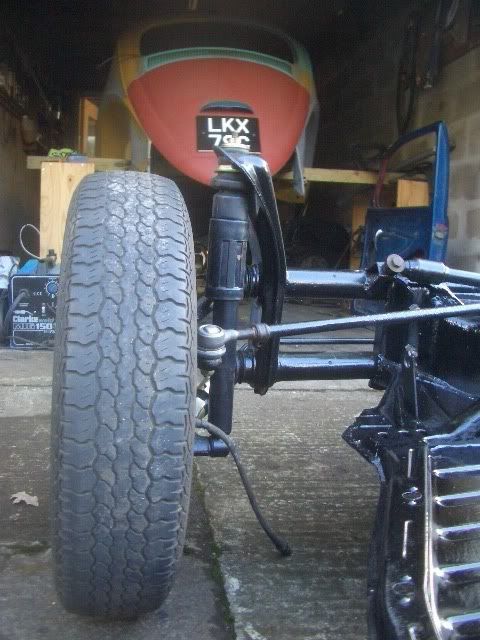
Front axle/suspension fitted
I now have front suspension, all set up and standard
More to come at some point... next job is swapping the gearbox for a 1500 (long) ratio one - could be fun, as gearboxes can be a real pain!
I aim to have it painted and on the road by this time next year
What goes up the middle in that huge tunnel? I mean presumably, it is only the gear linkage, but that doesn't make a lot of sense to have such a high tunnel! Must be something else...?
Anyway, the hammerite looks good! I always think a good lick of Hammerite makes things look sooo much better, you can hide all kinds of ****! (Not that you are here, obviously!)
Anyway, it looks awesome, great job! At least all the boring stuff is out the way now, and everyday spent working on it, you can see the car come together. Always rewarding.
Are you doing a full body re-spray as well?
gbduo
What goes up the middle in that huge tunnel? I mean presumably, it is only the gear linkage, but that doesn't make a lot of sense to have such a high tunnel! Must be something else...?
Anyway, the hammerite looks good! I always think a good lick of Hammerite makes things look sooo much better, you can hide all kinds of ****! (Not that you are here, obviously!)
Anyway, it looks awesome, great job! At least all the boring stuff is out the way now, and everyday spent working on it, you can see the car come together. Always rewarding.
Are you doing a full body re-spray as well?
Anyway, the hammerite looks good! I always think a good lick of Hammerite makes things look sooo much better, you can hide all kinds of ****! (Not that you are here, obviously!)
Anyway, it looks awesome, great job! At least all the boring stuff is out the way now, and everyday spent working on it, you can see the car come together. Always rewarding.
Are you doing a full body re-spray as well?
Thanks
It isn't Hammerite, it's actually gloss black paint sprayed (with the compressor) over 2k primer.
The tunnel only contains the throttle and clutch cables, the fuel line and the gearshift linkage. I suspect the height of it is for rigidity, as it is the main structural member of the car. It's really thick metal, too
The bodywork will be sprayed inside and out with 2k (none of this water based stuff, either) by myself. I've never painted a car before, so it could take a few attempts!
Sync
Very nice restoration you've got there - it's going to be lovely when it's all done.
Question: Will one of the aircooled Porsche 993 engines fit into that? If so, start saving; because that could then be the coolest project ever!
Question: Will one of the aircooled Porsche 993 engines fit into that? If so, start saving; because that could then be the coolest project ever!
Thanks. The 'Porsche 911 engine fits right in' rumour is entirely a myth, although I've lost count of how many people have told me they most definitely do bolt right in. However, although it will remain standard height, significant performance enhancements will be made. For now, I'm happy with almost doubling the standard 40bhp - it has/had a 1641 performance engine with twin carbs. I'm now planning to swap the carbs for a pair of ex-Alfa Romeo (Dellorto) carbs (so it'll now have one carb barrel per cylinder). That should see it close to 70-75bhp. Given ratio rockers I reckon I could get 80bhp from it.
Following that, it'll need serious ££ spending to get more performance, so that may take a few years as I have the VW microbus to keep going too.
JC.
I would imagine the Porsche 356 engine would be easier to install? Not that there'd be much of a power increase.
It would indeed. They do bolt in fairly easily I believe, but the cost of a Porsche 1600 is significantly more than a tuned beetle engine. I don't need the ability to say that I have a Porsche engine, so I'd rather buy modern aircooled 'performance' parts, than pay the big bucks for oldspeed/Porsche gear
Quick Reply
Related discussions
- Advanced Higher Biology Project Ideas
- Potential Infestation?
- Choosing the course to study
- will i be able to afford this car?
- cheapest car insurance for a 1.4 litre engine car
- Name an animal that begins with the last letter of the previous animal
- AQA A level History
- Exam predictions OCR History Russia
- Good/Prestigious Business Schools for Masters? Help Needed
- Part-Time Engineer, Part-Time Procrastinator - A GYG Journey
- Does a 22 year old woman who is 4ft8 need a lot of food to restore weight?
- Mature Returning Student - Will I Get Funding?
- Update on Potential Infestation - Please Help
- A-LEVEL history coursework
- HELP: University has cancelled my dissertation
- Are any London Universities ex-polys?
- What affects Kp?
- Make it More Dice-ey !!
- I want to be better
- Hi help my thread has gone
Latest
Trending
Last reply 5 months ago
Where is my car parked during the day? Advice for first car insuranceLast reply 7 months ago
Will paying £1,900 a year for insurance as a new 21 year old driver be a lot?Trending
Last reply 5 months ago
Where is my car parked during the day? Advice for first car insuranceLast reply 7 months ago
Will paying £1,900 a year for insurance as a new 21 year old driver be a lot?


