JC's MGB GT Factory V8 - Project 70's hotrod throwback.
Scroll to see replies

i like that you are putting the work in to the car restoring it mechanically etc, but i must admit the thing sticking out of the bonnet is really not to my taste and i don't think really suits the car all that well.
Good luck with it though
Good luck with it though
Thanks for the positive comments, guys.
I've had the car since April 2011. - Quite a long time for me to own a car. I normally get bored after about 6 weeks.
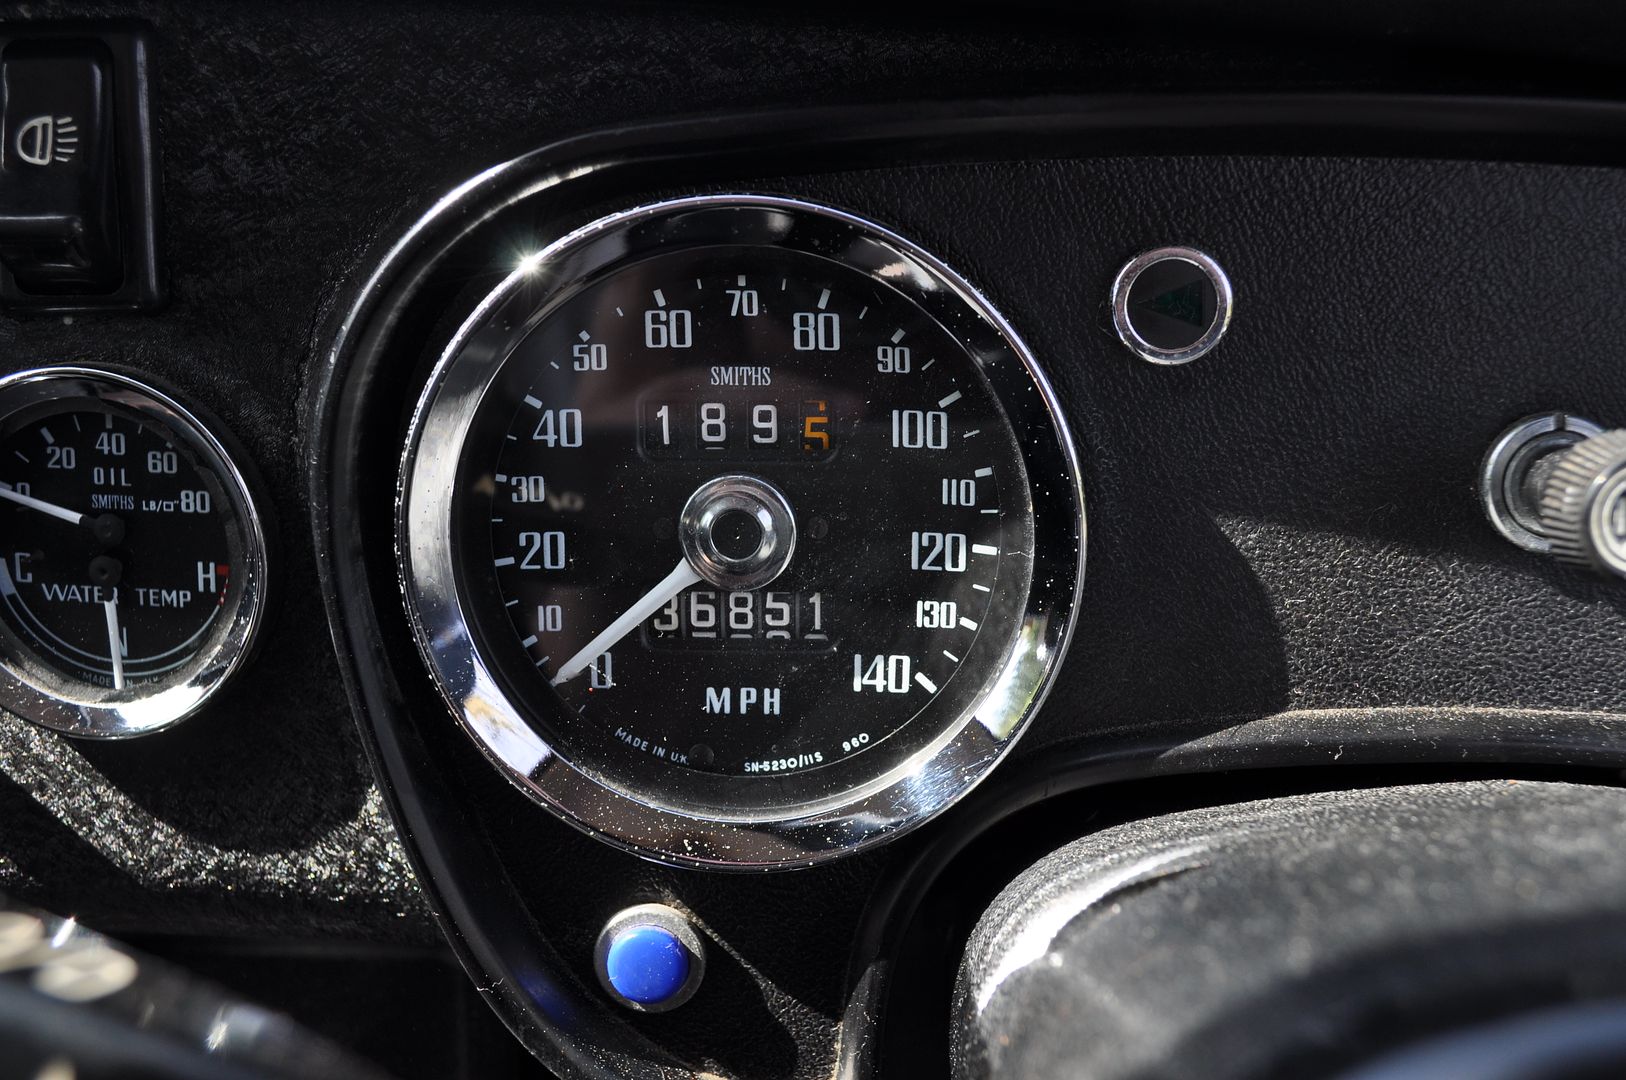
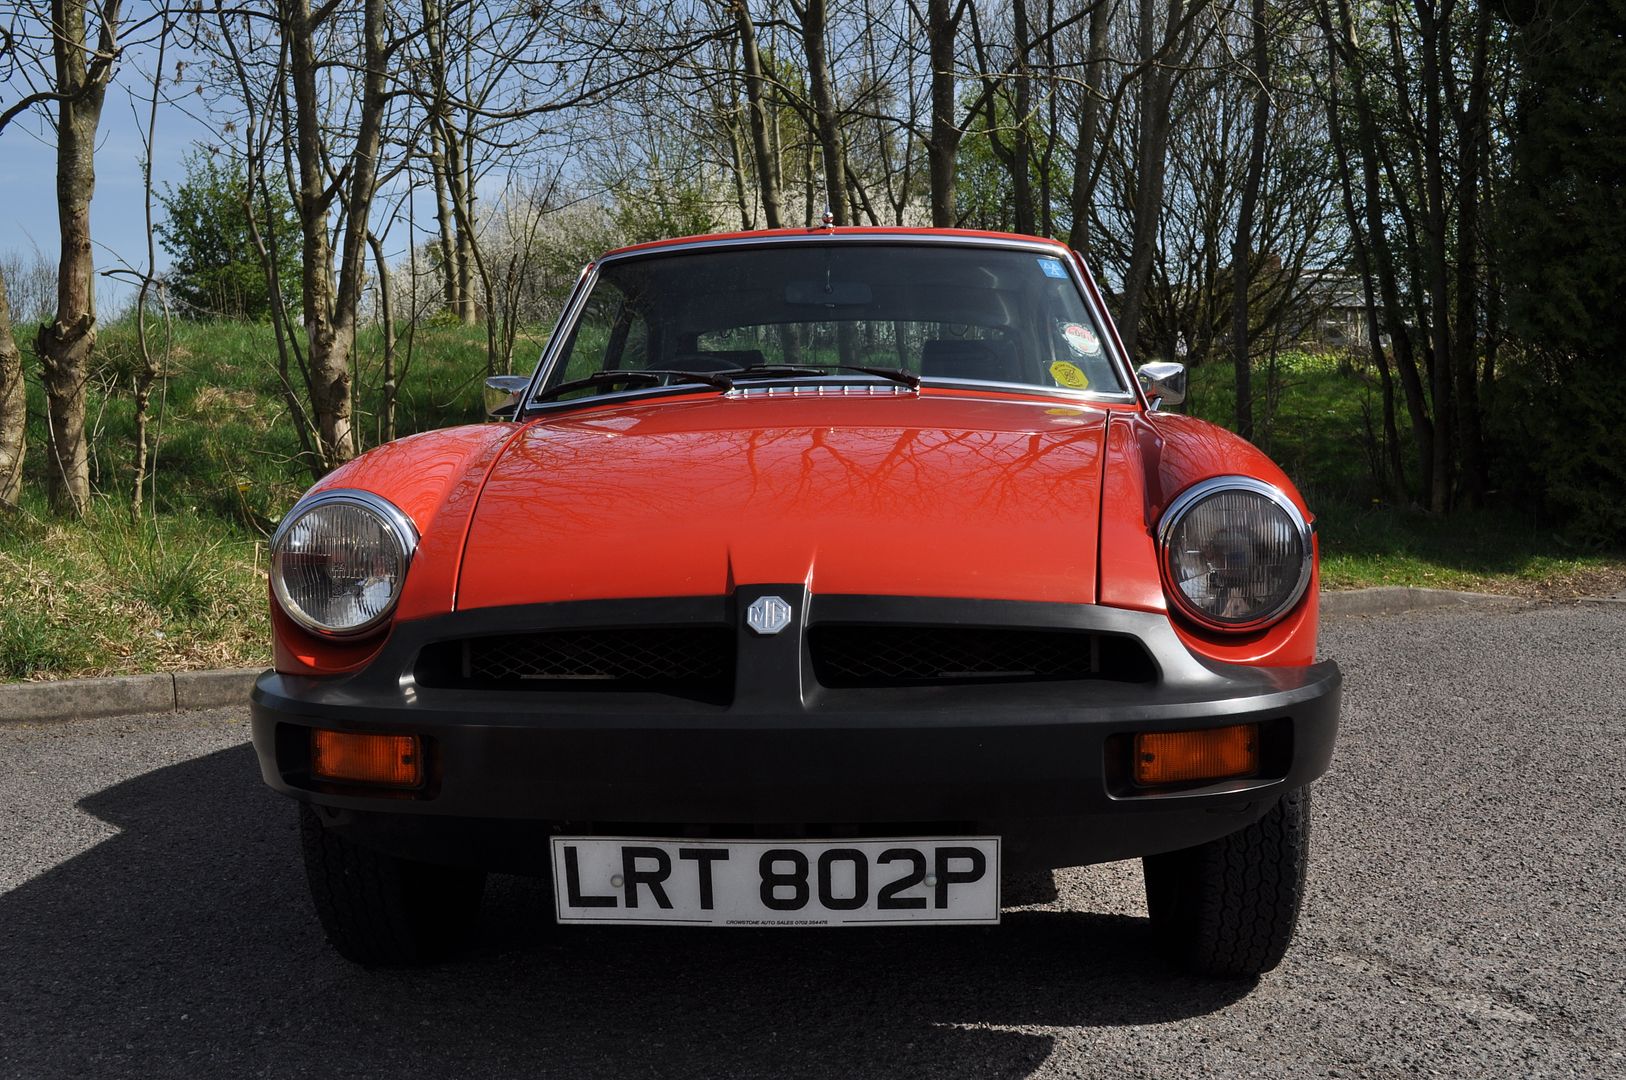
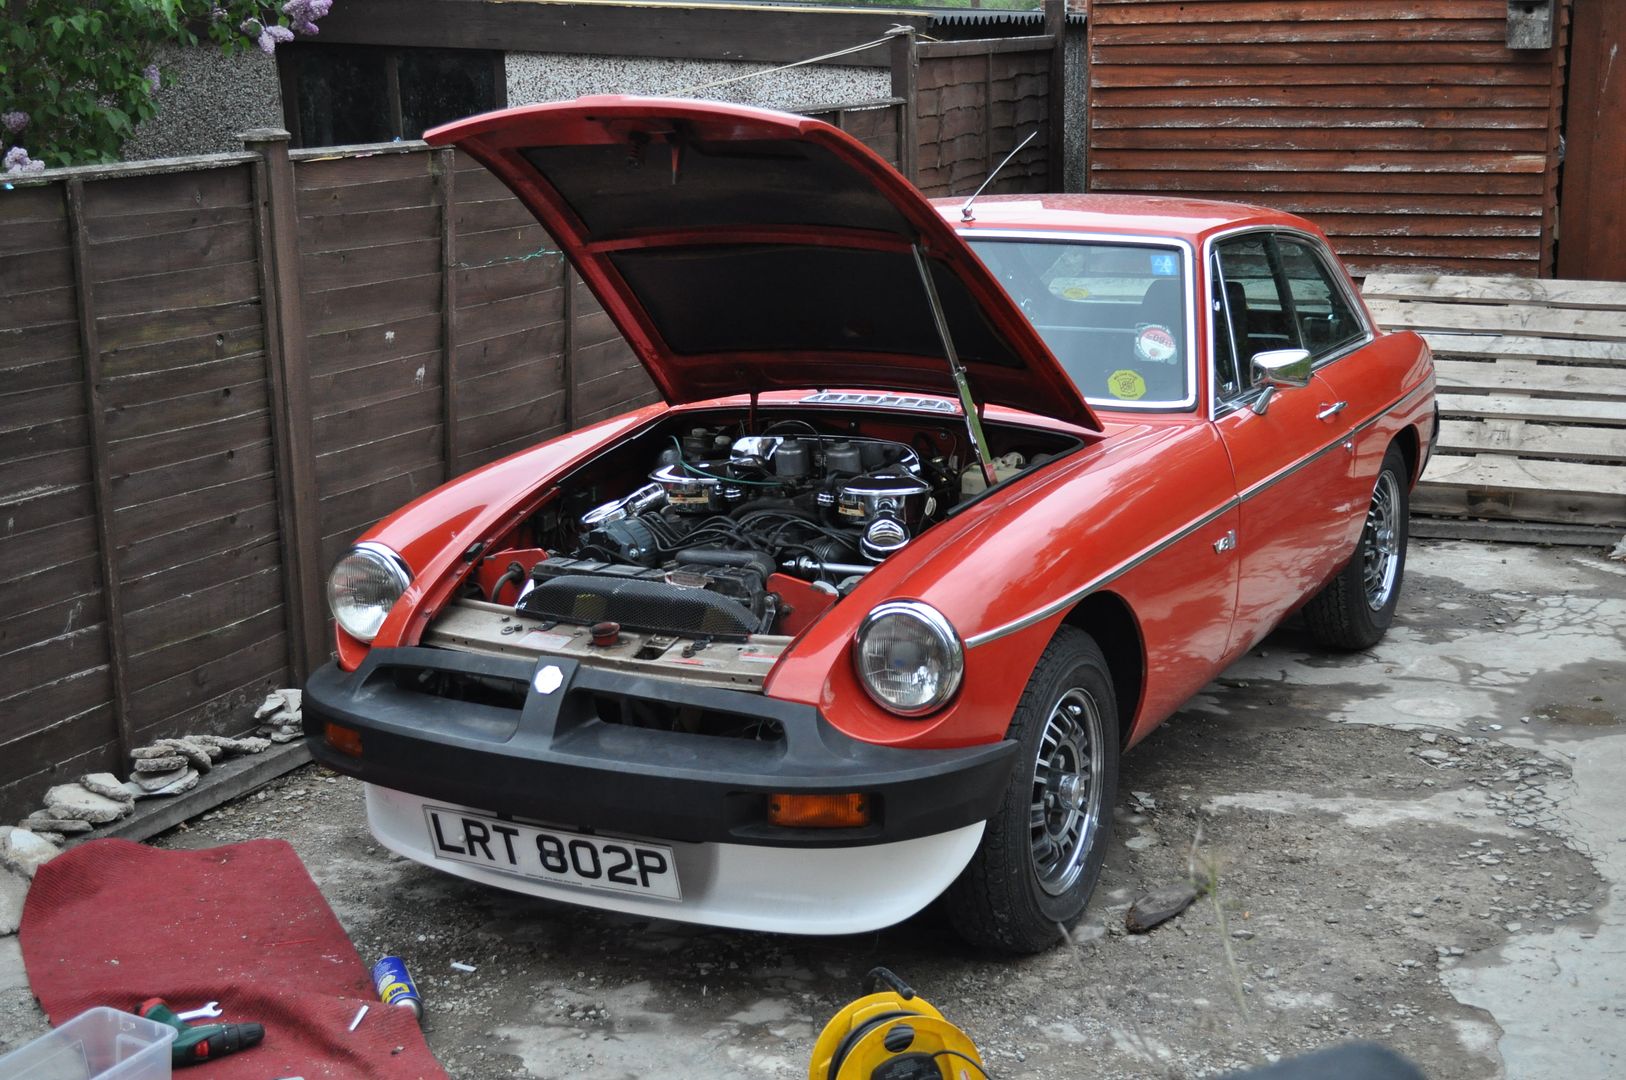
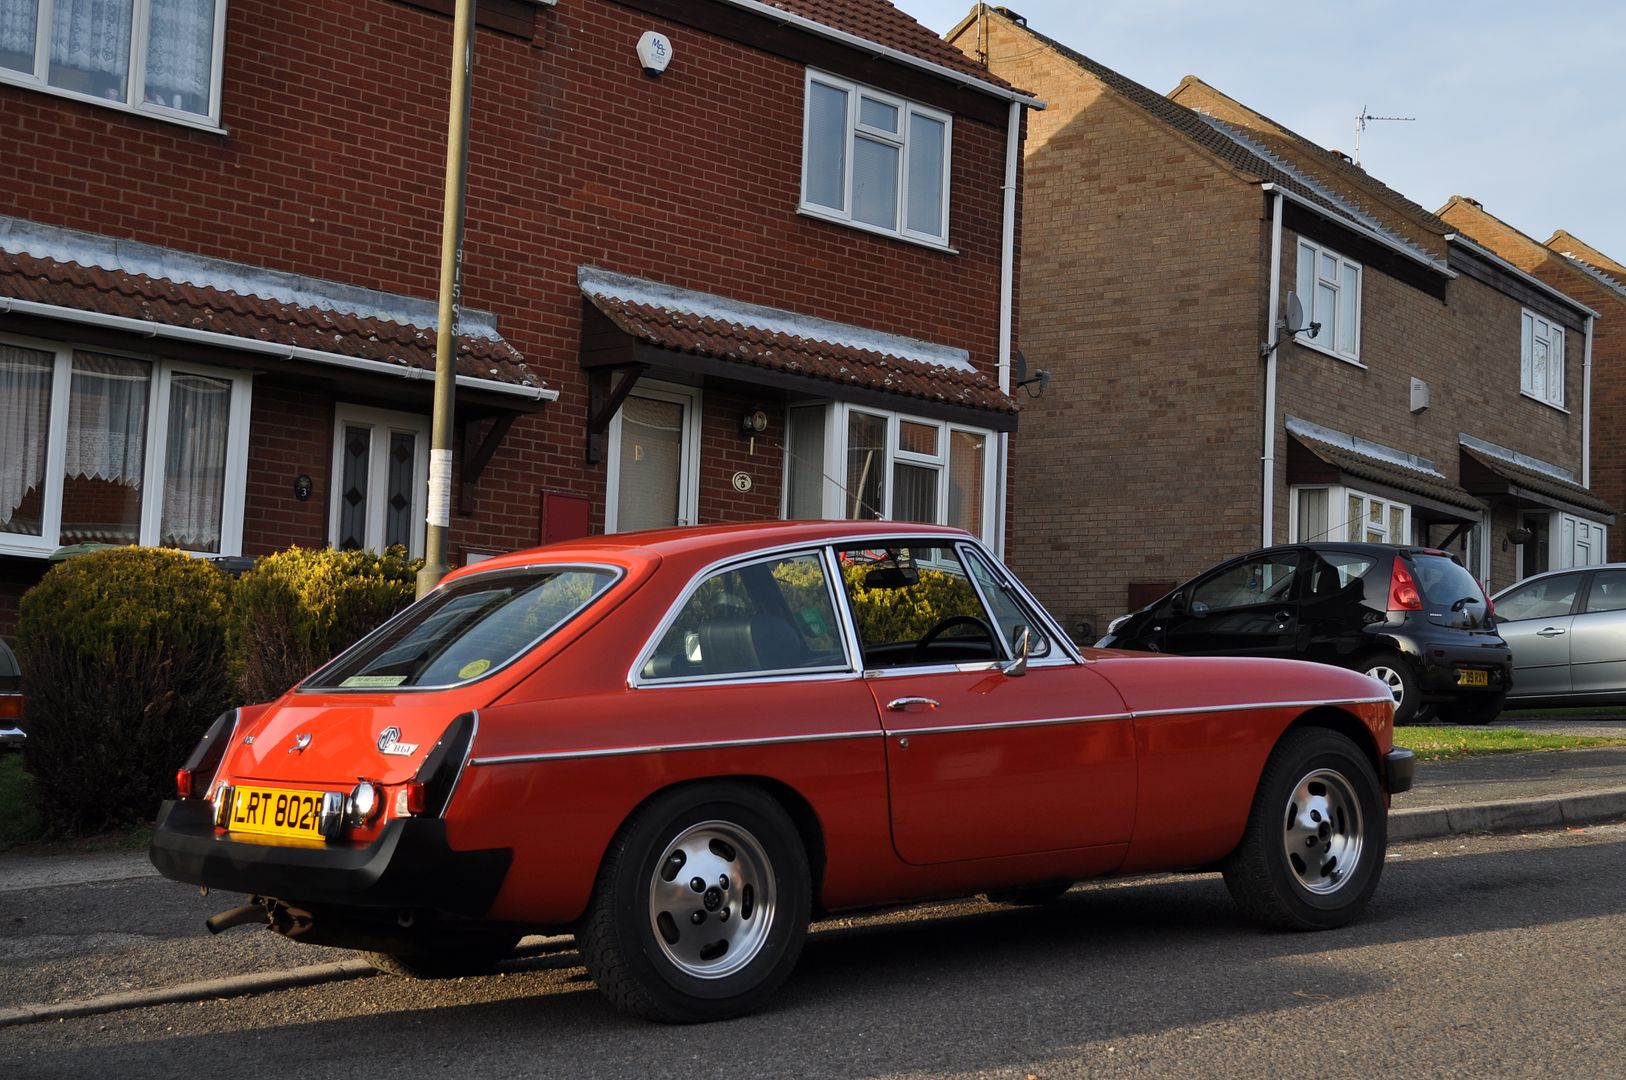
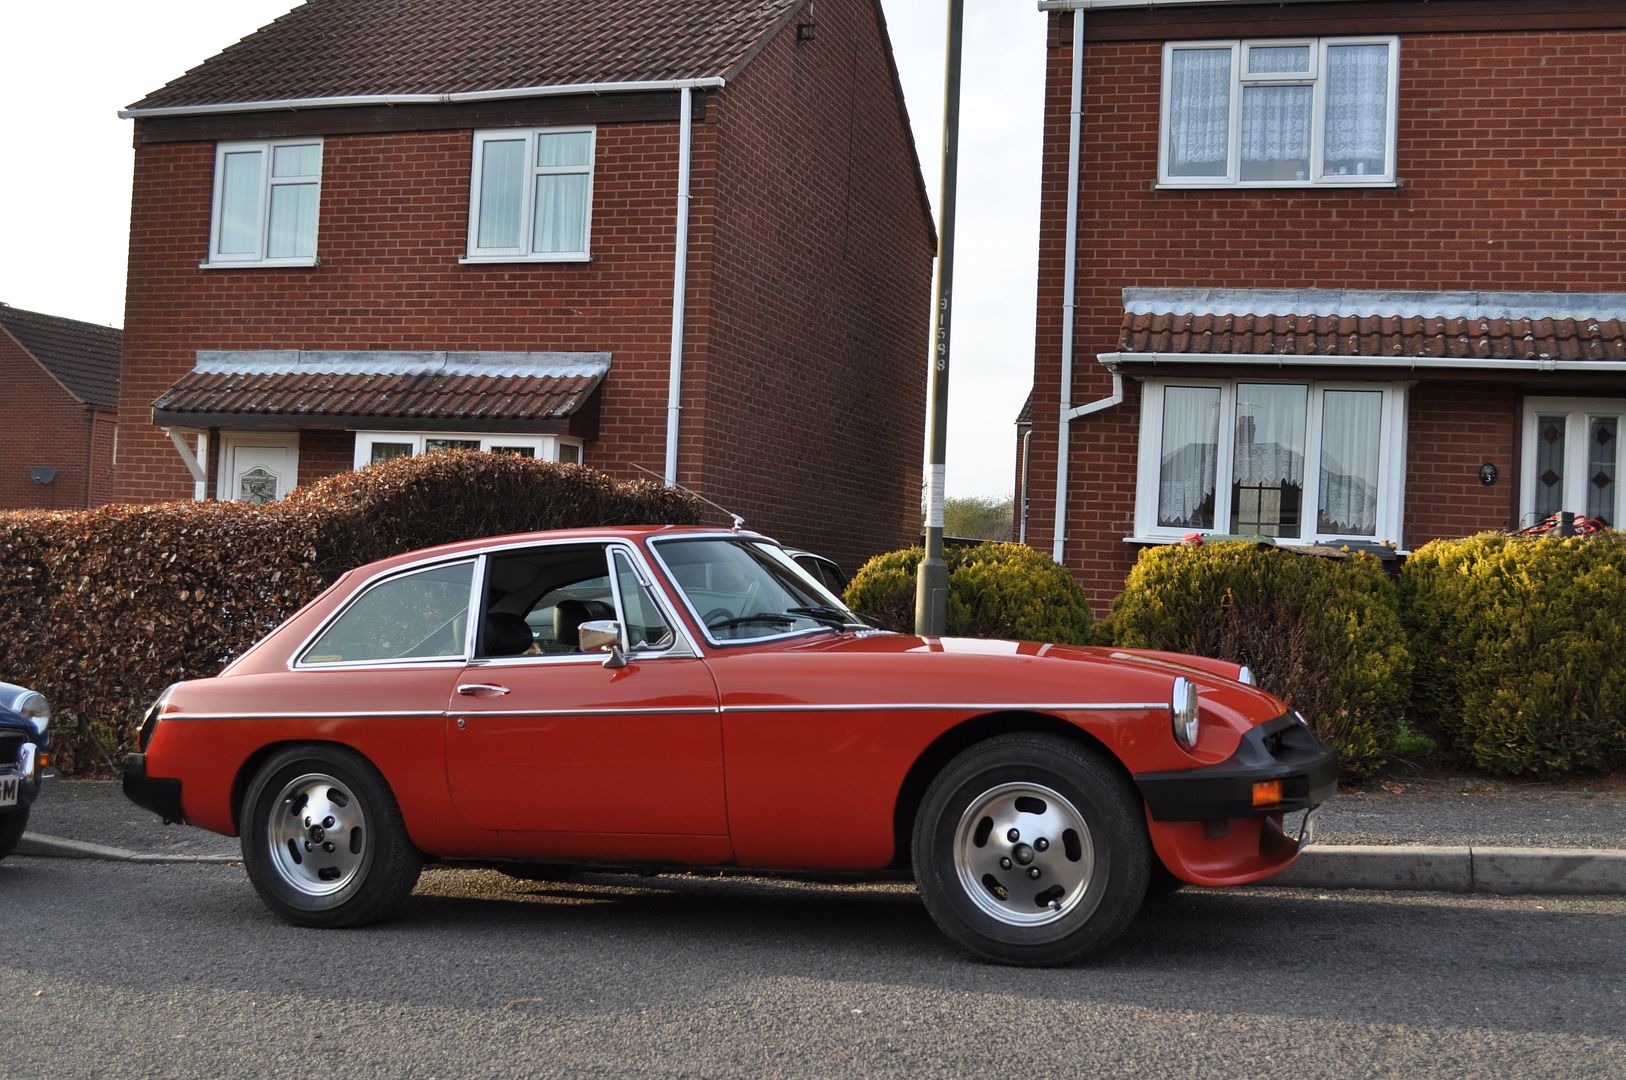
It's my 5th MGB GT V8 and I particularly wanted a rubber bumper car with no sunroof. When I picked it up it had 36k miles on the clock from new and I've done just short of 3000 miles over the summer last year. The car did around 22k with the first owner and then was sold in '78. The car then did only another 14k miles between '78 and April when I bought it. The previous owner lived abroad 11 months of the year and the GTV8 was a used as a seccond car when they were over here - hence the silly low milleage for a 37 year old car.
This is what she looked like when I bought her:
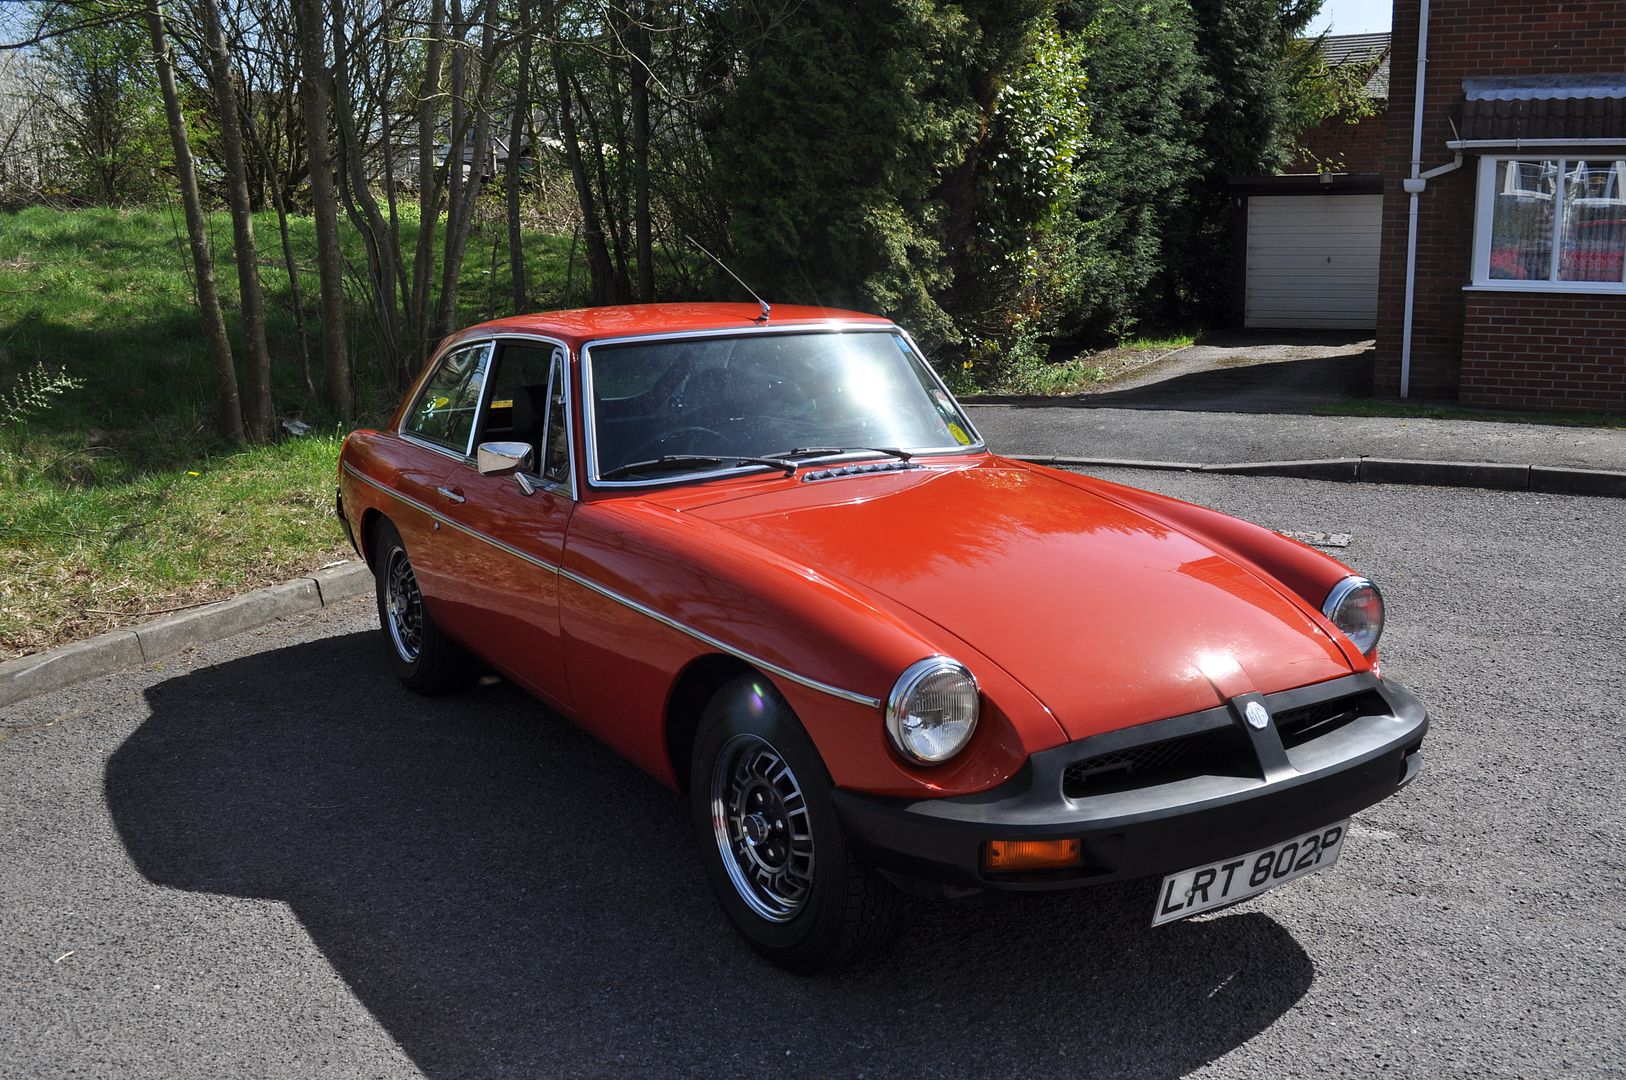
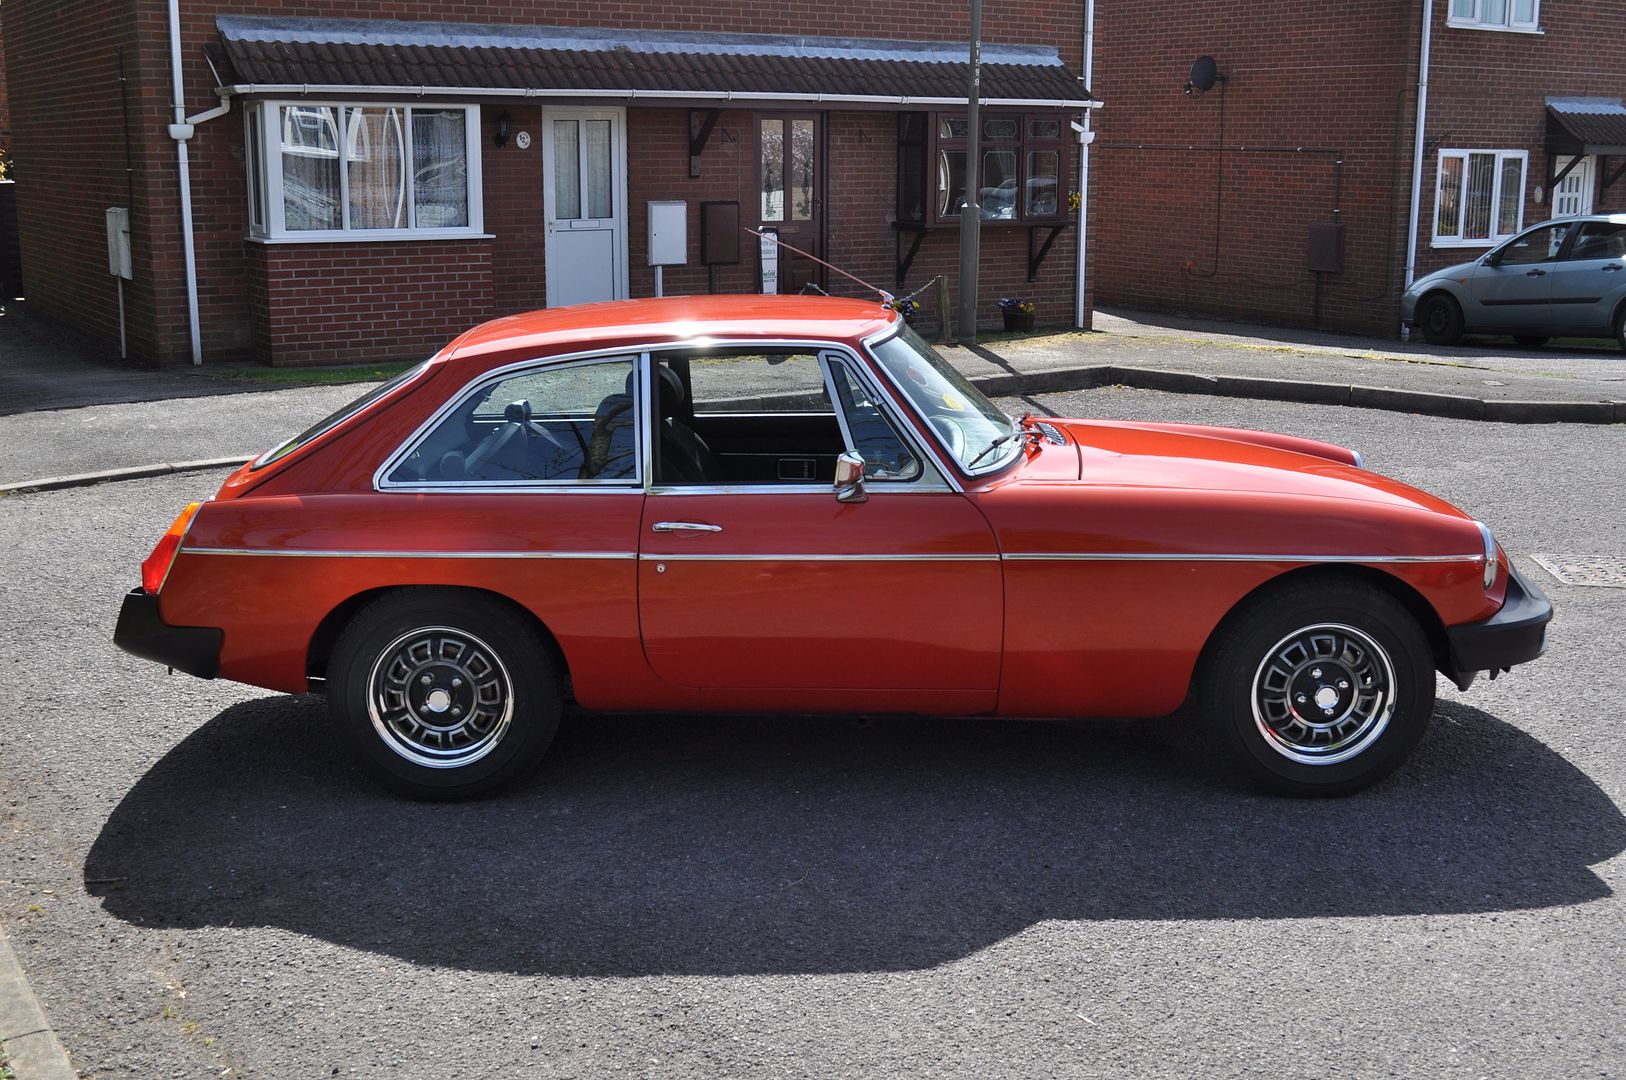

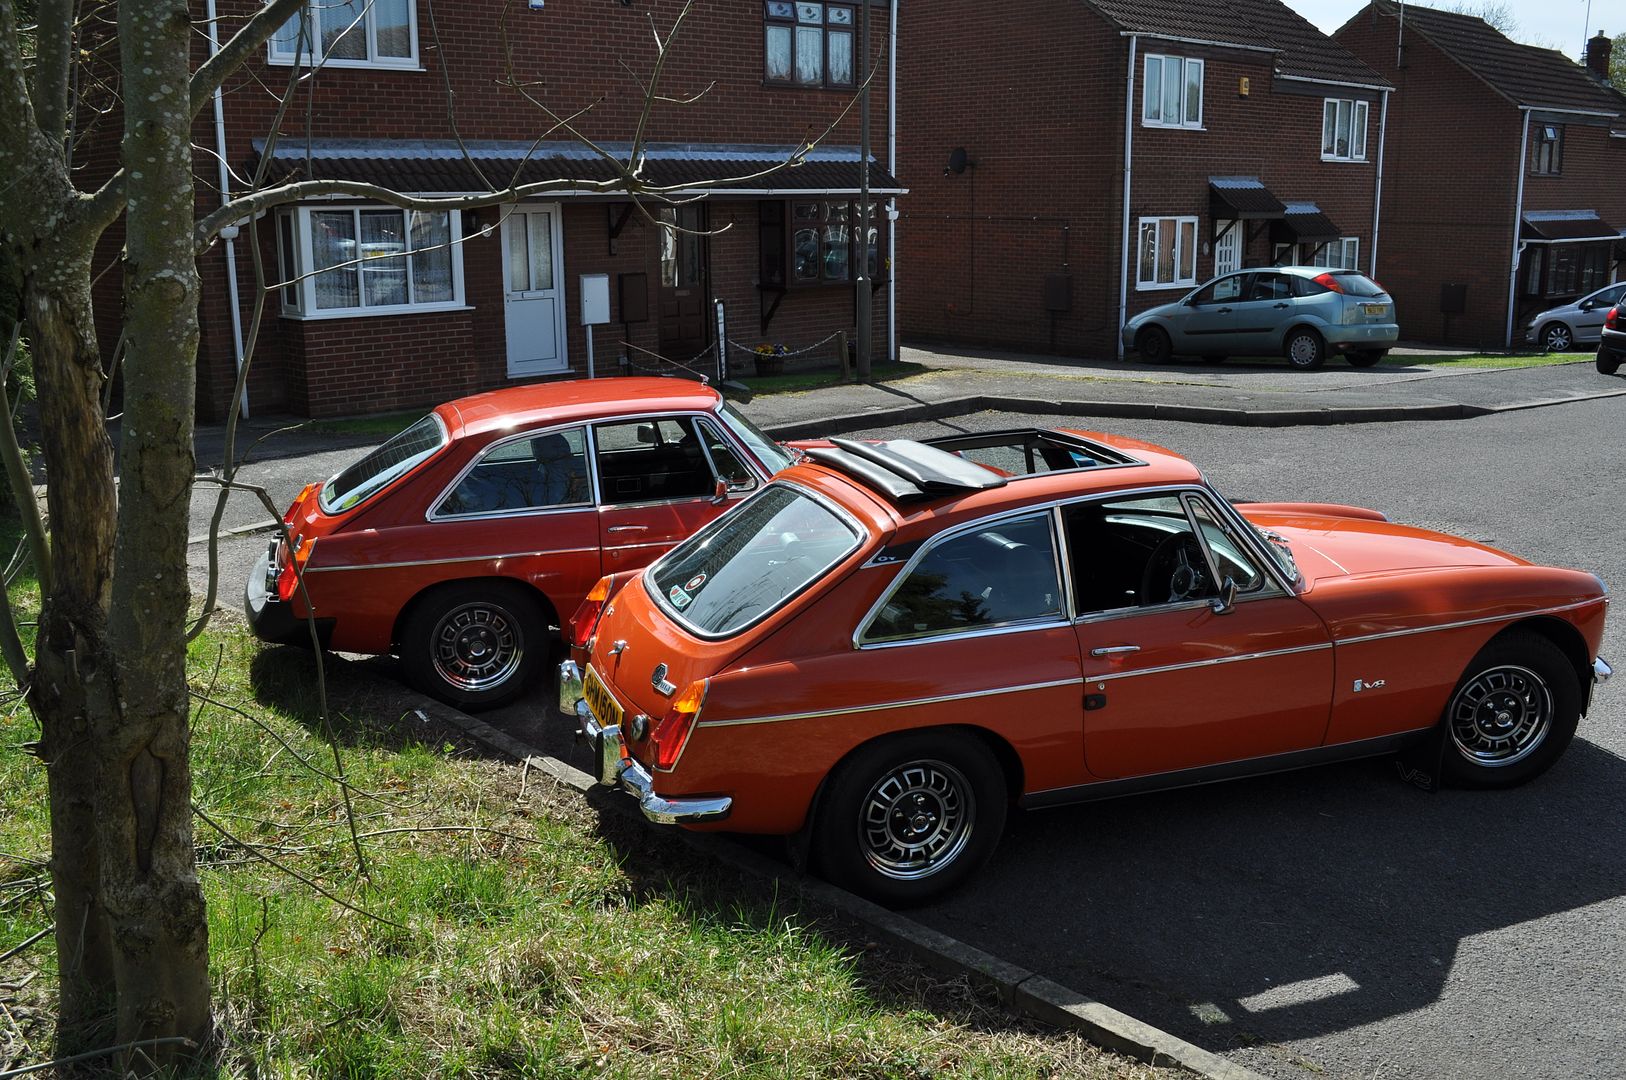
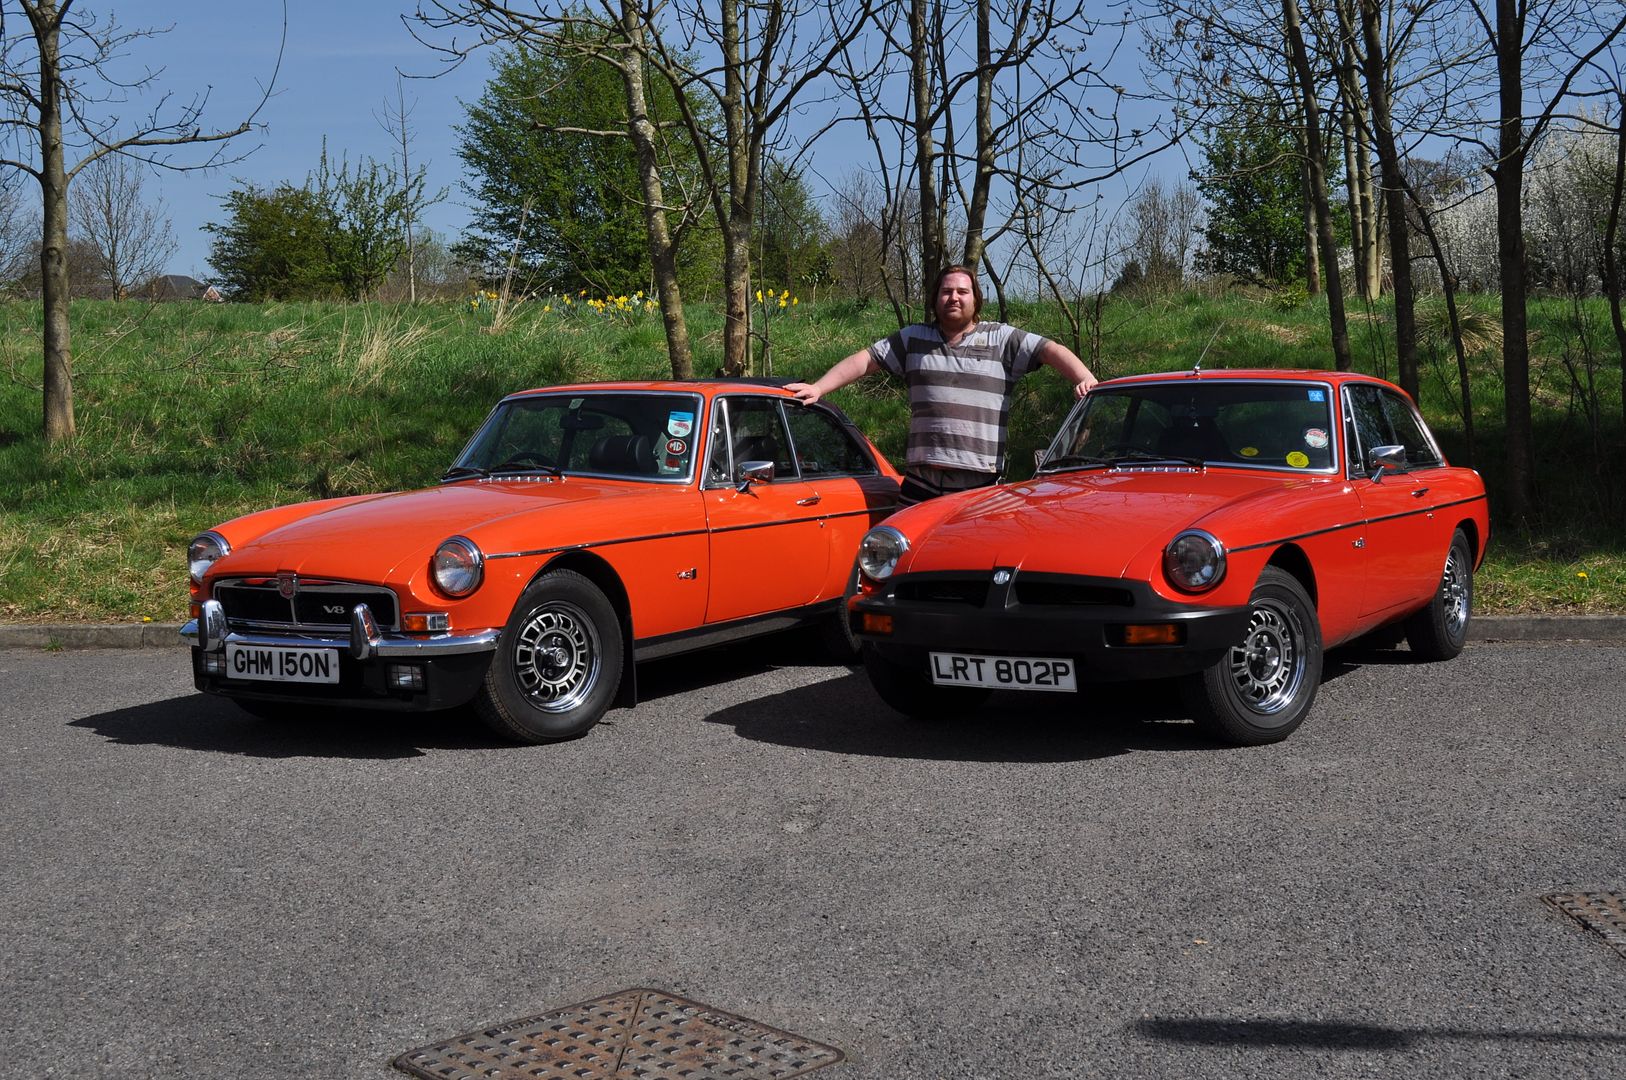
Last year I had two MGB GT V8's a Chrome Bumper and this one. In the end I chose to keep the rubber bumper model as it was basically the closest I was going to get to a brand new one. That and the Chrome bumper car had stainless oversills 100k miles on the clock and was generally a bit "tired".
I've had the car since April 2011. - Quite a long time for me to own a car. I normally get bored after about 6 weeks.
It's my 5th MGB GT V8 and I particularly wanted a rubber bumper car with no sunroof. When I picked it up it had 36k miles on the clock from new and I've done just short of 3000 miles over the summer last year. The car did around 22k with the first owner and then was sold in '78. The car then did only another 14k miles between '78 and April when I bought it. The previous owner lived abroad 11 months of the year and the GTV8 was a used as a seccond car when they were over here - hence the silly low milleage for a 37 year old car.
This is what she looked like when I bought her:
Last year I had two MGB GT V8's a Chrome Bumper and this one. In the end I chose to keep the rubber bumper model as it was basically the closest I was going to get to a brand new one. That and the Chrome bumper car had stainless oversills 100k miles on the clock and was generally a bit "tired".
(edited 12 years ago)
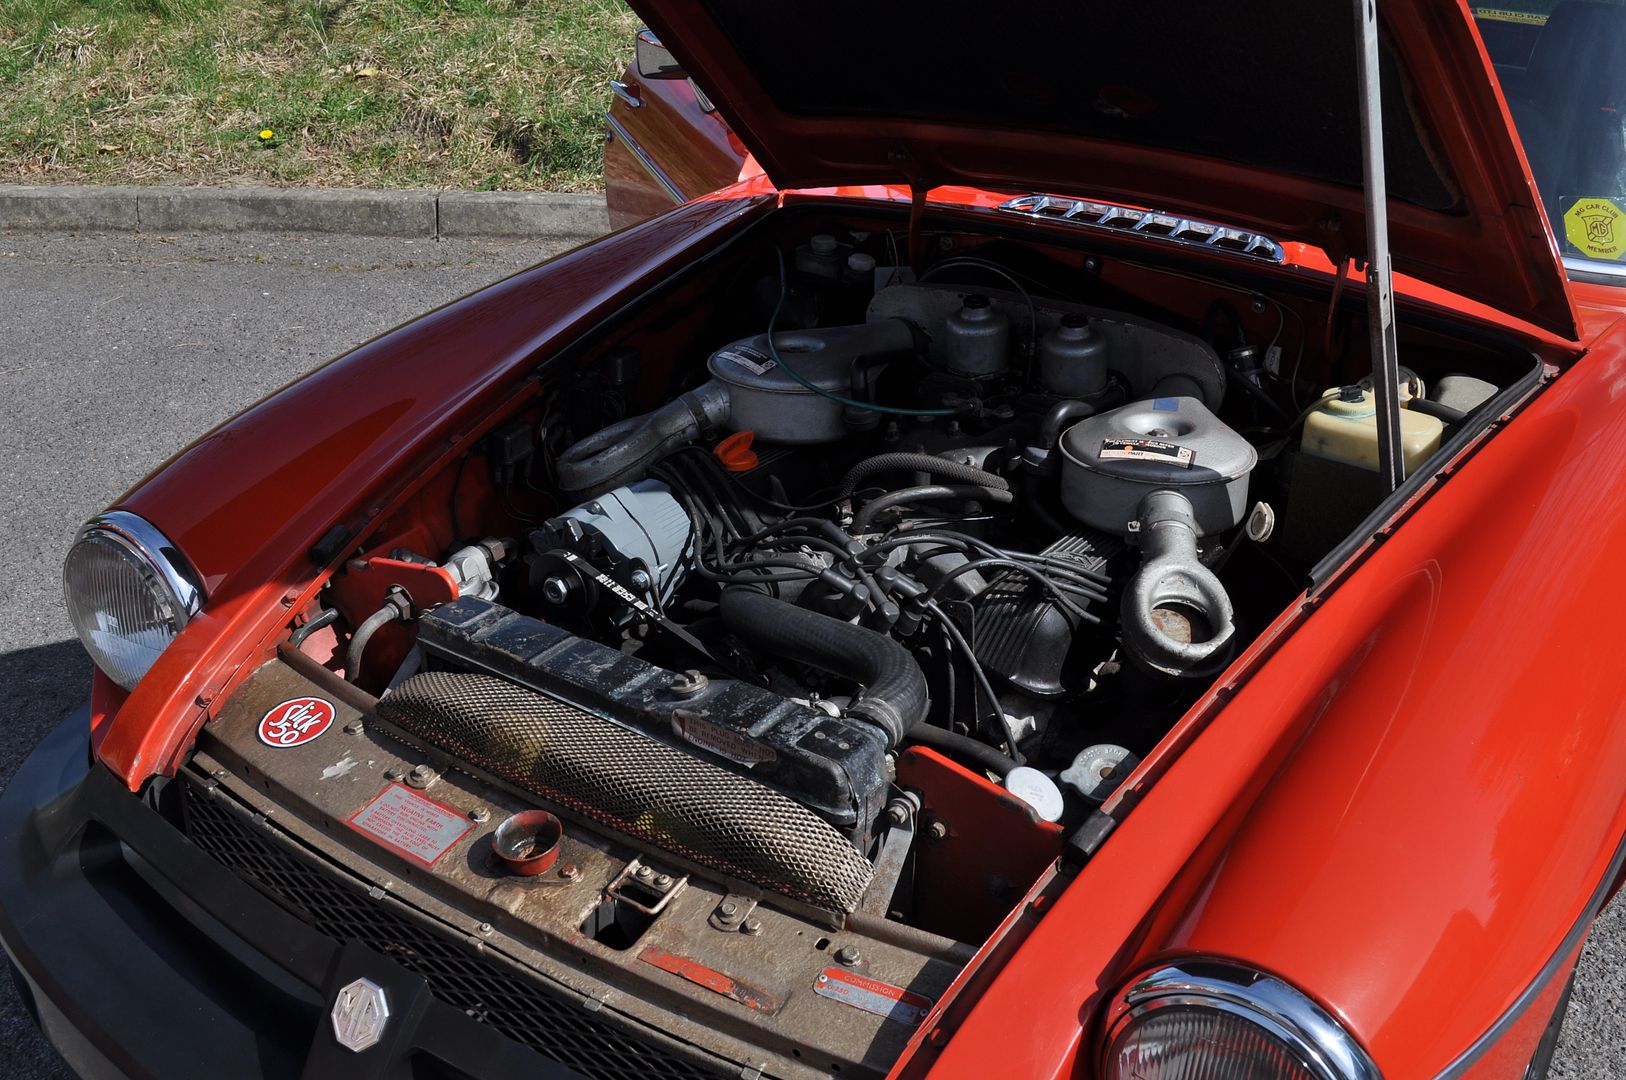
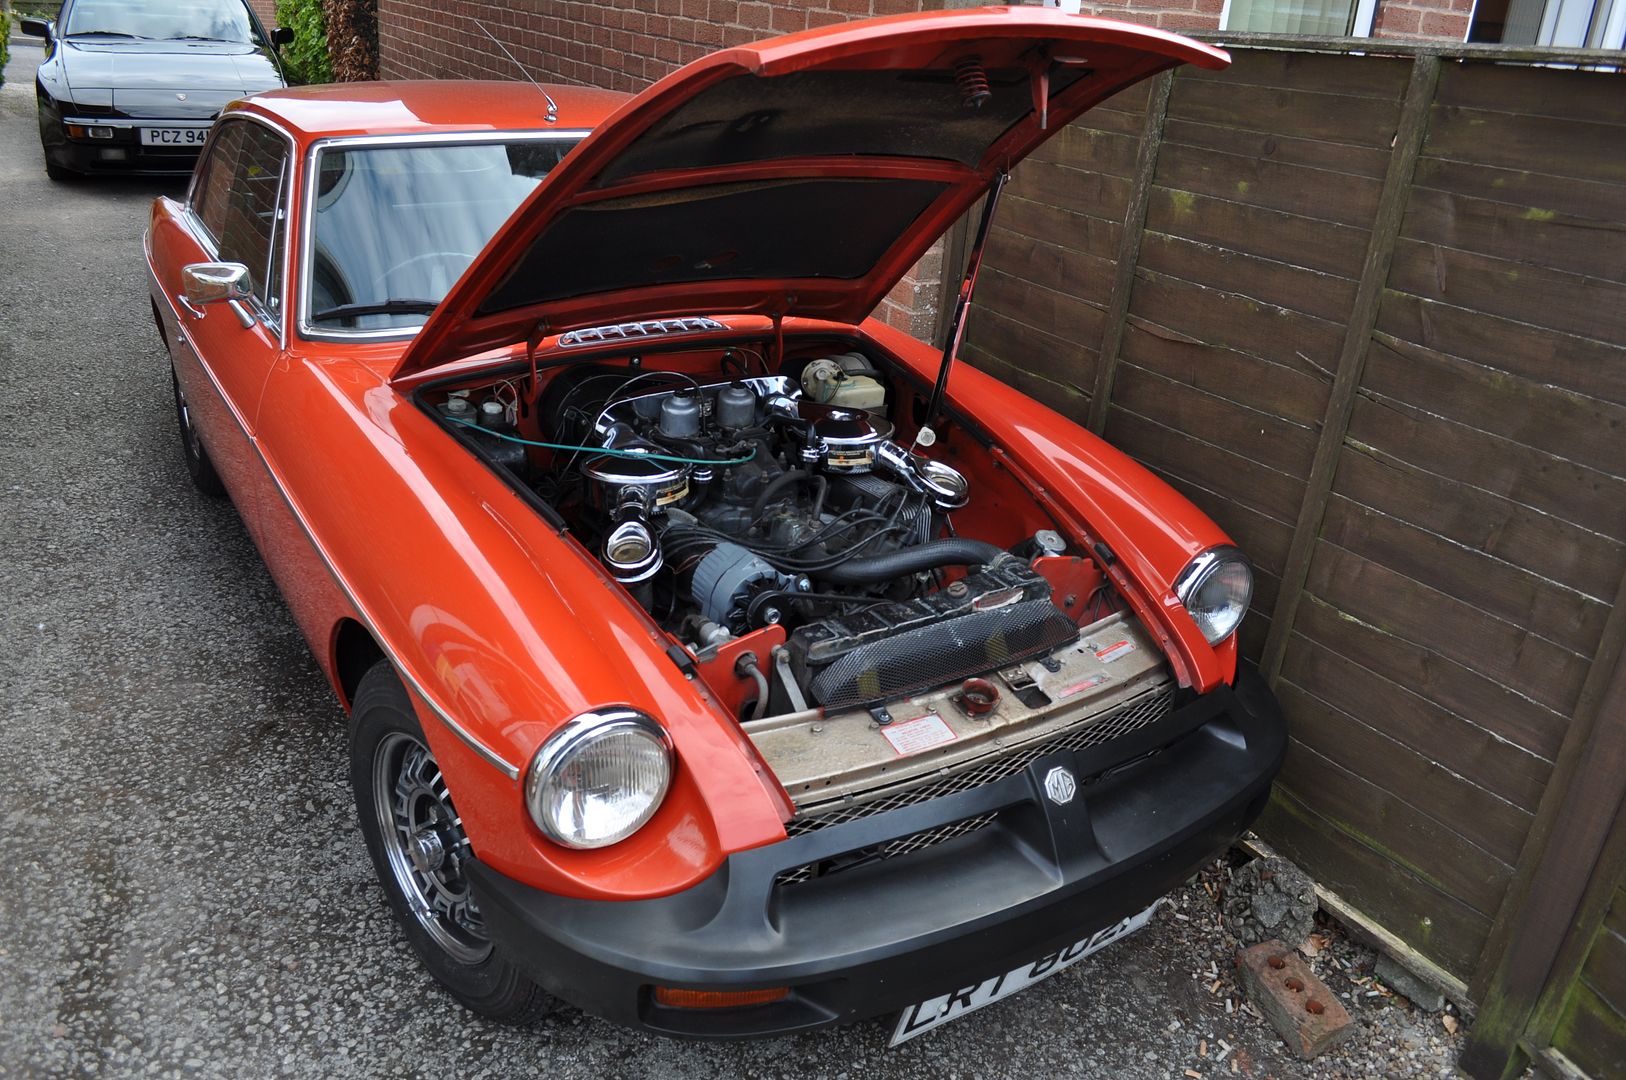
In addition to the Webber Carb instalation I've done quite a few other things to the car.
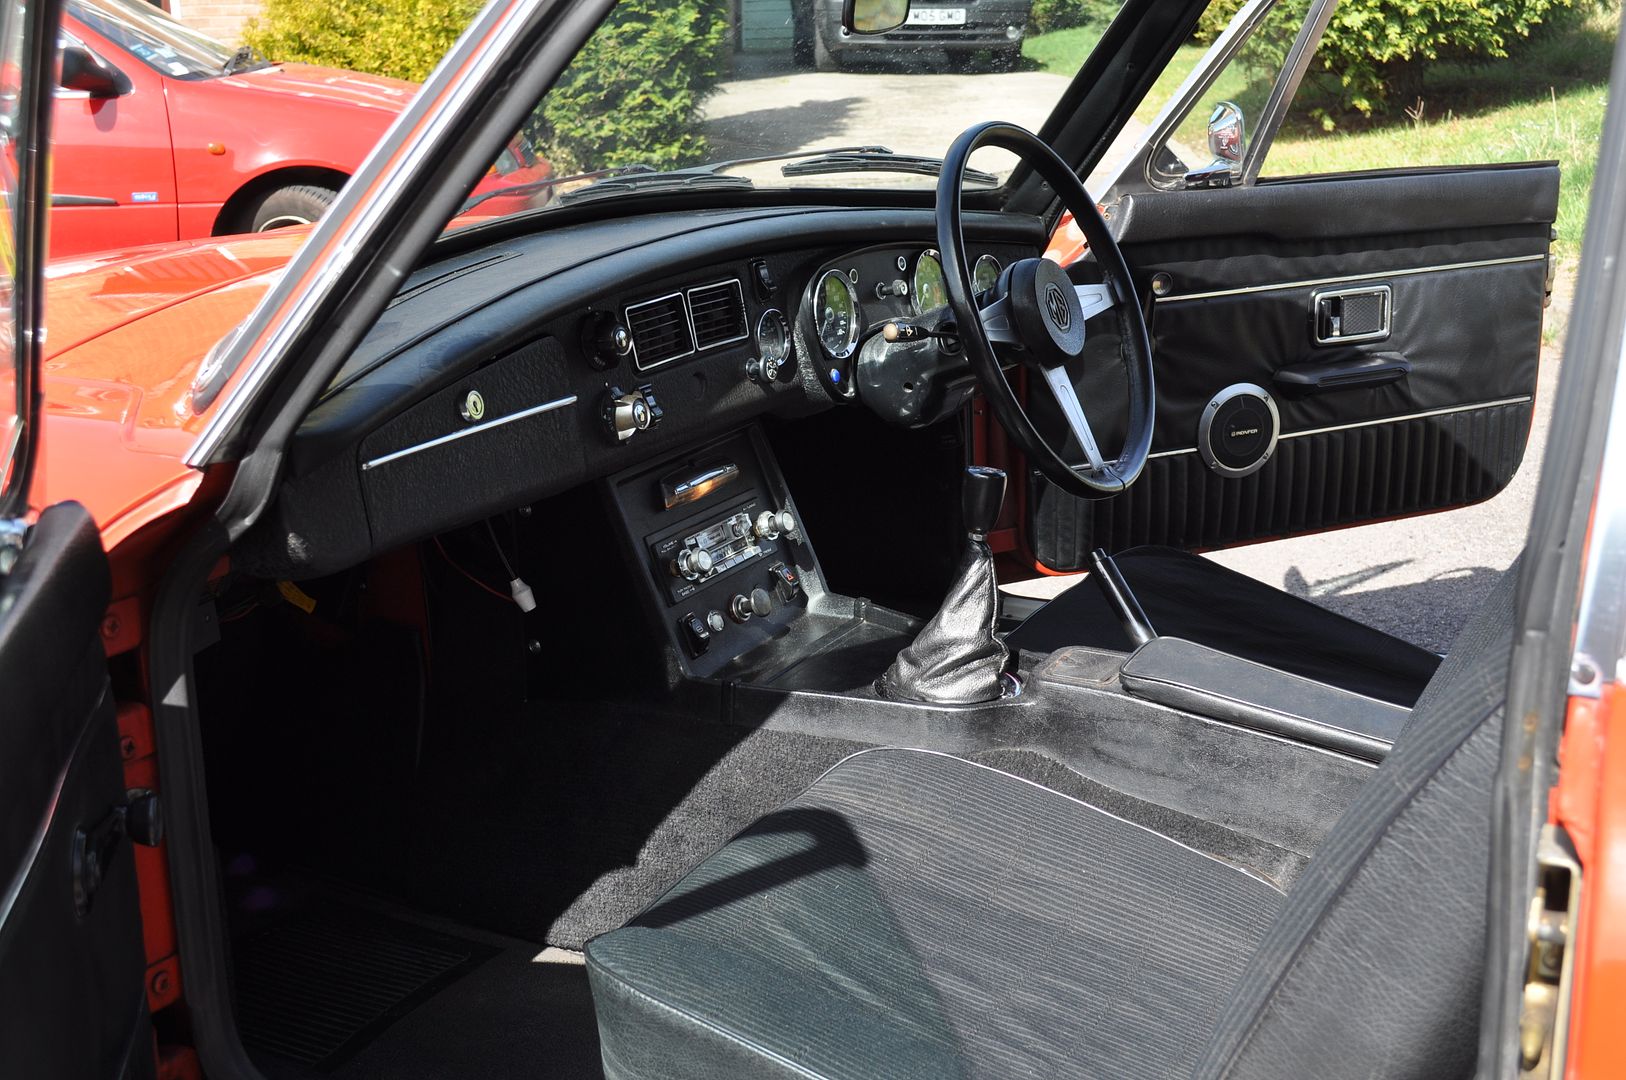
Re upholstered the seats with new foams and webbing - the original covers were cleaned and re-used.
Fitted a British Leyland "ST" department front spoiler and painted it body colour.
Fitted a new stainless mesh front spoiler
Attempted to tint the rear lights but it just looks silly
Fitted an lemans style quick release fuel cap
Improved the interior lighting
Fitted an Engine steady bar to stop the exhaust manifolds smacking the steering shaft on hard acceleration
Improved the paint on both the engine bay and touched in various stone chips and imperfections
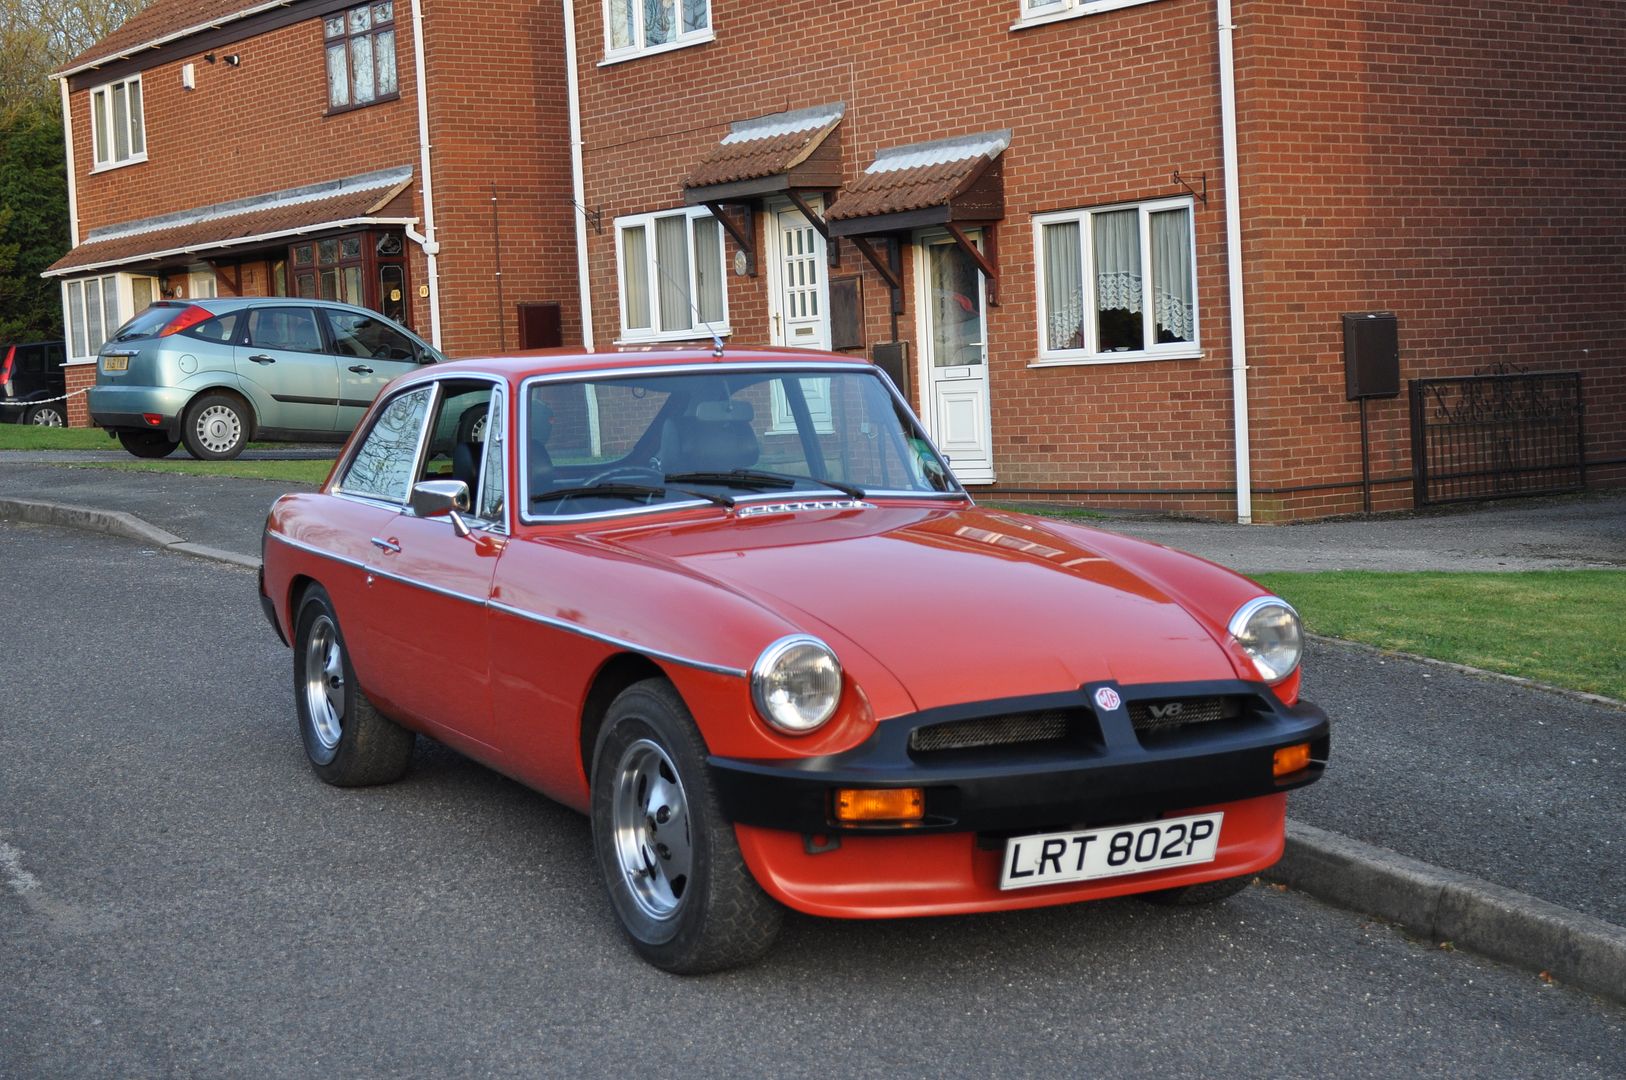
ST Spoiler instalation:
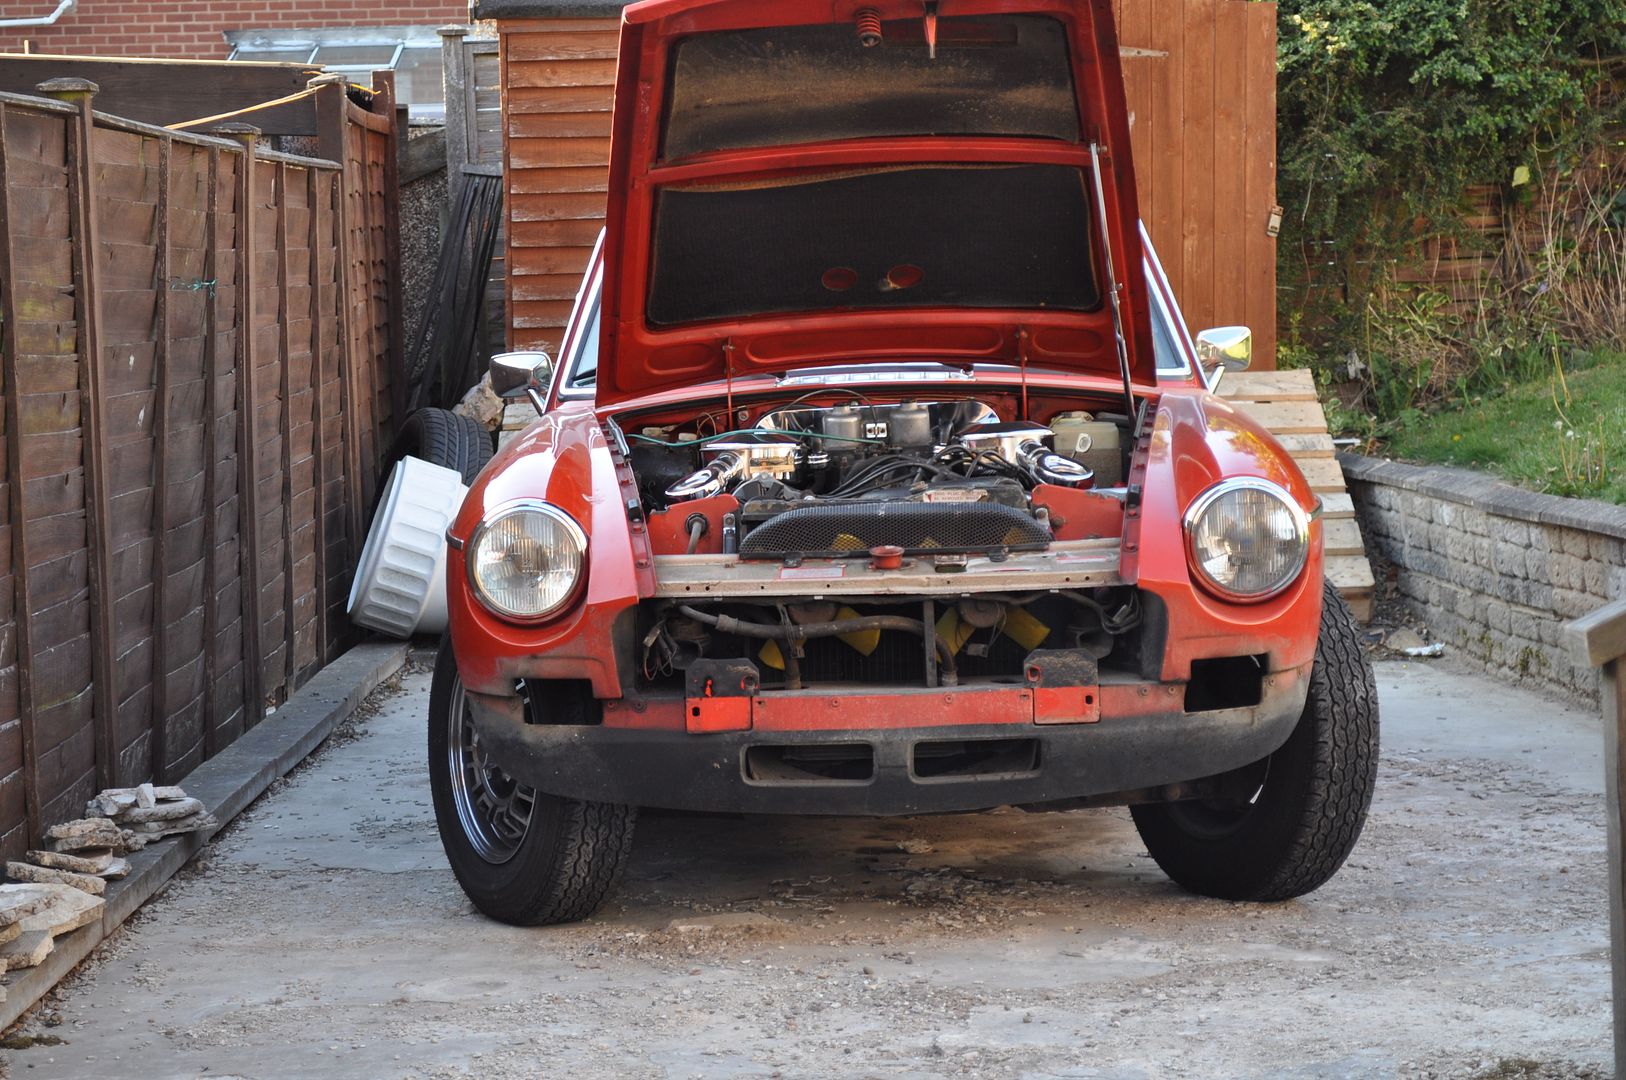
The original front valance was originally painted body colour. Although, as was the fashion at the time, some cars had their front valance and sills painted black. My V8 was given the partial black treatment. I didn't think it looked particularly nice... The other reason for wanting to do this conversion is that over 80mph the front end starts to lift and the steering can become very light and vague. Given the top speed of the car is 130mph it seemed like a good idea to sort out the aerodynamics a bit to improve high speed cruising.
This is what I started with:
The front bumper is only held on by four bolts - two under neath and two in the engine bay. Although to get at the bolts in the engine bay you also have to disconnect the wiring for the indicators, remove the fan guard and also remove the grille.
The new fibreglass front valance was offered up and the bolt holes drilled and two slots cut out with a dremel to allow the new front end to slot around the front chassis rail ends / bumper mounts.
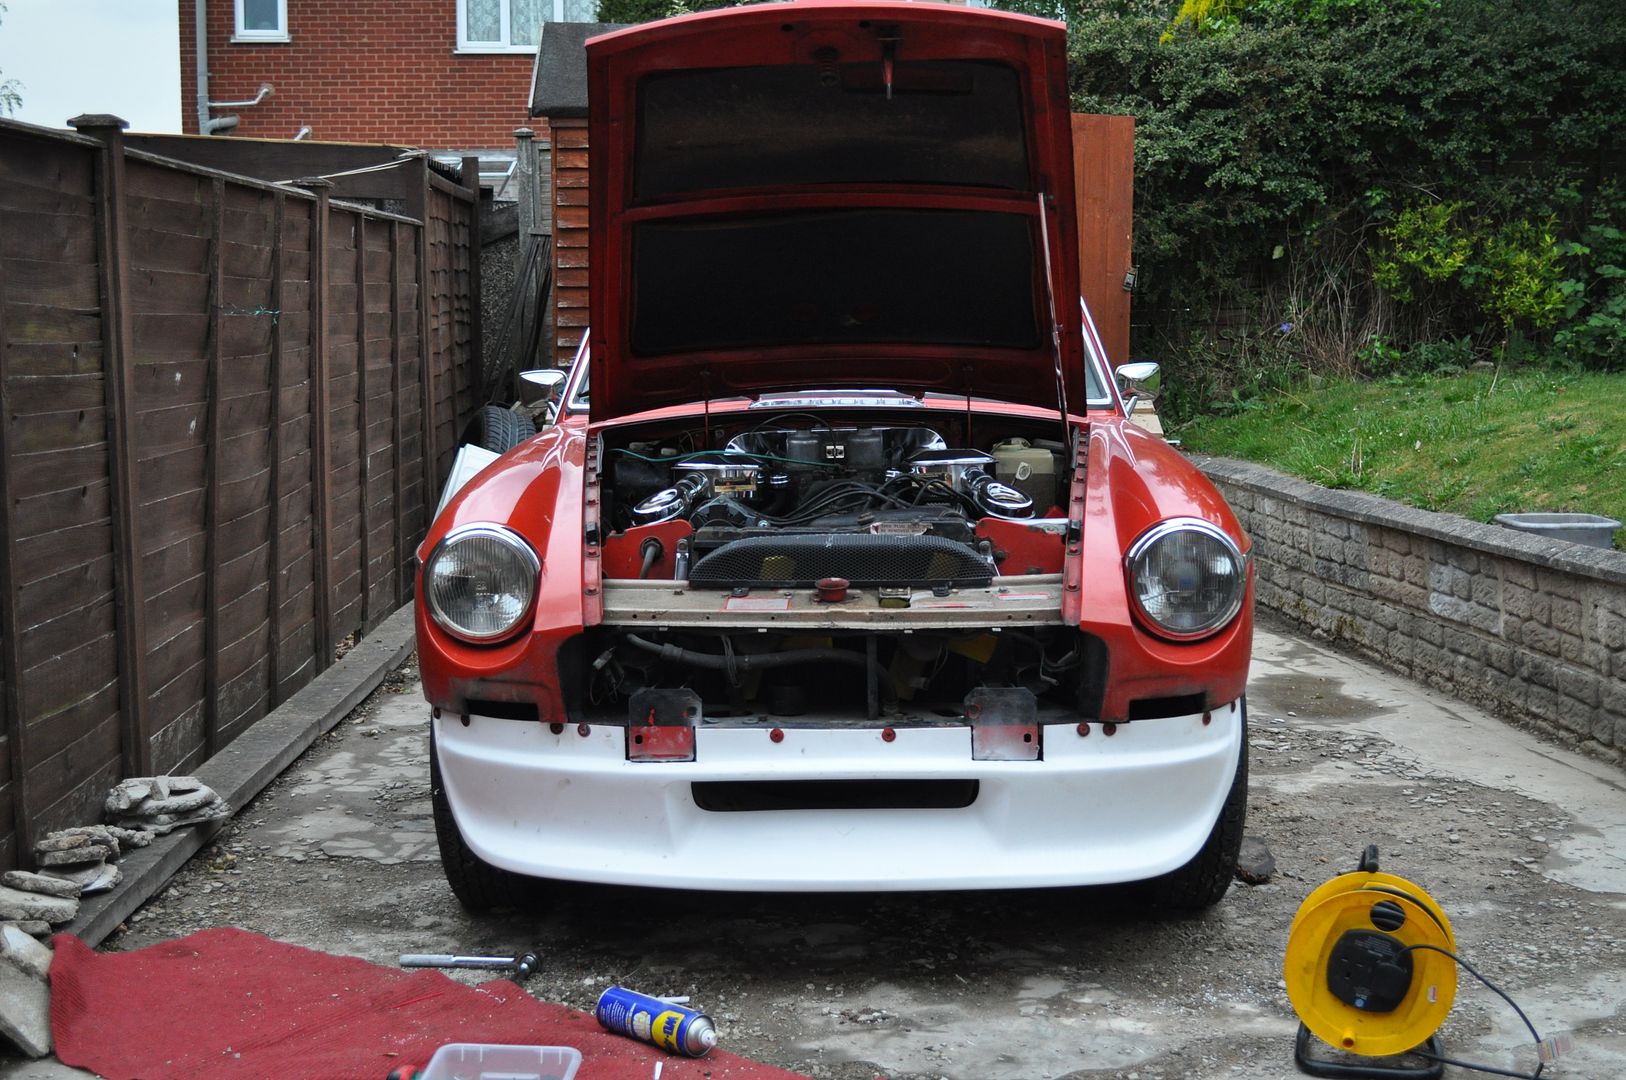
The front bumper was re-fitted to check clearances. One of the towing eyes had to be removed and the numberplate bracket modified slightly, but the new valance lined up nicely with the leading edge of the front wings.
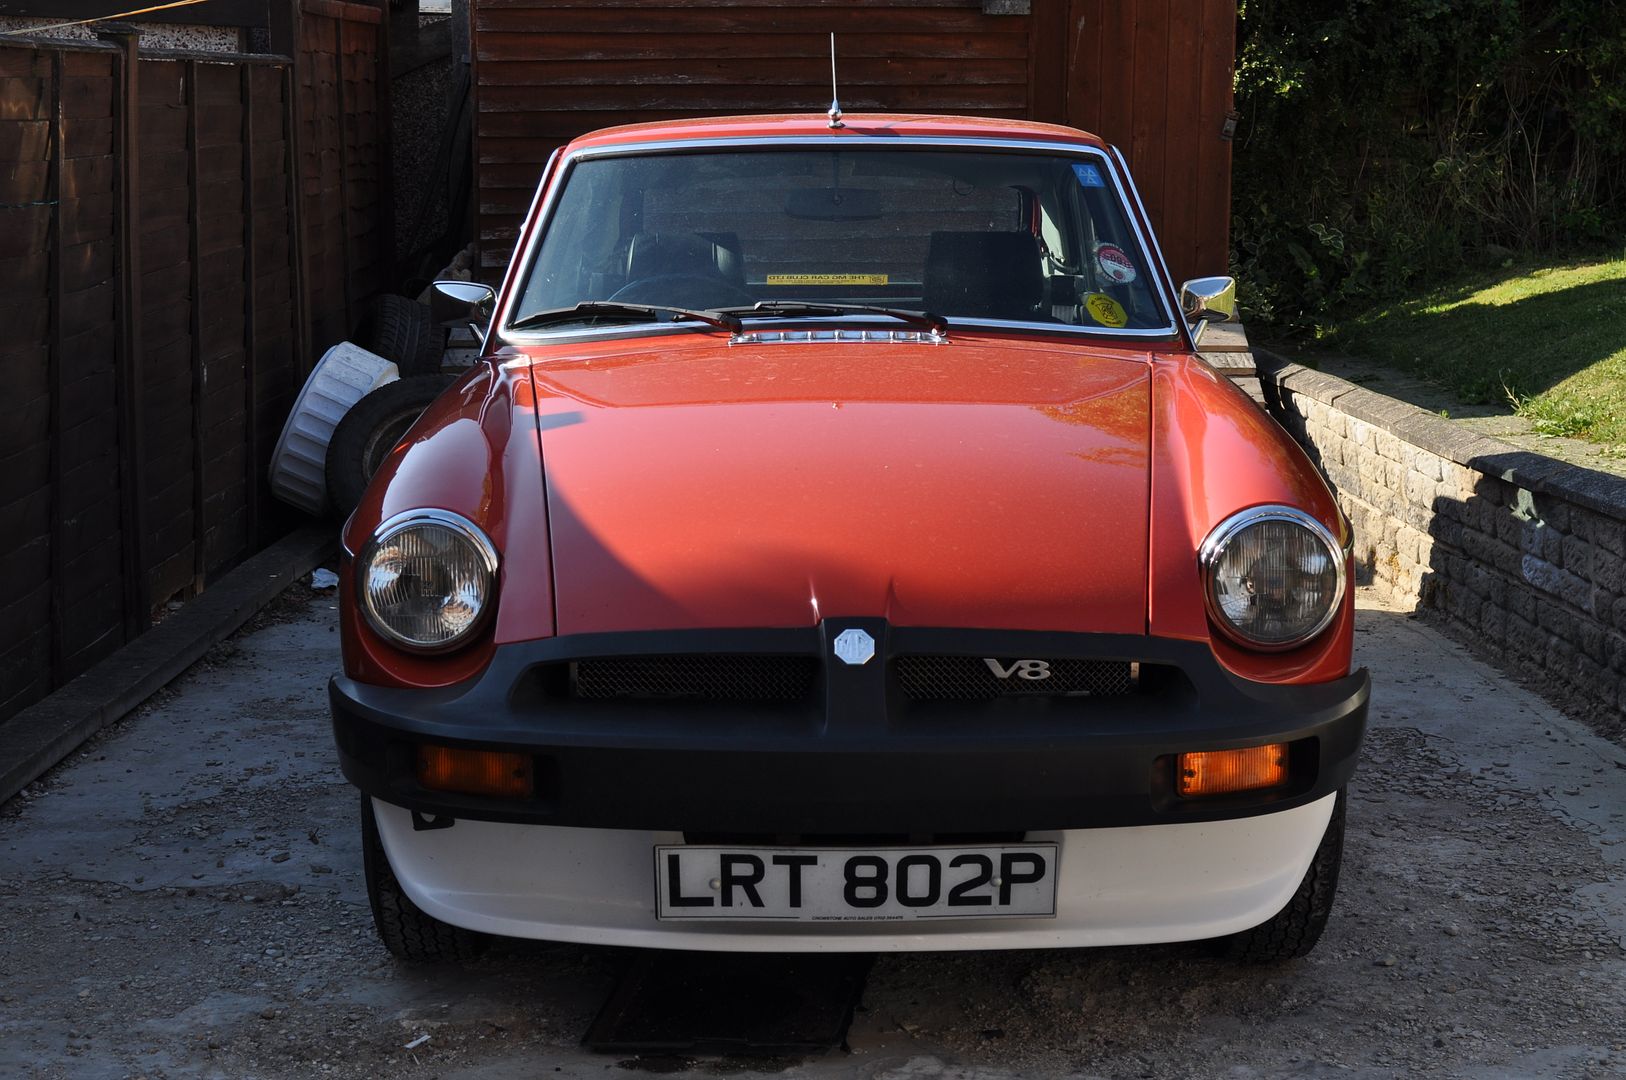
The car came with the original wide mesh front grille which some plank had decided to spray gold.
I bought a new stainless grille and fitted a V8 badge from a P6 that I used to own.
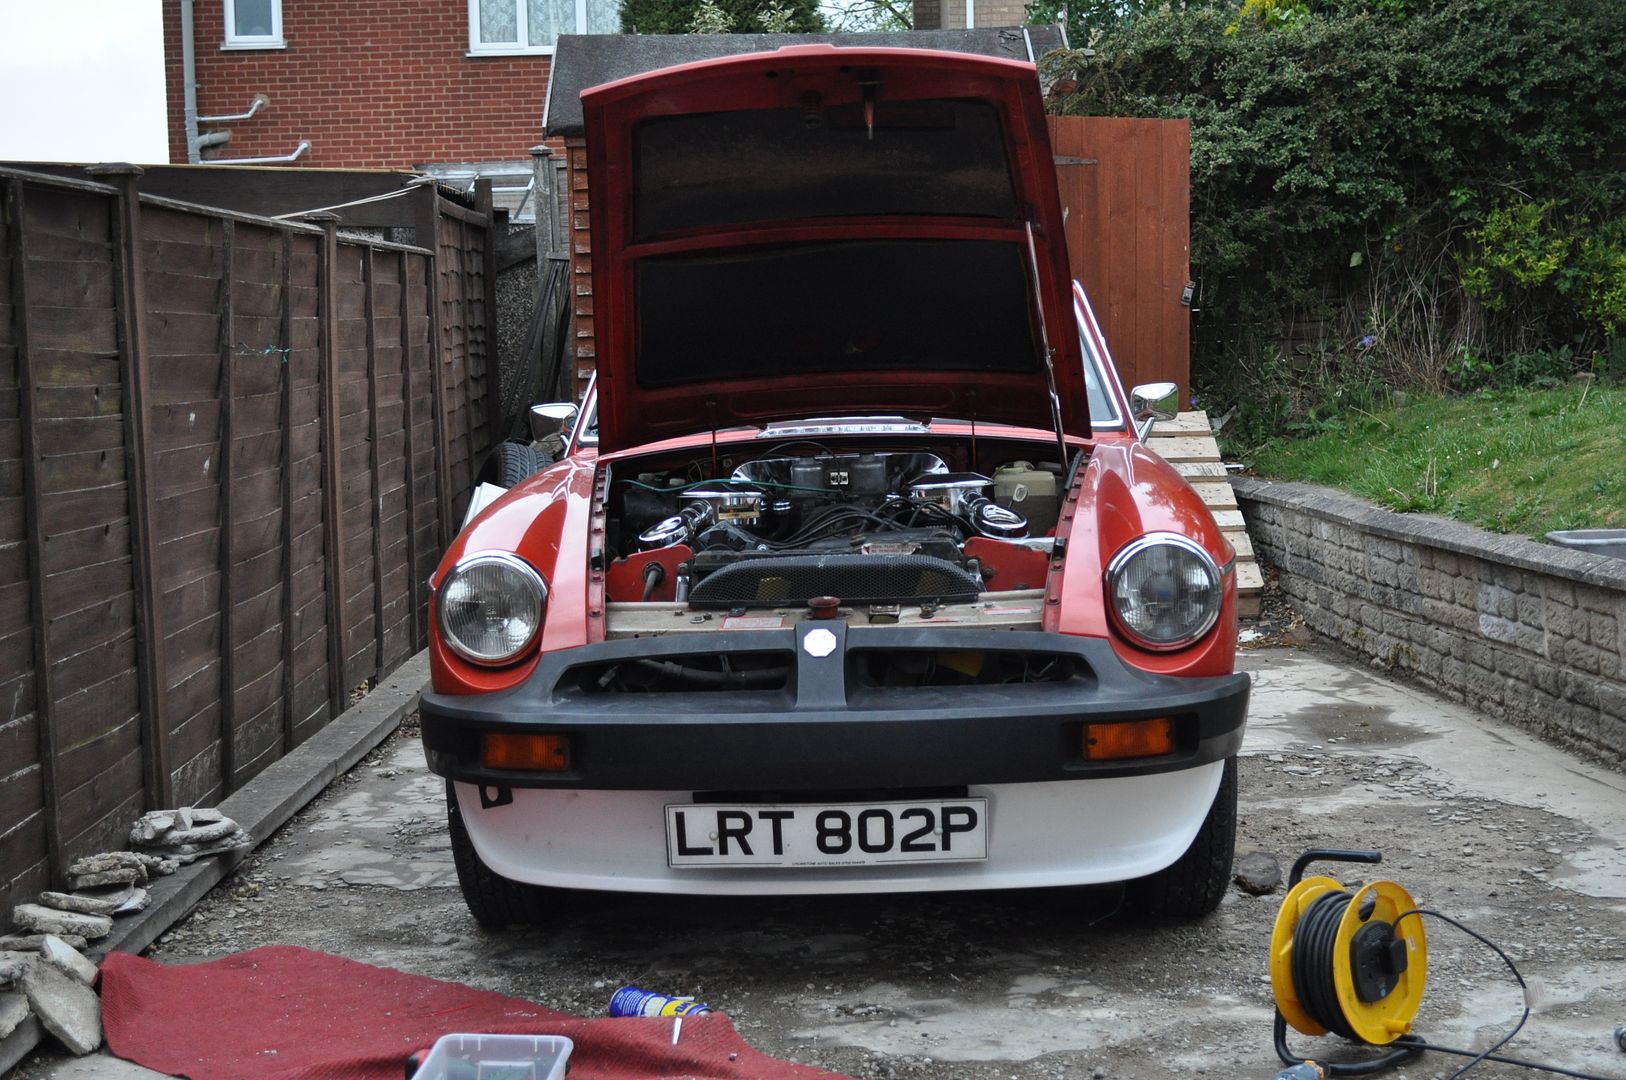
I then sprayed the front valance in the back garden with aerosol cans - not a bad result if I say so myself?
I also found a few moments to touch in the "MG" badge with some red enamel.

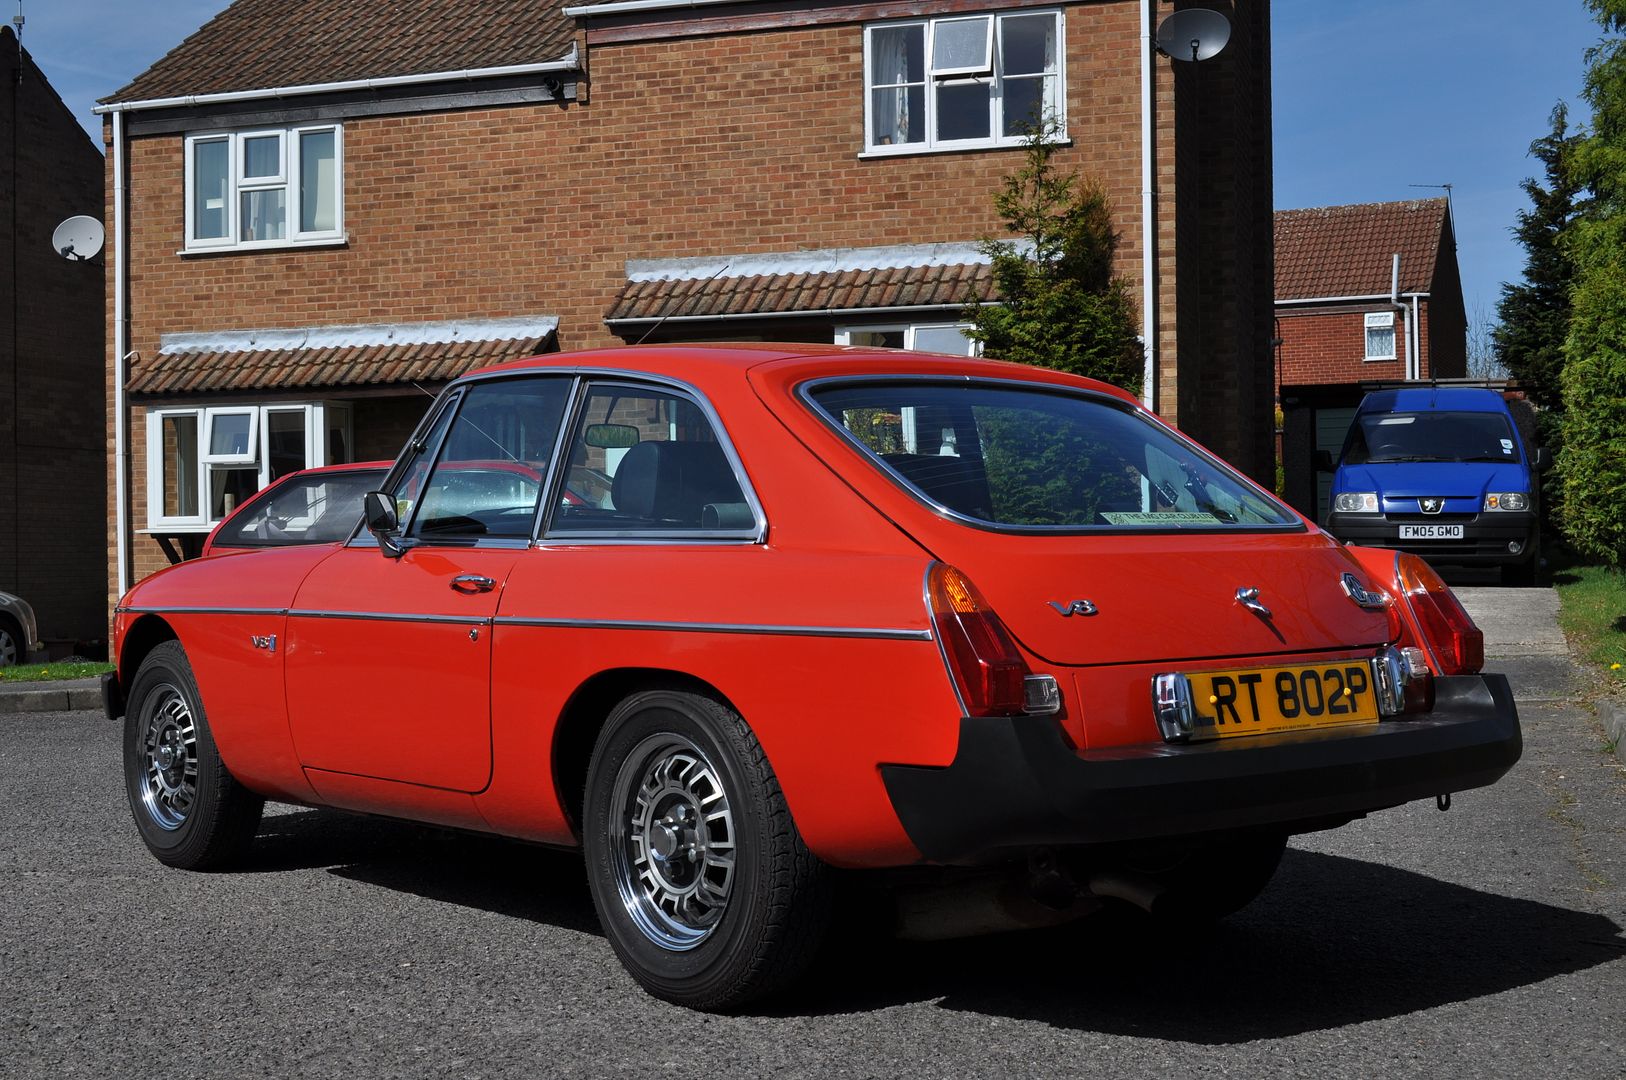
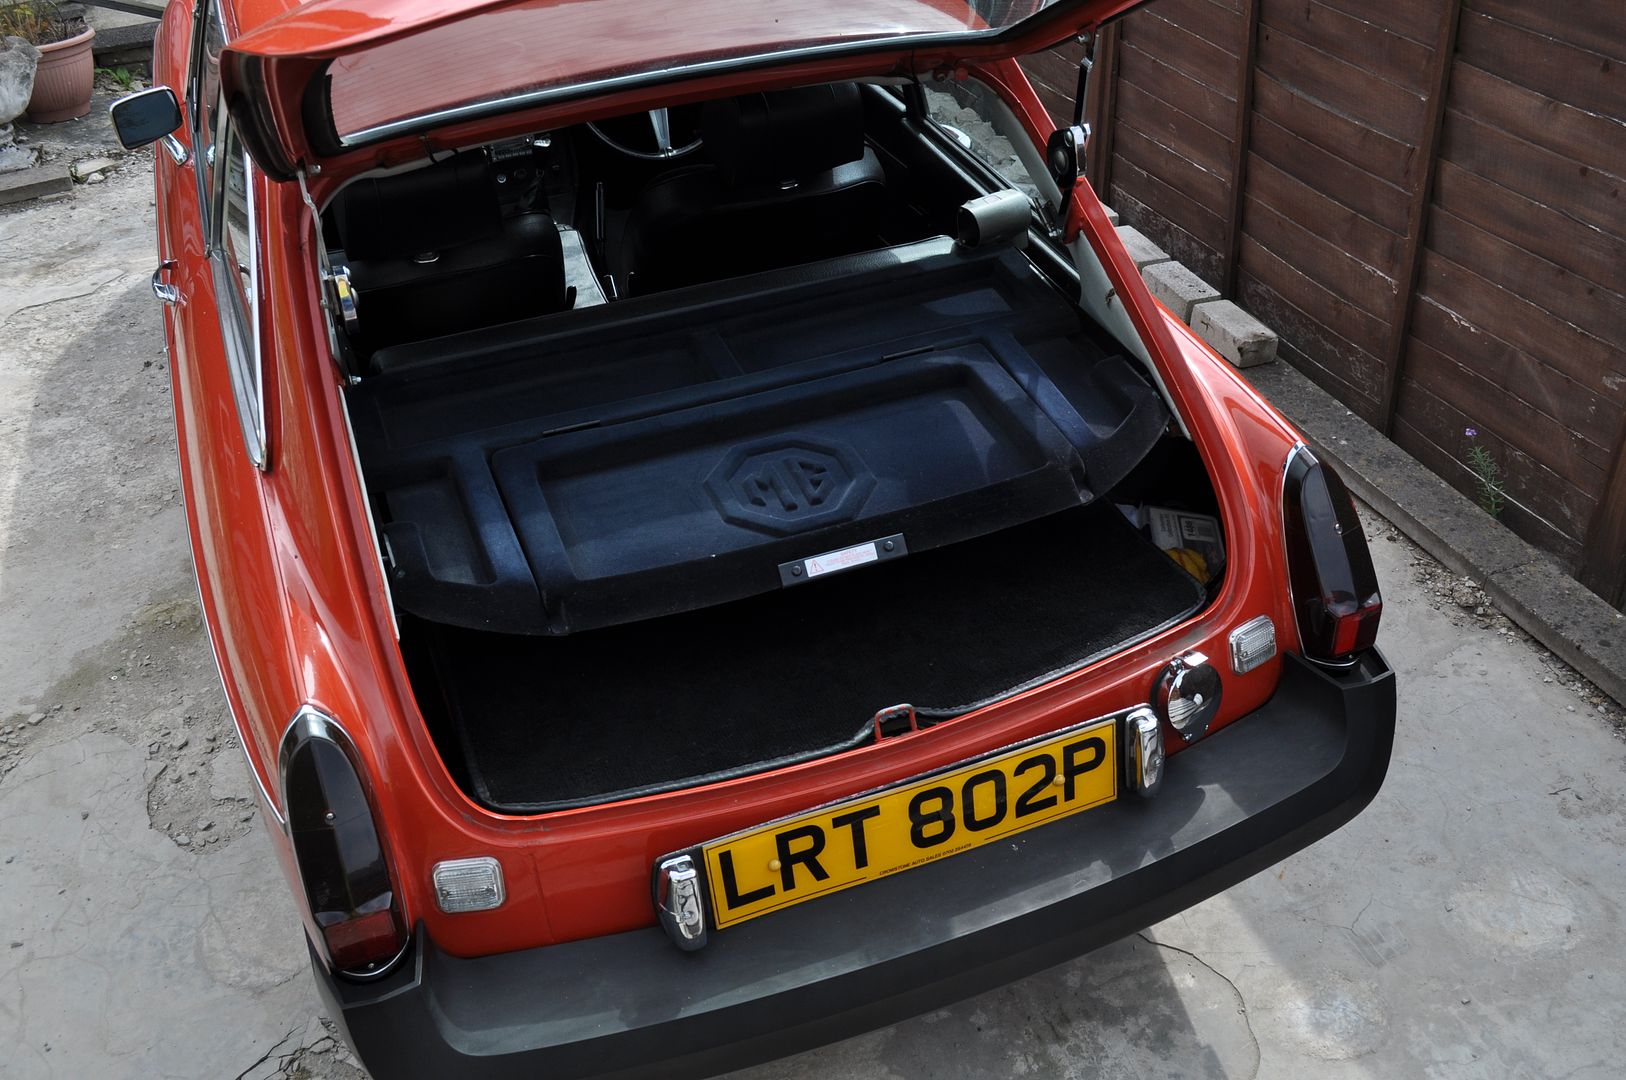
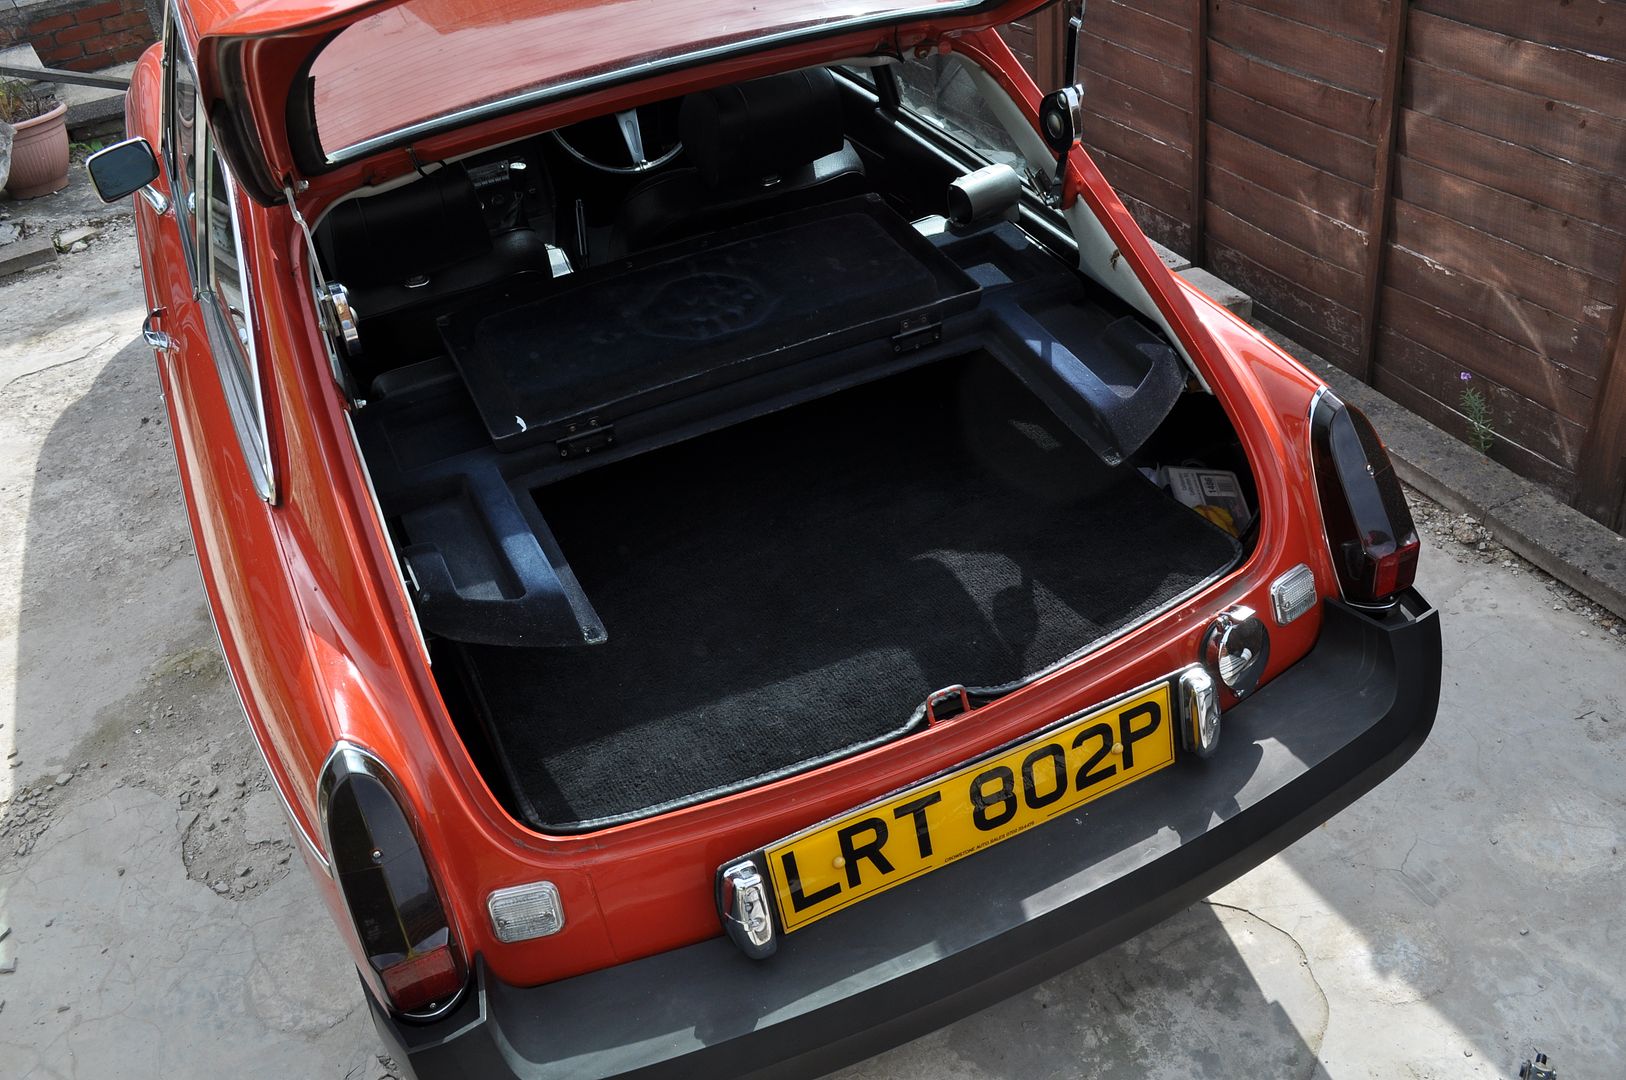
Rear Parcel shelf:
This was a bloody good find! They only made about 50 of these and they were sold through the MG owners club as the MGB GT was never fitted with one from the factory. When I look back I can't believe I paid £100 for a bit of fibreglass covered in flock, but it does look nice and imroves security a bit?
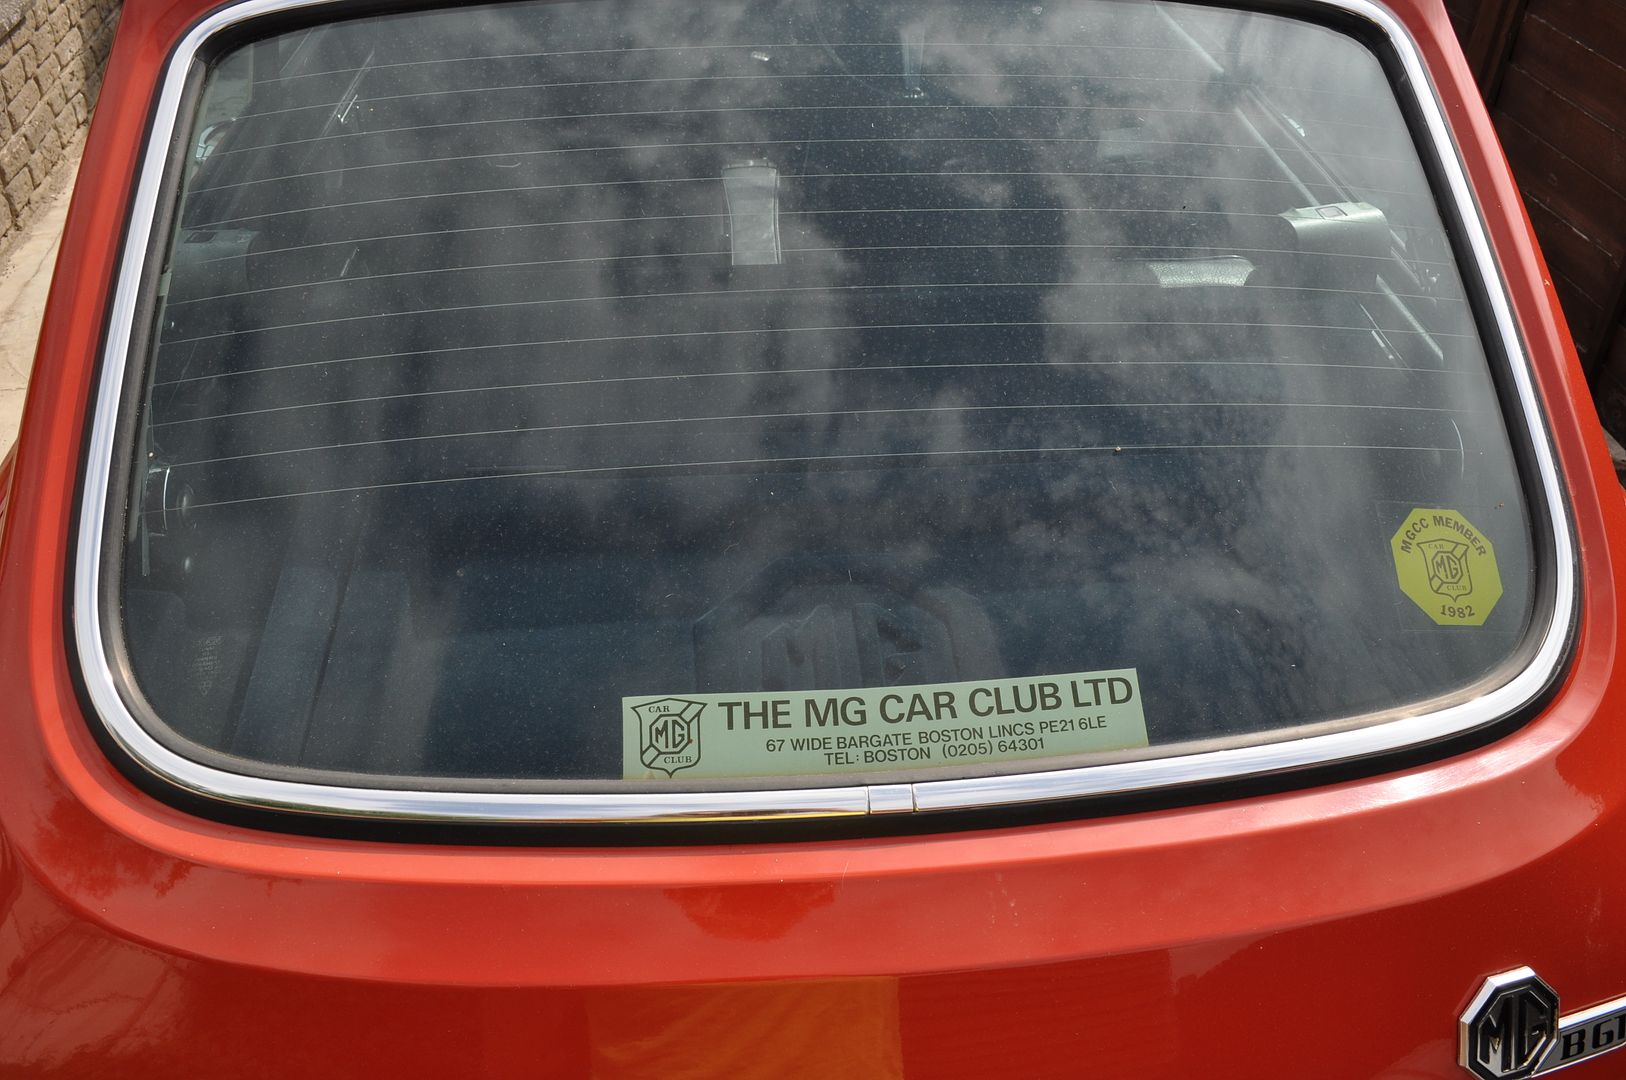
You can also see the results of the "tinting" experiment I did with the rear lights. I just removed the lenses and gave the inside a light dusting with satin black paint. One of the lenses was cracked so I figured I'd got nothing to loose doing the experiment. I think maybe I put a little bit too much paint on!
I suppose the general idea is to play with the thing as and when the mood takes me. Not sure what I'll do next? New brakes all round, rear suspension rebuild MGC Bonnet and air conditioning are all on the list of jobs.
I might look at converting to fuel injection one day perhaps?
Re upholstered the seats with new foams and webbing - the original covers were cleaned and re-used.
Fitted a British Leyland "ST" department front spoiler and painted it body colour.
Fitted a new stainless mesh front spoiler
Attempted to tint the rear lights but it just looks silly
Fitted an lemans style quick release fuel cap
Improved the interior lighting
Fitted an Engine steady bar to stop the exhaust manifolds smacking the steering shaft on hard acceleration
Improved the paint on both the engine bay and touched in various stone chips and imperfections
ST Spoiler instalation:
The original front valance was originally painted body colour. Although, as was the fashion at the time, some cars had their front valance and sills painted black. My V8 was given the partial black treatment. I didn't think it looked particularly nice... The other reason for wanting to do this conversion is that over 80mph the front end starts to lift and the steering can become very light and vague. Given the top speed of the car is 130mph it seemed like a good idea to sort out the aerodynamics a bit to improve high speed cruising.
This is what I started with:
The front bumper is only held on by four bolts - two under neath and two in the engine bay. Although to get at the bolts in the engine bay you also have to disconnect the wiring for the indicators, remove the fan guard and also remove the grille.
The new fibreglass front valance was offered up and the bolt holes drilled and two slots cut out with a dremel to allow the new front end to slot around the front chassis rail ends / bumper mounts.
The front bumper was re-fitted to check clearances. One of the towing eyes had to be removed and the numberplate bracket modified slightly, but the new valance lined up nicely with the leading edge of the front wings.
The car came with the original wide mesh front grille which some plank had decided to spray gold.
I bought a new stainless grille and fitted a V8 badge from a P6 that I used to own.
I then sprayed the front valance in the back garden with aerosol cans - not a bad result if I say so myself?
I also found a few moments to touch in the "MG" badge with some red enamel.
Rear Parcel shelf:
This was a bloody good find! They only made about 50 of these and they were sold through the MG owners club as the MGB GT was never fitted with one from the factory. When I look back I can't believe I paid £100 for a bit of fibreglass covered in flock, but it does look nice and imroves security a bit?
You can also see the results of the "tinting" experiment I did with the rear lights. I just removed the lenses and gave the inside a light dusting with satin black paint. One of the lenses was cracked so I figured I'd got nothing to loose doing the experiment. I think maybe I put a little bit too much paint on!
I suppose the general idea is to play with the thing as and when the mood takes me. Not sure what I'll do next? New brakes all round, rear suspension rebuild MGC Bonnet and air conditioning are all on the list of jobs.
I might look at converting to fuel injection one day perhaps?
(edited 12 years ago)
Get it on a dyno. Let us all see if that V8 is anything more than a nice ornament on your grille. hehe
Original post by Potential Trigger
Get it on a dyno. Let us all see if that V8 is anything more than a nice ornament on your grille. hehe
Hoping to put her on the dyno at some point over the summer.
With the new carb and distributor setup, I would imagine she's running around 150bhp / 220ftlbs of torque? It's only a little buick 215ci V8 after all.

Still, for the year it was built (75) it's no slouch and at just under a ton in weight it seems to out drag most most stuff running around the roads these days up a hill?
The weak point on these cars is the gearbox. Attempting a burnout in first gear would probably kill it and for similar reasons you can't actually put an awful lot more power through them. If I want to go quicker I'll have to fit a different gearbox and if I'm going to do that I'd rather fit a chevy LS1 up front and this car is just too nice in the body for a BGT to start doing engine / trans swaps.
No, this one will only ever be a mildly tweaked road car. I think realistically if you want to go very fast there's better cars out there to start with as a base than an old MGB.
Original post by JC.
Hoping to put her on the dyno at some point over the summer.
With the new carb and distributor setup, I would imagine she's running around 150bhp / 220ftlbs of torque? It's only a little buick 215ci V8 after all.
Still, for the year it was built (75) it's no slouch and at just under a ton in weight it seems to out drag most most stuff running around the roads these days up a hill?
The weak point on these cars is the gearbox. Attempting a burnout in first gear would probably kill it and for similar reasons you can't actually put an awful lot more power through them. If I want to go quicker I'll have to fit a different gearbox and if I'm going to do that I'd rather fit a chevy LS1 up front and this car is just too nice in the body for a BGT to start doing engine / trans swaps.
No, this one will only ever be a mildly tweaked road car. I think realistically if you want to go very fast there's better cars out there to start with as a base than an old MGB.
I know it's not why these cars exist or are owned but 150hp from a 3.5 litre v8 is pretty shocking! Loving the project so far though, hows the hunt for a donor bonnet going?
Original post by Fuzzed_Out
I know it's not why these cars exist or are owned but 150hp from a 3.5 litre v8 is pretty shocking! Loving the project so far though, hows the hunt for a donor bonnet going?
150bhp in 1975 was pretty good going. Back then, the average family car was probably only making somewhere between 40 and 95bhp? It's unfair to judge the thing by todays standards. In any case, 225bhp is quite easy to get out of a 3.5 nASP Rover V8.
I've not found a cheap bonnet yet to muck about with. I do keep looking on eBay and the MG magazines though...
Original post by JC.
Hoping to put her on the dyno at some point over the summer.
With the new carb and distributor setup, I would imagine she's running around 150bhp / 220ftlbs of torque? It's only a little buick 215ci V8 after all.
Still, for the year it was built (75) it's no slouch and at just under a ton in weight it seems to out drag most most stuff running around the roads these days up a hill?
The weak point on these cars is the gearbox. Attempting a burnout in first gear would probably kill it and for similar reasons you can't actually put an awful lot more power through them. If I want to go quicker I'll have to fit a different gearbox and if I'm going to do that I'd rather fit a chevy LS1 up front and this car is just too nice in the body for a BGT to start doing engine / trans swaps.
No, this one will only ever be a mildly tweaked road car. I think realistically if you want to go very fast there's better cars out there to start with as a base than an old MGB.
With the new carb and distributor setup, I would imagine she's running around 150bhp / 220ftlbs of torque? It's only a little buick 215ci V8 after all.
Still, for the year it was built (75) it's no slouch and at just under a ton in weight it seems to out drag most most stuff running around the roads these days up a hill?
The weak point on these cars is the gearbox. Attempting a burnout in first gear would probably kill it and for similar reasons you can't actually put an awful lot more power through them. If I want to go quicker I'll have to fit a different gearbox and if I'm going to do that I'd rather fit a chevy LS1 up front and this car is just too nice in the body for a BGT to start doing engine / trans swaps.
No, this one will only ever be a mildly tweaked road car. I think realistically if you want to go very fast there's better cars out there to start with as a base than an old MGB.
It definitely isn't a slouch, for its time its pretty quick. I agree it's not something you would go for if you wanted to go all out performance, but I like the vintage look of the MGB. I like your subtle mods, keeps it very oem looking.
Right, since it was nice and sunny today I decided to spend an hour on the car to get the new suspension system all finished up.
First job was to centralise the antiroll bar - nice easy one. Just slacken the ARB mounts and give it a gentle tap with the hammer until it was about in the middle.
I also refitted the brake calipers and pads - no point fitting new just yet since the disks arn't that old and neither are the pads.
Once that job was out of the way I had to change the track rod ends. Unbelievably the last set of ends I fitted to the car lasted just 50 miles before the rubber gaitors split open. They were propper quentin hazel ends too.
The new TRE's are the re-greasable type - you can see the grease nipples on the top if you look at the photos closely.
The last job was to grease the entire front suspension. To do this, you fill a grease gun up with suitable grease, engage the gun with one of the 6 grease nipples on the suspension and pump the arm of the gun until you start to see fresh grease ooze out of all the joints.
That's it - it's all back together. The only thing that needs doing now is to take the car somewhere to have the tracking aligned.
Total cost of the front suspension overhaul was around £220. The front end is now much stiffer - I can tell just by bouncing the front end by hand.
I'm really looking forward to getting her out on the open road in april to test out how much of a difference it's made. Usually, it feels like a totally different car to drive.
Near side:
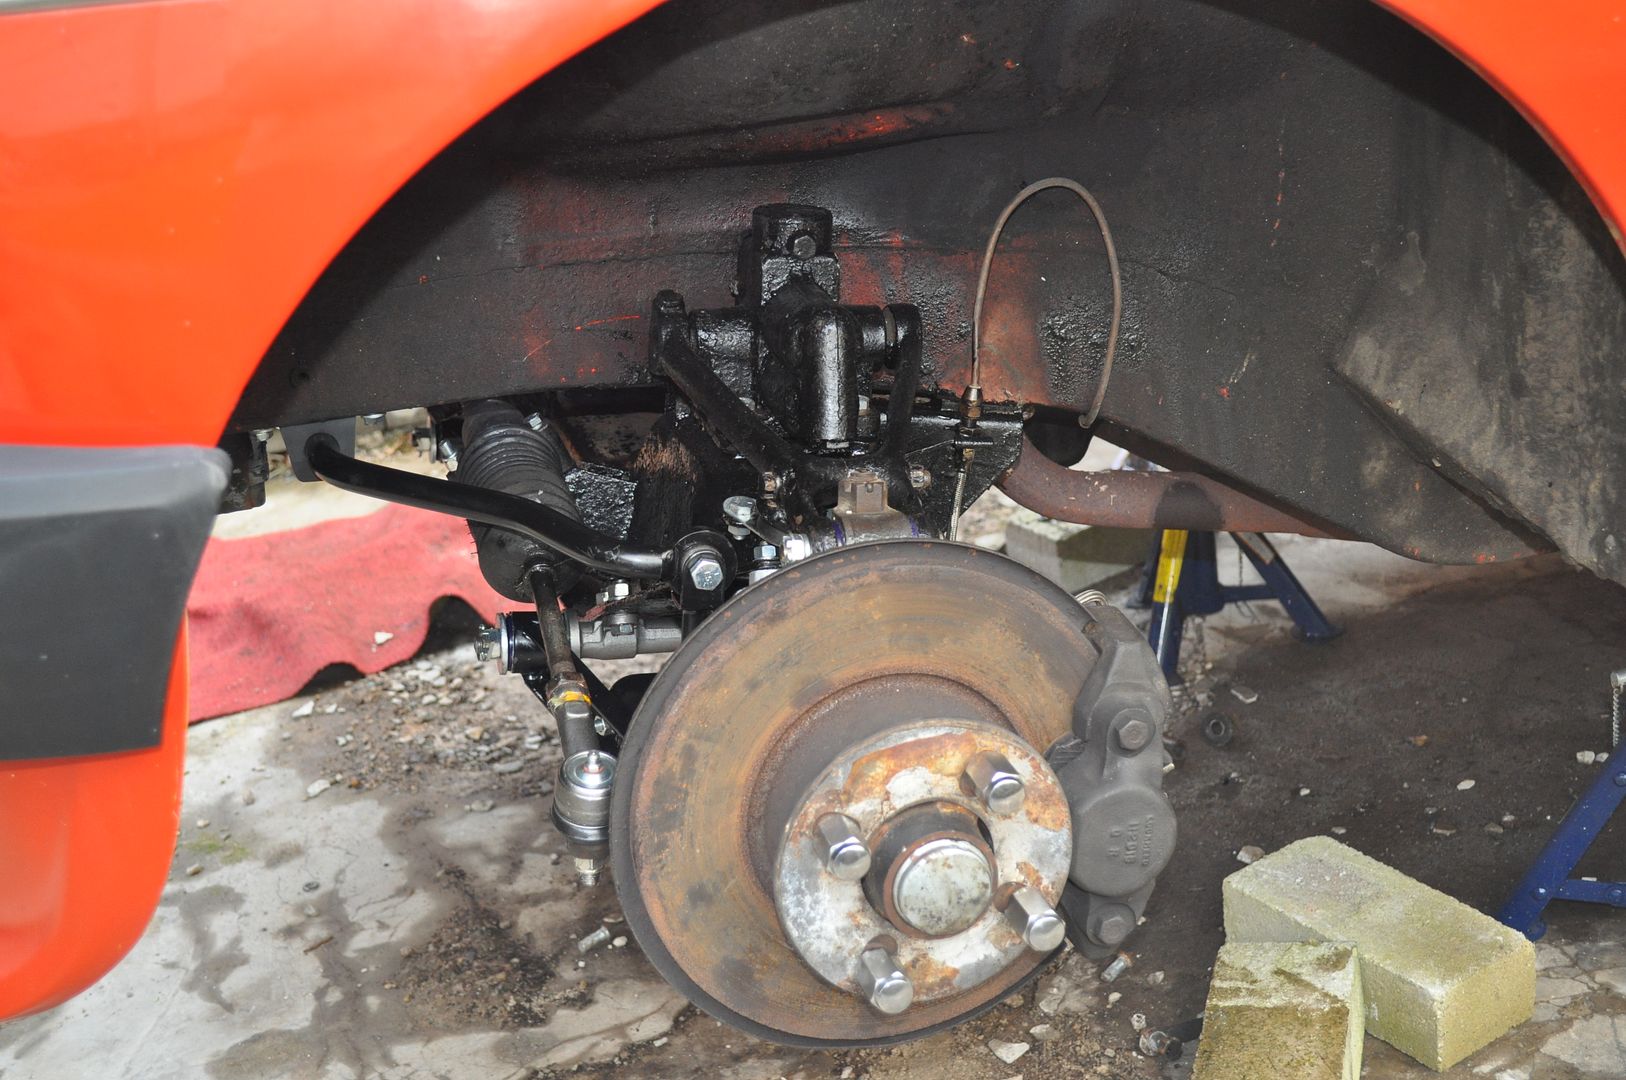
Off side:
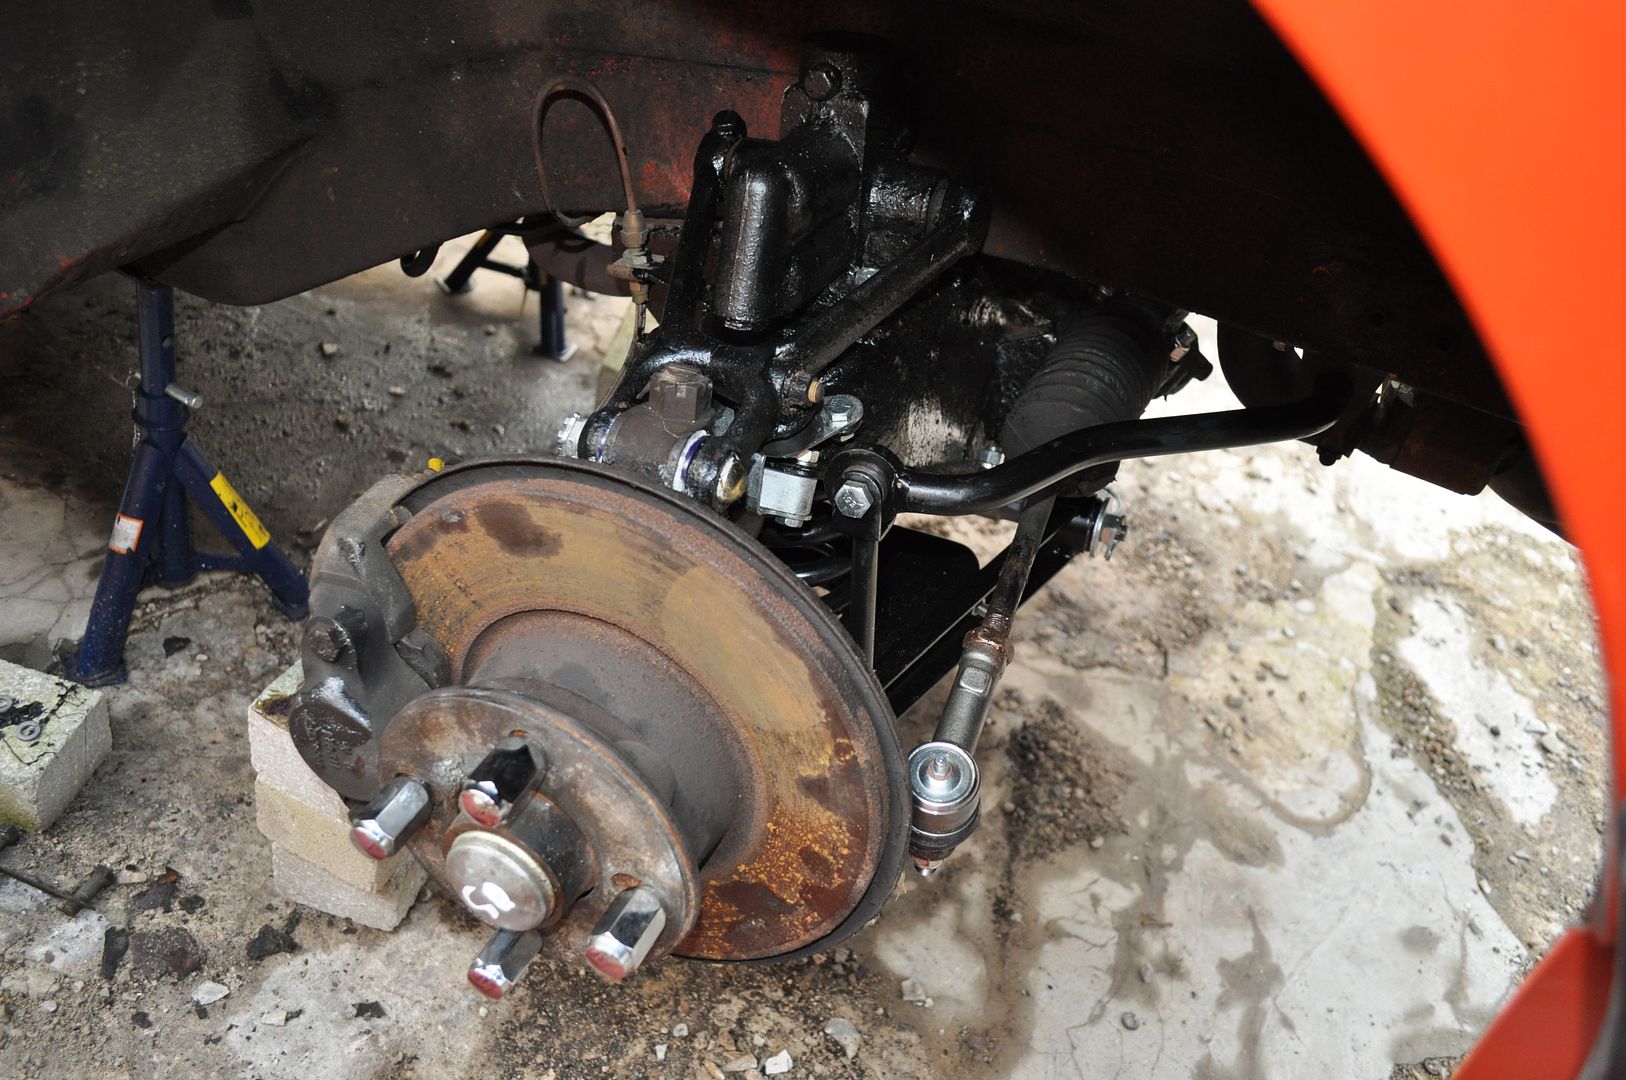
Close-up of nearside on full lock:

First job was to centralise the antiroll bar - nice easy one. Just slacken the ARB mounts and give it a gentle tap with the hammer until it was about in the middle.
I also refitted the brake calipers and pads - no point fitting new just yet since the disks arn't that old and neither are the pads.
Once that job was out of the way I had to change the track rod ends. Unbelievably the last set of ends I fitted to the car lasted just 50 miles before the rubber gaitors split open. They were propper quentin hazel ends too.
The new TRE's are the re-greasable type - you can see the grease nipples on the top if you look at the photos closely.
The last job was to grease the entire front suspension. To do this, you fill a grease gun up with suitable grease, engage the gun with one of the 6 grease nipples on the suspension and pump the arm of the gun until you start to see fresh grease ooze out of all the joints.
That's it - it's all back together. The only thing that needs doing now is to take the car somewhere to have the tracking aligned.
Total cost of the front suspension overhaul was around £220. The front end is now much stiffer - I can tell just by bouncing the front end by hand.
I'm really looking forward to getting her out on the open road in april to test out how much of a difference it's made. Usually, it feels like a totally different car to drive.
Near side:
Off side:
Close-up of nearside on full lock:
(edited 12 years ago)
OK, time for the next update.
Having run the car for a couple of hundred miles, I think I'm going to change the wishbone arms at some point. The new ones are giving too much camber. Great round town - the car sticks like the proverbial to a blanket, but at high speed (motorway cruising speed) it feels a bit twitchy. The ride is an awful lot better, though? So it's either new A arms or lower springs? I've had super low MGB's in the past and it was just a pain in the bum negotiating speed humps etc...
I found some time to polish the cosmics and it's now looking pretty good? Miles better than the stock rims in my opinion. Just need to buy some centrecaps?
Now for this months project: MGC Bonnet.
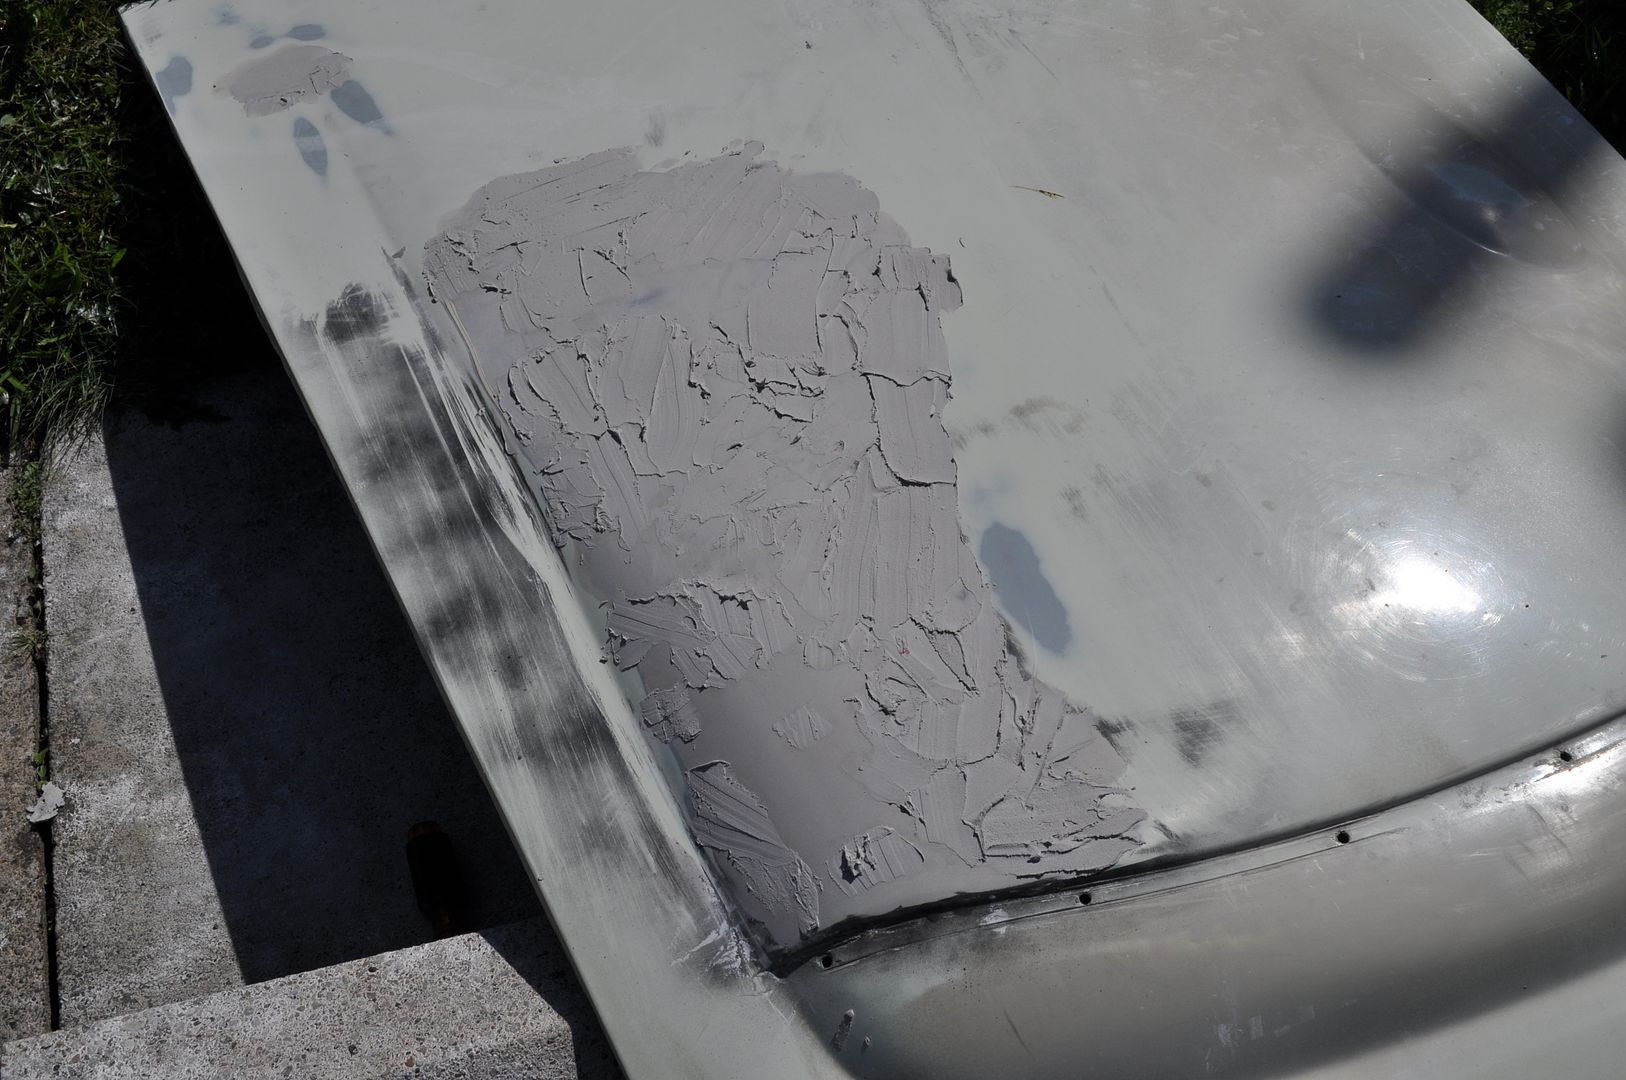
Nothing too exciting, really... I managed to find a ratty condition aluminium MGC bonnet for £70 (Brand new ones are a grand now because they are so rare) so I thought i'd see if I can bring it back to life and try it for size on the car?
It arrived this morning and it's in pretty bad shape. I've spent the day on it and it's starting to look more like what it's supposed to be now?
This is my first go at prepping a bonnet. I've done wings before but not a bonnet. No pressure then, being the largest panel on a car!!!
Bascially, everything that's black is a low spot and needs filling in and flatting.
So far I've put 3 golfballs worth of filler on the bonnet and sanded about 50% of it off.
Hopefully I'll have it in primer by the end of the week if I can be bothered to put the hours in to make it look right.
I'm hoping to have it prepped and painted and on the car by the end of the month for the retro show @ santapod.

When painted and the stainless finishing strip is fitted to the power bulge I think it'll look quite nice.
Should look a bit like this:

Having run the car for a couple of hundred miles, I think I'm going to change the wishbone arms at some point. The new ones are giving too much camber. Great round town - the car sticks like the proverbial to a blanket, but at high speed (motorway cruising speed) it feels a bit twitchy. The ride is an awful lot better, though? So it's either new A arms or lower springs? I've had super low MGB's in the past and it was just a pain in the bum negotiating speed humps etc...
I found some time to polish the cosmics and it's now looking pretty good? Miles better than the stock rims in my opinion. Just need to buy some centrecaps?
Now for this months project: MGC Bonnet.
Nothing too exciting, really... I managed to find a ratty condition aluminium MGC bonnet for £70 (Brand new ones are a grand now because they are so rare) so I thought i'd see if I can bring it back to life and try it for size on the car?
It arrived this morning and it's in pretty bad shape. I've spent the day on it and it's starting to look more like what it's supposed to be now?
This is my first go at prepping a bonnet. I've done wings before but not a bonnet. No pressure then, being the largest panel on a car!!!
Bascially, everything that's black is a low spot and needs filling in and flatting.
So far I've put 3 golfballs worth of filler on the bonnet and sanded about 50% of it off.
Hopefully I'll have it in primer by the end of the week if I can be bothered to put the hours in to make it look right.
I'm hoping to have it prepped and painted and on the car by the end of the month for the retro show @ santapod.
When painted and the stainless finishing strip is fitted to the power bulge I think it'll look quite nice.
Should look a bit like this:
(edited 11 years ago)
Done a little more to the C bonnet today...
Bodywork is really tedious - I'm so glad I don't do this for a living. Broadly speaking, the finished results are only ever as good in proportion to the effort put in to the prep work before hand.
Carrying on from yesterday...
All the low spots identified with black paint had fresh body filler applied this morning in localised areas....
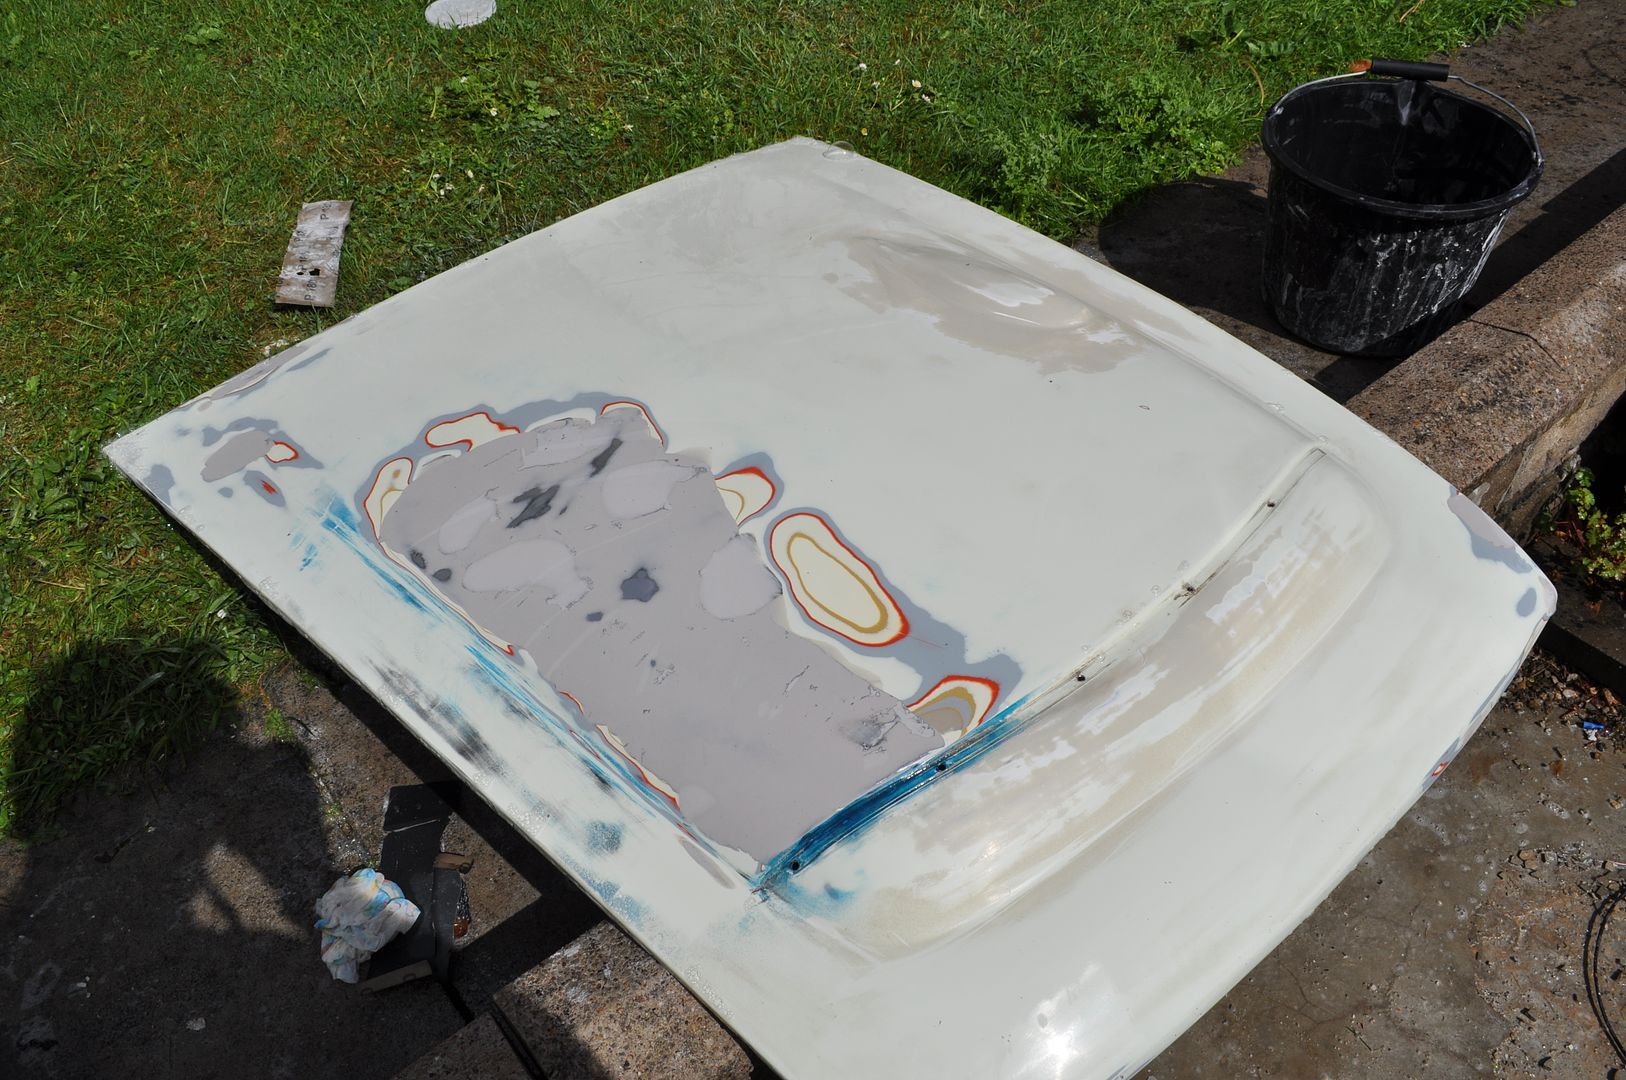
Then comes the process of taking the top off with 180 grit paper. In this photo I've worked from the nose of the bonnet back to about where you can see the black sanding block...
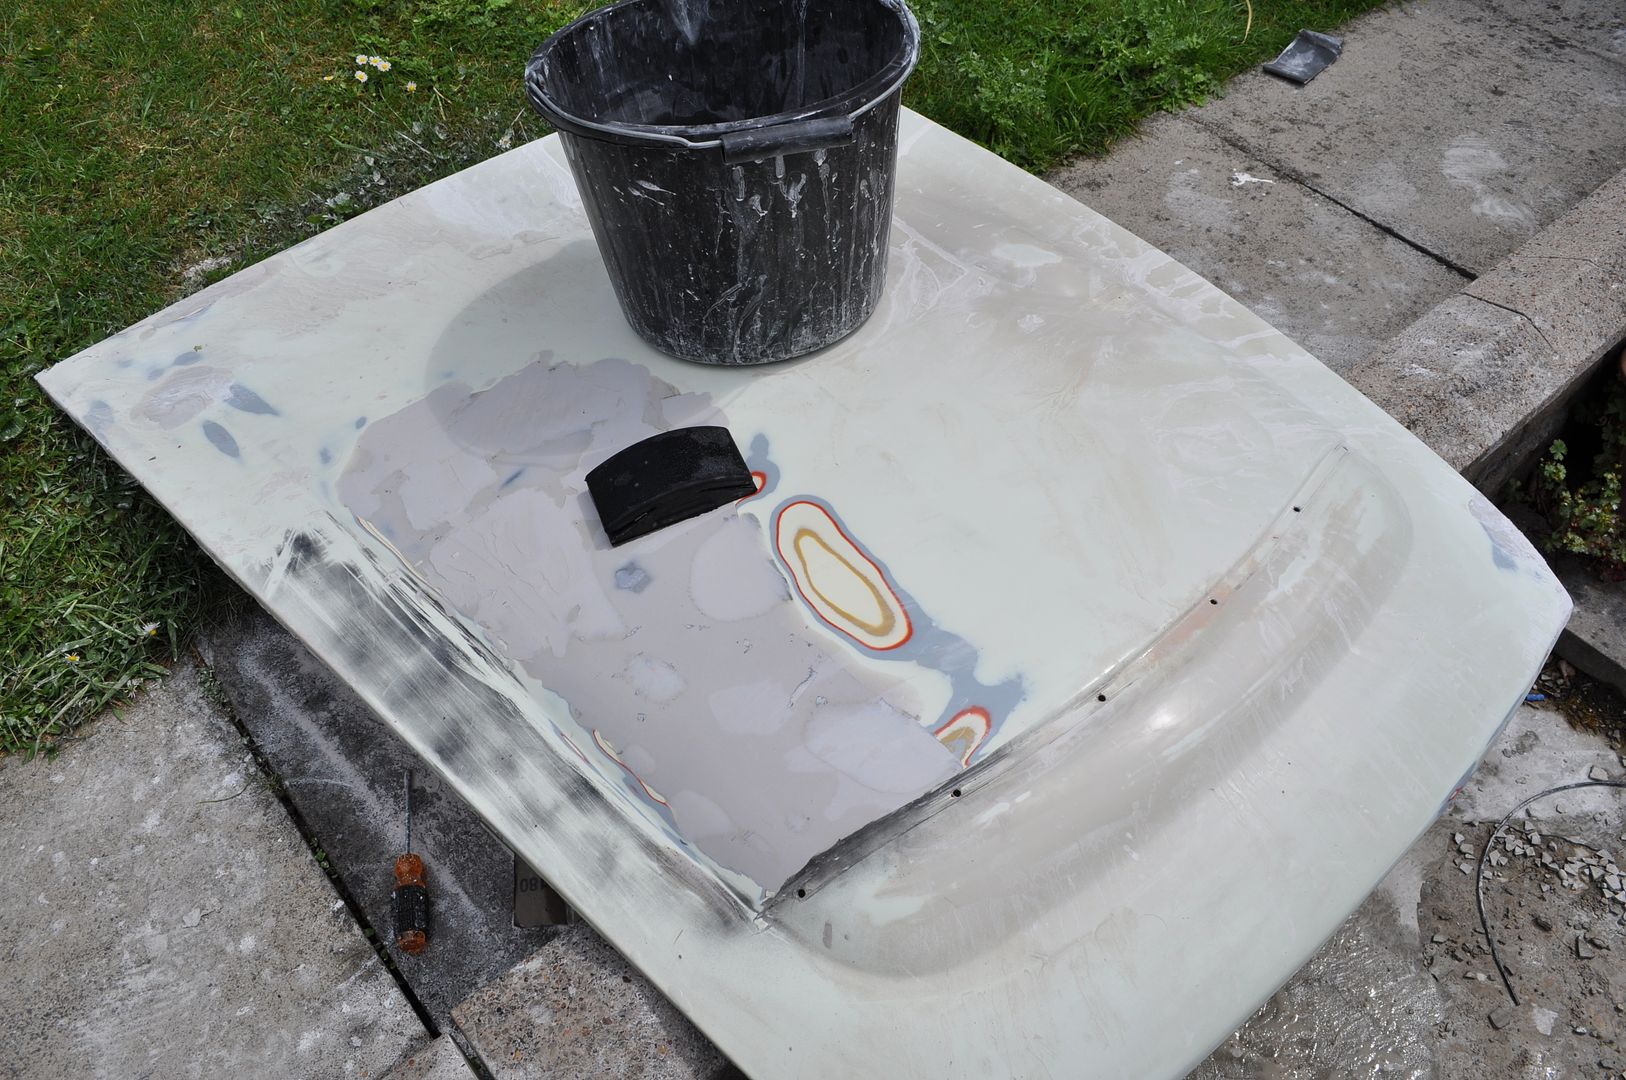
You can see here the different layers of paint applied to the bonnet over the years coming through as I start to get the surface nice and smooth...

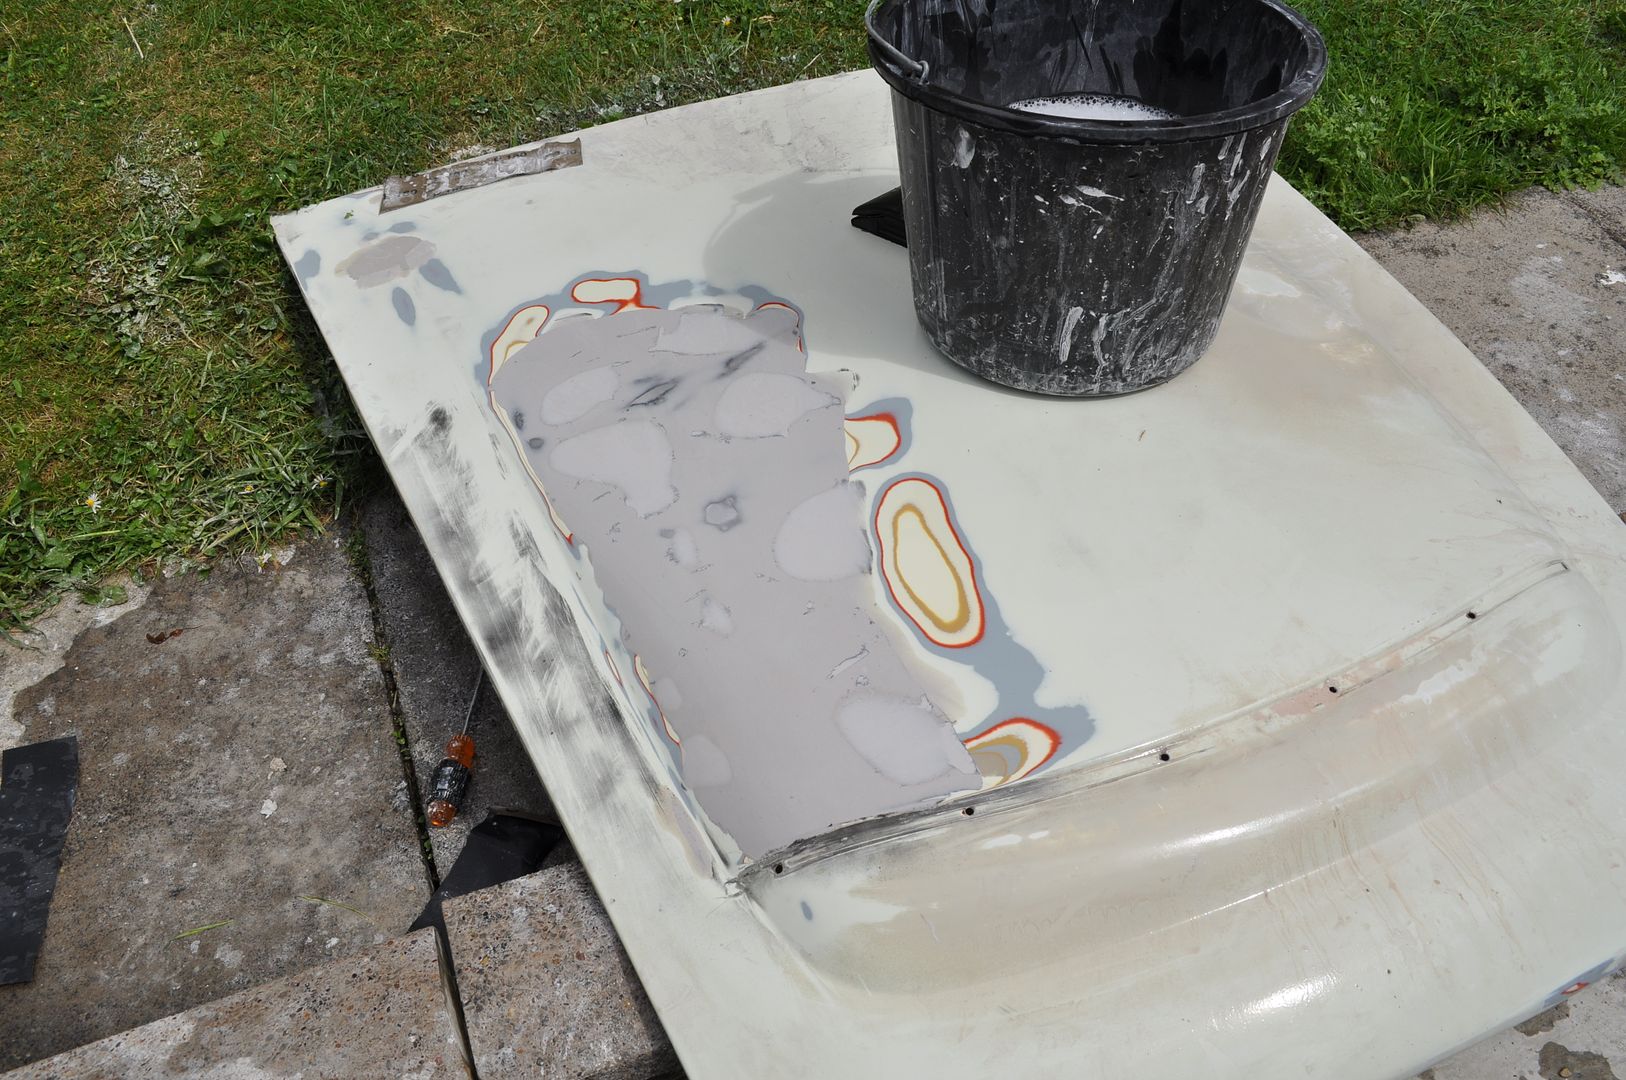
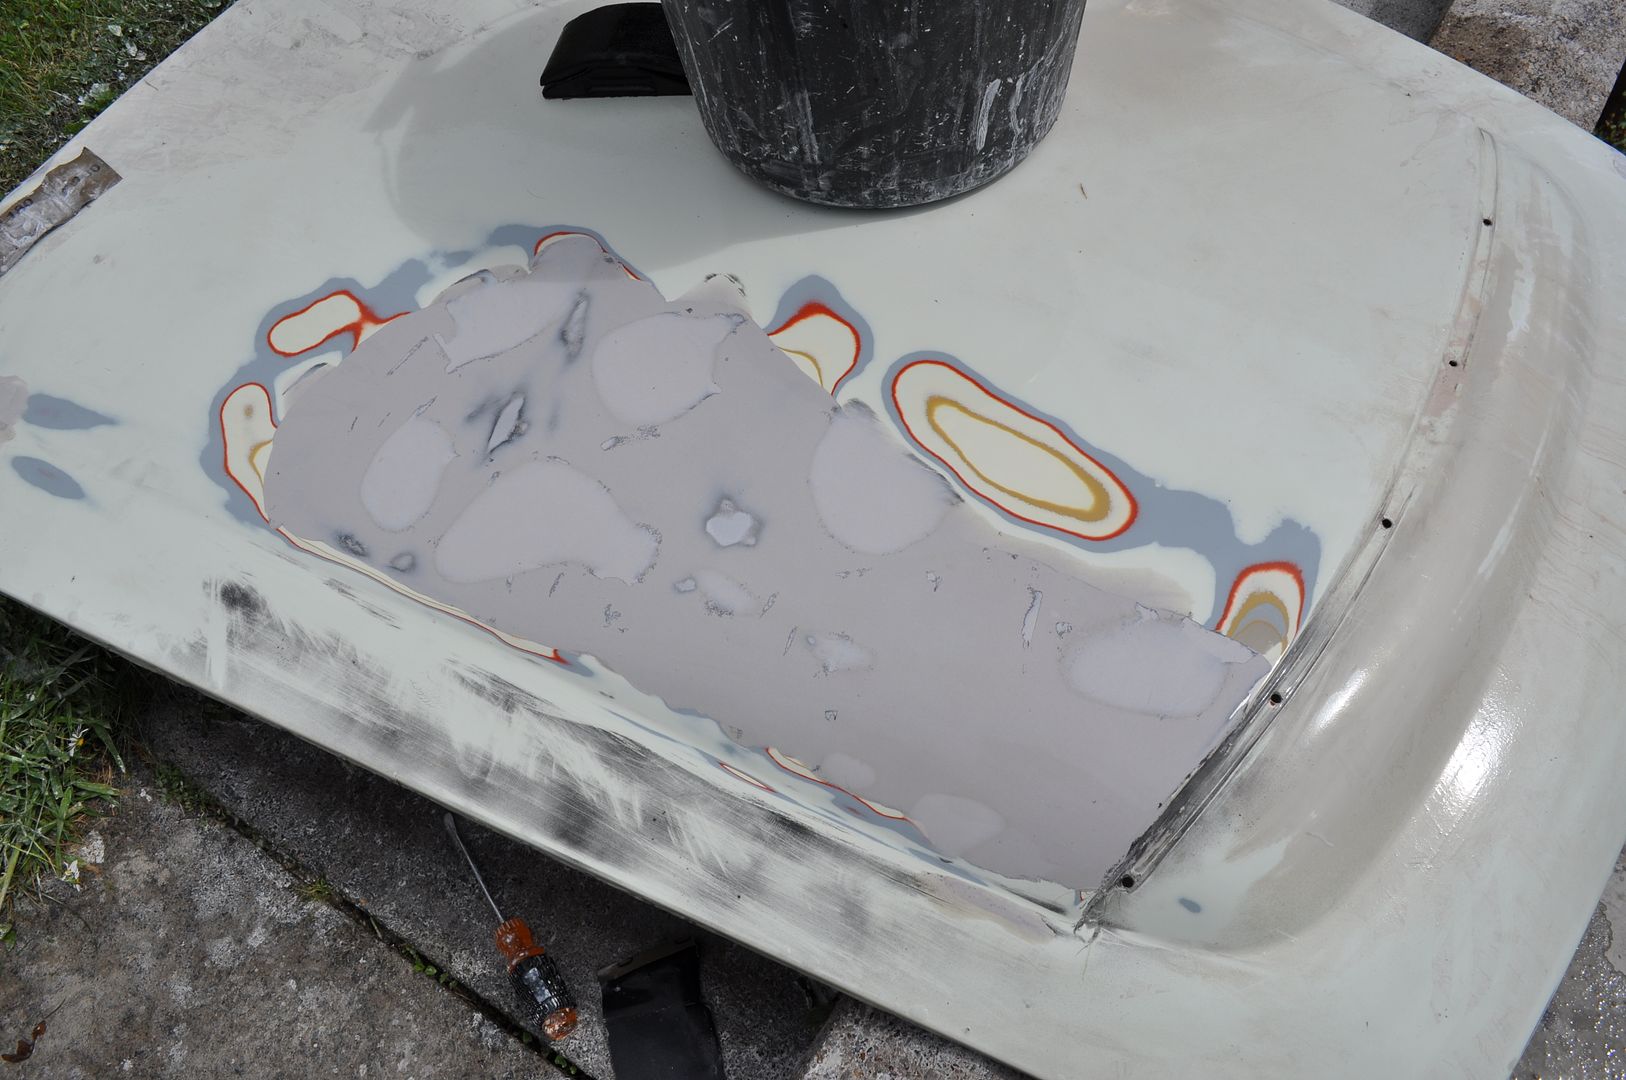
A little more work with some 400 grit paper sees the power bulge starting to take on a nice shape. You can see clearly just how much of the filler that was applied this morning has been removed. The fresh stuff is the smaller lighter coloured patches.
Next, I spray on a very fine coat of teal blue paint that I happend to have laying around in the shed to act as a guide coat. The theory here is when I start sanding away at this with 600 grit paper that I should be able to remove all the blue paint.
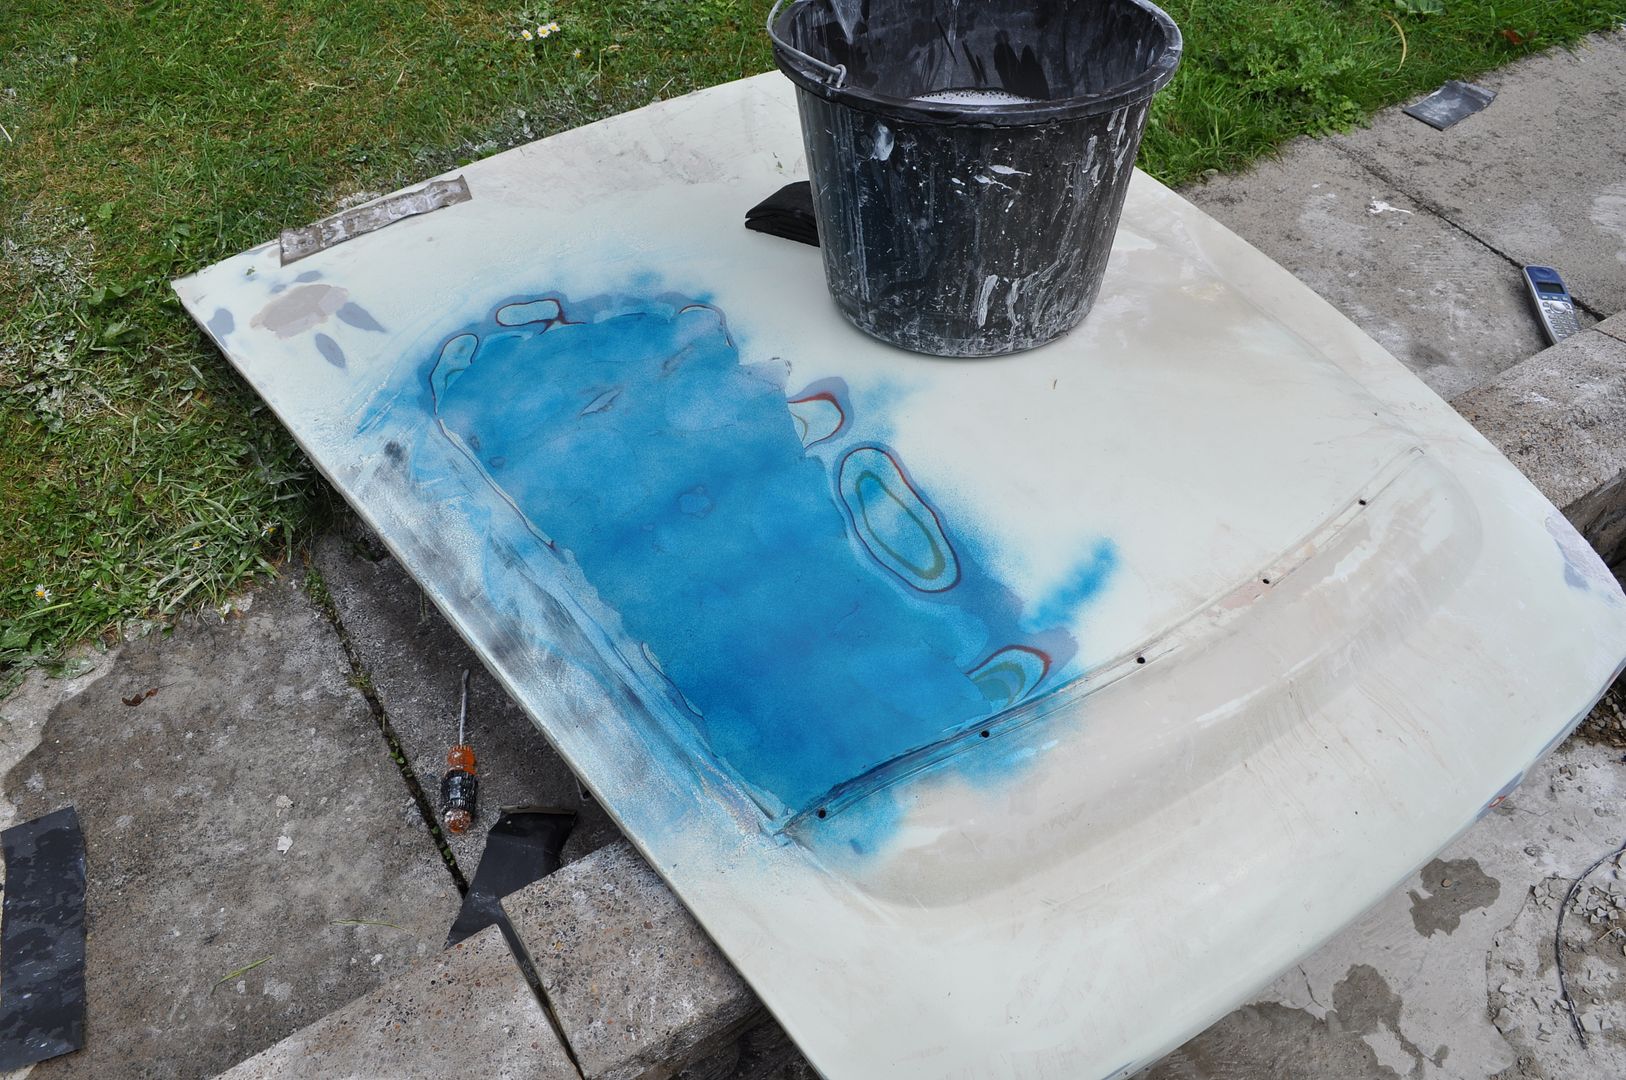
A little sanding reveals only some small areas that have blue paint remaining. These areas are "low spots".
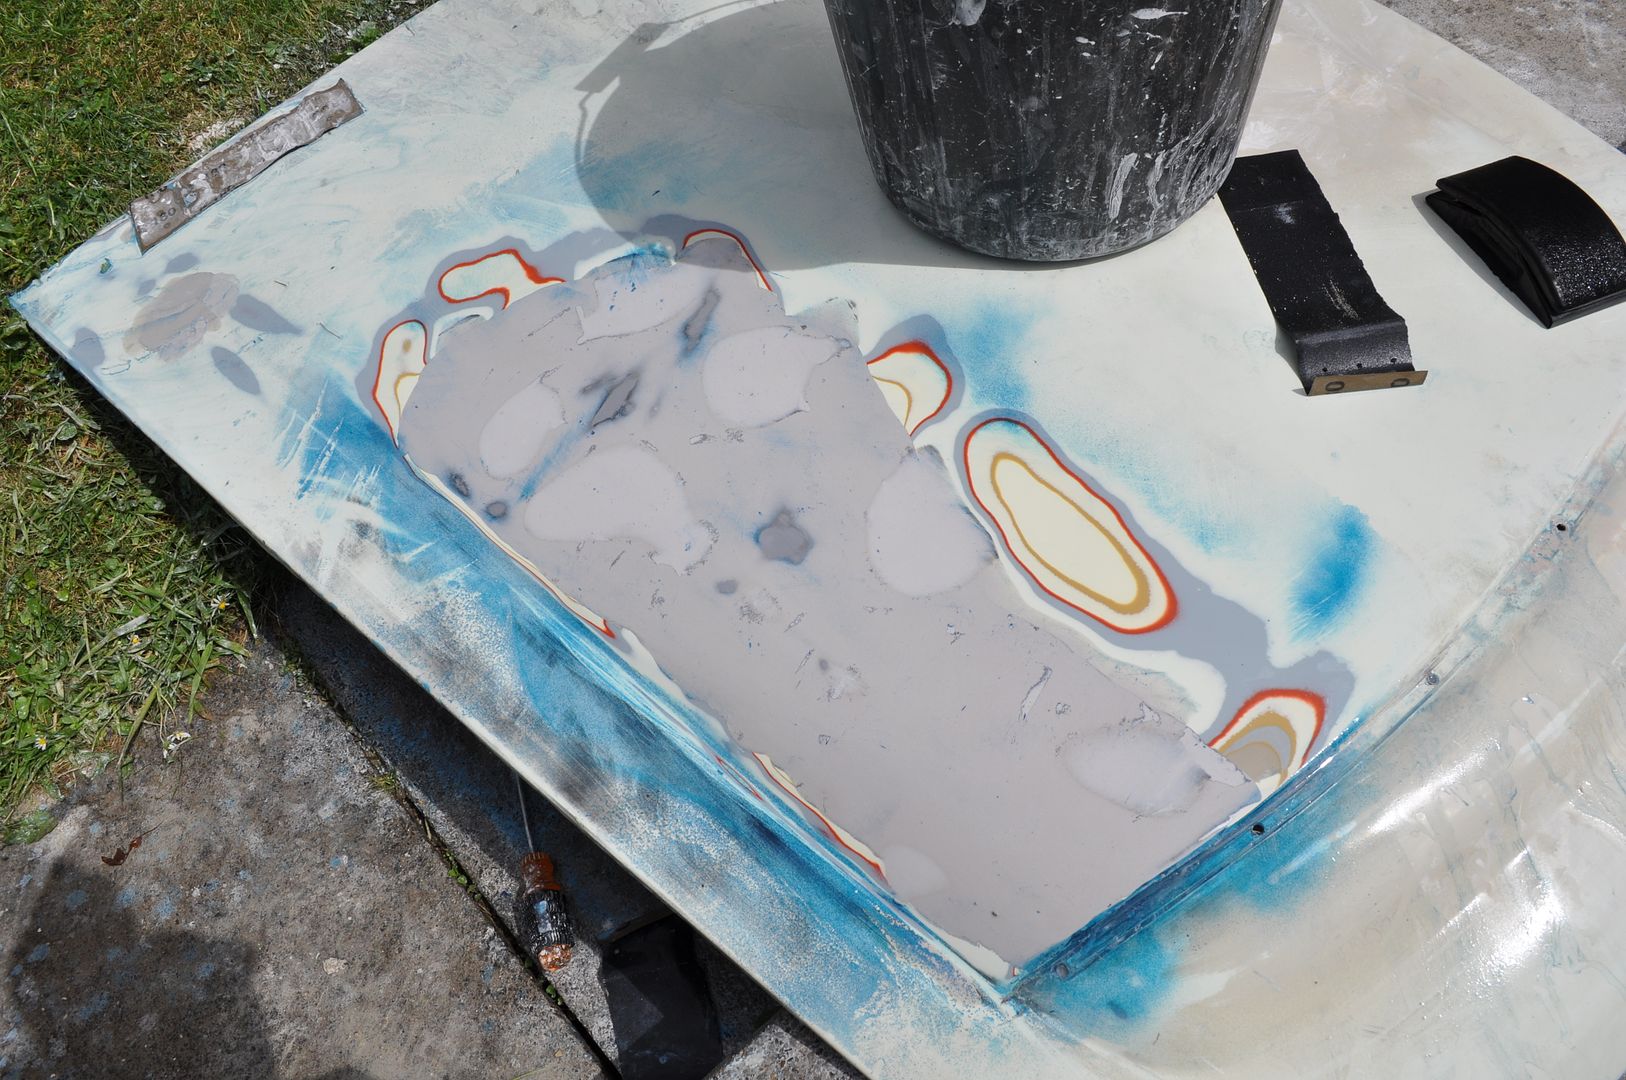
I then sand these low spot areas a little more to get them back flush with the surrounding area. Some areas are a little too deep to "block out" so these areas will have to have more filler applied and the whole process above repeated.
The size of these low spots is now only about 1.5 mm in size at the largest so I'm nearing the end of the prep work for this section of the bonnet.
Hopefully I'll have these filled and sanded and the whole bonnet in high build primer by the end of the week.
It's a long process, but hopefully the results will be worth it.
Not bad so far for a first attempt at a large panel with compound curves if I do say so myself!
Bodywork is really tedious - I'm so glad I don't do this for a living. Broadly speaking, the finished results are only ever as good in proportion to the effort put in to the prep work before hand.
Carrying on from yesterday...
All the low spots identified with black paint had fresh body filler applied this morning in localised areas....
Then comes the process of taking the top off with 180 grit paper. In this photo I've worked from the nose of the bonnet back to about where you can see the black sanding block...
You can see here the different layers of paint applied to the bonnet over the years coming through as I start to get the surface nice and smooth...
A little more work with some 400 grit paper sees the power bulge starting to take on a nice shape. You can see clearly just how much of the filler that was applied this morning has been removed. The fresh stuff is the smaller lighter coloured patches.
Next, I spray on a very fine coat of teal blue paint that I happend to have laying around in the shed to act as a guide coat. The theory here is when I start sanding away at this with 600 grit paper that I should be able to remove all the blue paint.
A little sanding reveals only some small areas that have blue paint remaining. These areas are "low spots".
I then sand these low spot areas a little more to get them back flush with the surrounding area. Some areas are a little too deep to "block out" so these areas will have to have more filler applied and the whole process above repeated.
The size of these low spots is now only about 1.5 mm in size at the largest so I'm nearing the end of the prep work for this section of the bonnet.
Hopefully I'll have these filled and sanded and the whole bonnet in high build primer by the end of the week.
It's a long process, but hopefully the results will be worth it.
Not bad so far for a first attempt at a large panel with compound curves if I do say so myself!
Original post by Fuzzed_Out
I know it's not why these cars exist or are owned but 150hp from a 3.5 litre v8 is pretty shocking! Loving the project so far though, hows the hunt for a donor bonnet going?
You are doing the wrong math. Instead of hp/liter, look at hp/weight. That v8 is lighter than many four cylinders and two men can carry it, no problem. Hp/weight is what real engineers care about. Also, the engine is capable of a lot more for very little money
Still the best engine ever built IMO
Original post by Made in the USA
You are doing the wrong math. Instead of hp/liter, look at hp/weight. That v8 is lighter than many four cylinders and two men can carry it, no problem. Hp/weight is what real engineers care about. Also, the engine is capable of a lot more for very little money
Still the best engine ever built IMO
Still the best engine ever built IMO
Real engineers eh? Last time I checked they were knocking about 220kg ish and quite heavy for an ally block. Cheers for dragging me back to the thread though, really fun to see the progress JC is making, I hate bodywork too!
(edited 11 years ago)
Thanks for the positive comments.
A fully built up "wet" RV8 weighs about 230kg's. Although still a damn sight lighter than a ford 289 or a SBC. I can carry a RV8 block with crank rods and pistons on my own, but I wouldn't be able to pick it up with the heads on.
Not much more progress to report - weather has been rubbish lately. I've got the last lot of filler on the bonnet, just waiting for a suitable dry day when I'm not working to finish the prep. I did try it on the car... it nearly fits. Just need to cut a couple of notches in the frame of the bonnet to clear the radiator support and then we'll be makin' bacon.
Unfortunately, my new MG midget race car has, I suspect, got a failed rear main oil seal. It's dumping shed loads of oil out the back and I suspect the brand new performance clutch has become contaminated as it's slipping @ full power. So, I reccon I'll be pulling the engine out of that before I get a chance to finish the V8.
I'm supposed to be racing the V8 on the first of July @ Santapod so I really need to get the midget sorted then get this bonnet finished and the new breather setup plumbed in otherwise it won't be going anywhere and I'm running out of days fast.
It's been a pretty crap week as far as cars go for me!
Original post by JC.
Thanks for the positive comments.
A fully built up "wet" RV8 weighs about 230kg's. Although still a damn sight lighter than a ford 289 or a SBC. I can carry a RV8 block with crank rods and pistons on my own, but I wouldn't be able to pick it up with the heads on.
Not much more progress to report - weather has been rubbish lately. I've got the last lot of filler on the bonnet, just waiting for a suitable dry day when I'm not working to finish the prep. I did try it on the car... it nearly fits. Just need to cut a couple of notches in the frame of the bonnet to clear the radiator support and then we'll be makin' bacon.
Unfortunately, my new MG midget race car has, I suspect, got a failed rear main oil seal. It's dumping shed loads of oil out the back and I suspect the brand new performance clutch has become contaminated as it's slipping @ full power. So, I reccon I'll be pulling the engine out of that before I get a chance to finish the V8.
I'm supposed to be racing the V8 on the first of July @ Santapod so I really need to get the midget sorted then get this bonnet finished and the new breather setup plumbed in otherwise it won't be going anywhere and I'm running out of days fast.
It's been a pretty crap week as far as cars go for me!
A fully built up "wet" RV8 weighs about 230kg's. Although still a damn sight lighter than a ford 289 or a SBC. I can carry a RV8 block with crank rods and pistons on my own, but I wouldn't be able to pick it up with the heads on.
Not much more progress to report - weather has been rubbish lately. I've got the last lot of filler on the bonnet, just waiting for a suitable dry day when I'm not working to finish the prep. I did try it on the car... it nearly fits. Just need to cut a couple of notches in the frame of the bonnet to clear the radiator support and then we'll be makin' bacon.
Unfortunately, my new MG midget race car has, I suspect, got a failed rear main oil seal. It's dumping shed loads of oil out the back and I suspect the brand new performance clutch has become contaminated as it's slipping @ full power. So, I reccon I'll be pulling the engine out of that before I get a chance to finish the V8.
I'm supposed to be racing the V8 on the first of July @ Santapod so I really need to get the midget sorted then get this bonnet finished and the new breather setup plumbed in otherwise it won't be going anywhere and I'm running out of days fast.
It's been a pretty crap week as far as cars go for me!
the crap days make the good ones that much better! look forwards to seeing the results.. got an idea what you hope to run at the pod??
Original post by omarion526
the crap days make the good ones that much better! look forwards to seeing the results.. got an idea what you hope to run at the pod??
Today was mixed.
Got the bug catcher scoop mounted and made the linkage to make the butterflys open which was a good start. Also made up a new breather system which should hopefully stop the thing leaking oil everywhere...
Then I fell down a manhole and mullered my left leg. Only a flesh wound, fortunately, but I've been limping since...
If she runs a mid 15 at the pod I'll be happy. I can only do a gentle launch with the factory gearbox otherwise first gear will blow up. I'd like to replace the 4 speed manual with a borg warner 65 automatic. I've collected a few parts from an MGB automatic - shifter, centre console etc, so on the inside it'll look like it was built that way from the factory?
That's a job for another year when I've got a bigger house, though!
-JC.
Have you got a before pic of the bonnet? Seems almost an 'odd' amount of work - too much to be minor denting but not enough to have been a proper accident.
Just tried my hand at a bit of bodywork for the first time - my dad was moving my brother's car a few feet, but just by hand as the battery was flat - unfortunately he forgot the brakes would be a lot harder with the engine off and ran it into a load of bricks. Cracked the bumper, broke an air duct and a fog light and a bit of the undertray. Bit of glass fibre mat (and far less epoxy than I expected) has got the crack just about ok, although there's still a bit of a bump even with a bit of filler. The rest of the scratching is pretty easy to fill but I'm not quite happy with the join over the crack, I know it'll never be perfect but might run another bit of filler down. Funnily enough I haven't found it as much of a pain as I was expecting, but it is only a small area!
Just tried my hand at a bit of bodywork for the first time - my dad was moving my brother's car a few feet, but just by hand as the battery was flat - unfortunately he forgot the brakes would be a lot harder with the engine off and ran it into a load of bricks. Cracked the bumper, broke an air duct and a fog light and a bit of the undertray. Bit of glass fibre mat (and far less epoxy than I expected) has got the crack just about ok, although there's still a bit of a bump even with a bit of filler. The rest of the scratching is pretty easy to fill but I'm not quite happy with the join over the crack, I know it'll never be perfect but might run another bit of filler down. Funnily enough I haven't found it as much of a pain as I was expecting, but it is only a small area!
I haven't got a pic actually... Essentially, the guy who owned it before has his MGC at the bodyshop for a full restoration. The area that i've "shaped" was the area removed with a DA sander by the body guy. The body guy took one look at it and thought "stuff this, he can buy another bonnet". The whole bonnet is covered with a skim of filler. The bonnet frame is buckled and held together by strips of steel that have been rivited on & if you run your hand over the skin on the inside you can feel ripples in the ally. It's obviously been involved in a pretty big smash at some point and I wouldn't be surprised if at one point it got folded in half. Really the thing is a piece of junk and wants weighing in. However, I only want it for one weekend away at the end of June to generate a few laughs from my mates so I don't mind spending a bit of time tarting it up. It'll be coming off again almost imediately anyway!
If I like the look I might put my hand in my pocket and let a pro bodyshop prep and paint a new one and fit it to the car. Although, it won't be going on with the bug catcher if I do go that route - brand new C bonnets are a grand now so it's a lot of money to throw at the car anyway when the same grand could buy me other much more useful things - LSD for the back axle would only be about £800, for example?
So far I've spent about £120 on it, although I'll probably end up throwing another 30 quid at it in paint to get it finished?
If i've got time tommorow I *might* throw some primer at it and see how it looks. I say might... I've basically taken two days off to bugger around with the cars and I probably aught to get on with some real work and pay some bills!
Ah, that makes a bit more sense. A lot of work for a single use bonnet mind! Are you hand sanding or powered? Proper spray gun or rattle can?
I've got a whole bunch of stuff I'd like to get on with but looking for a new job kinda takes priority Just given myself a new bit of tinwork to straighten after forgetting to close a lid before dropping a couple of hundred kilos on the hydraulics, d'oh!
Edit: How complicated is the bonnet structure? The top skin doesn't look too complicated to replicate if you're paying a grand a time, though I've never tried it...
I've got a whole bunch of stuff I'd like to get on with but looking for a new job kinda takes priority
Just given myself a new bit of tinwork to straighten after forgetting to close a lid before dropping a couple of hundred kilos on the hydraulics, d'oh!Edit: How complicated is the bonnet structure? The top skin doesn't look too complicated to replicate if you're paying a grand a time, though I've never tried it...
(edited 11 years ago)
Quick Reply
Related discussions
- What car has everything you want ultimate dream car
- I bought the cheapest Boxter in the UK largely for a laugh AMA
- Grant Thornton final interview
- What’s the best car to buy???
- OCR A level Computer Science Project help
- Silly mechanics question
- Grant Thornton School Leaver
- Has anyone met someone from TSR in person?
- cheaper insurance after a write off?
- Physics help needed (It's actually more math but it's supposed to be physics)
- Bank of America Apprenticeship
- Failed a Module In Year 3, What Happens Next?
- A level Computer Sciecne Project
- Best music is from what era?
- Hong Kong Jockey Club Scholarship 2023
- Is First/Upper Second a first class degree in uni of Wolverhampton
- can You publish a Computer Science A-level project? If so how soon ?
- AQA A level computer science NEA ideas
- hey anybody planning on goin UOB six form
- AQA A level Computer science - Project Marked wrong
Latest
Trending
Last reply 5 months ago
Where is my car parked during the day? Advice for first car insuranceLast reply 7 months ago
Will paying £1,900 a year for insurance as a new 21 year old driver be a lot?Trending
Last reply 5 months ago
Where is my car parked during the day? Advice for first car insuranceLast reply 7 months ago
Will paying £1,900 a year for insurance as a new 21 year old driver be a lot?