My project - Puma bodge repair!!
Scroll to see replies

Been offline for a month with a melted laptop!!
Its all running now, wheels tracking done and a couple hundred miles of trouble free running!
Carrying on with the stalk mod!
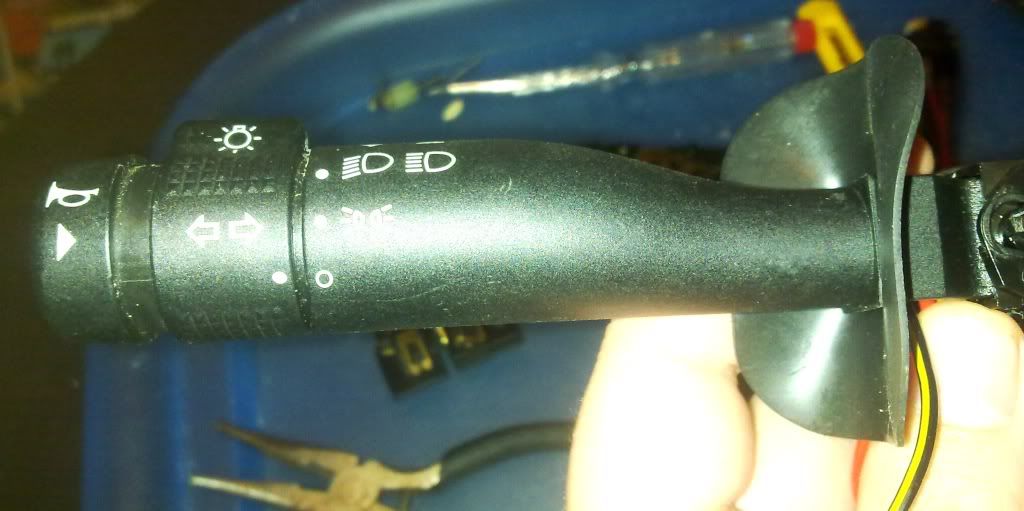
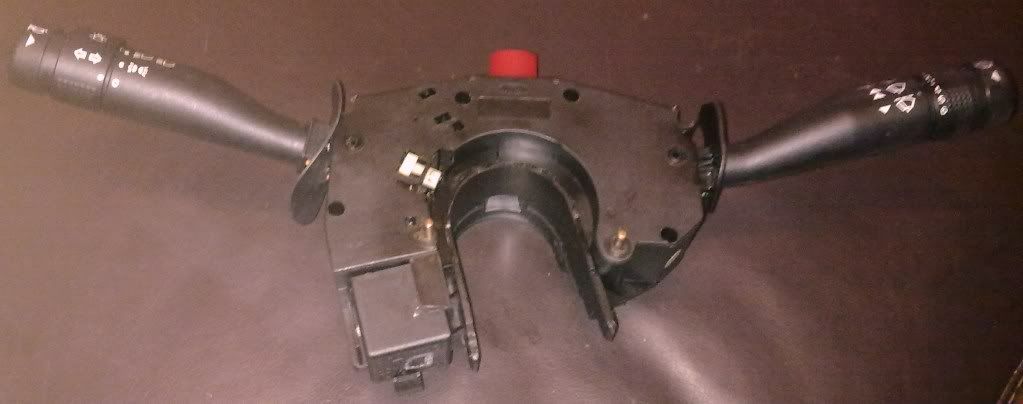
I have now fitted the horn unit to the stalk. It just slides in and you fit the retaining pin to hold it in:
At the other end i have crimped on the correct sized connectors.
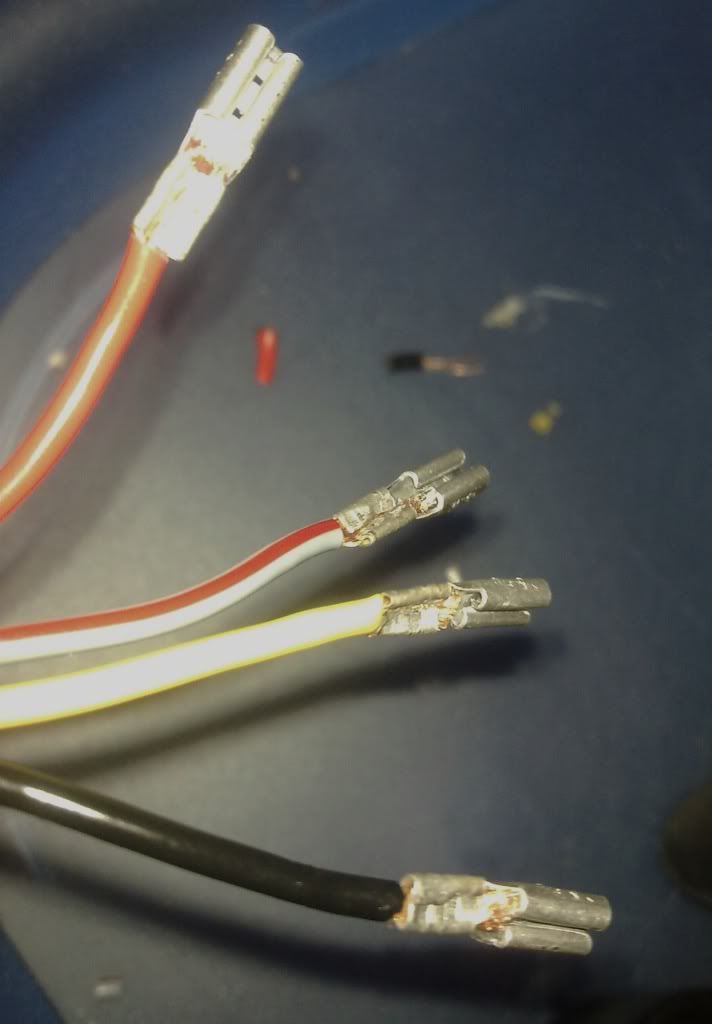
Now to fit the stalk attach a wire extension onto the horn wire which is the black wire with yellow stripe. All the other wires plug onto the same connector as when you took off the the old stalk. The original black/yellow wire is now grey/red as the horn wire has taken that colour on the new stalk unit. Also the earth on the original puma stalk will sometimes be black or green/yellow.
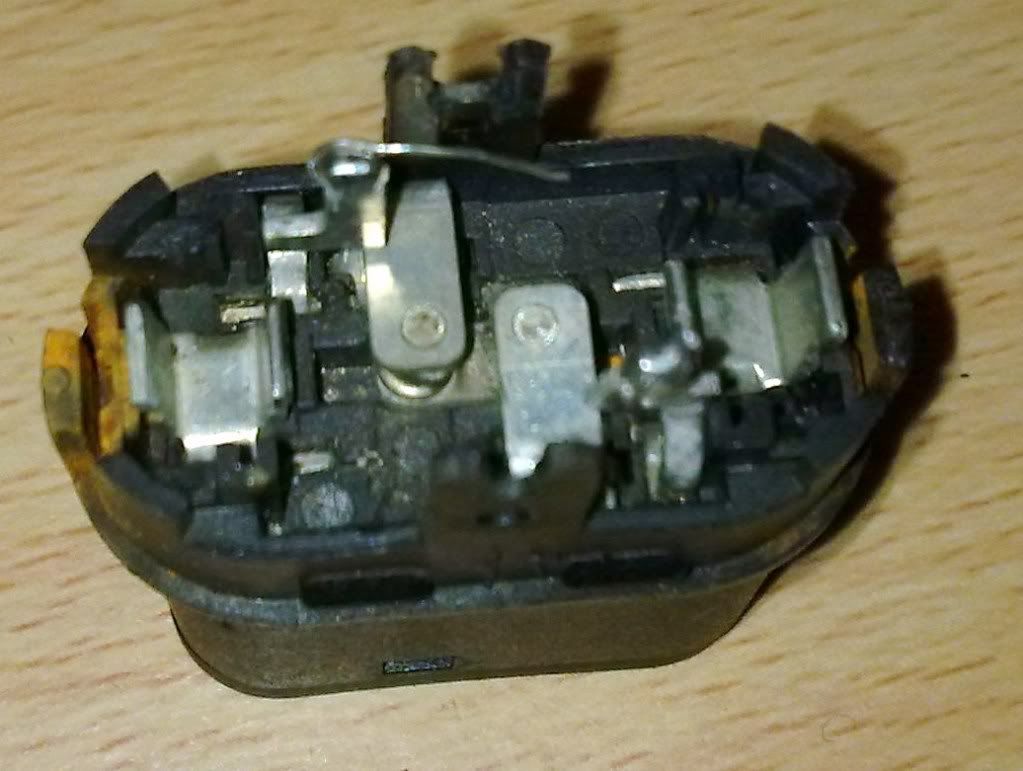
In essence the horn stalk mod is now almost done. All that needs doing is connecting the horn wire to the horn prongs on the circuit board. in essence the extra horn switch is in parallel to the original ones. The horn prong we are connecting to, is the one on the right of the circuit board. The wire will have to be run along the edge of the circuit board below where the hazard flasher unit goes as there is just enough room!!
Mext now looking at the right hand stalk unit, we want to fit the variable intermittant wipe stalk unit. The wiring and fitting is indentical to the original stalk except with the addition of 2 extra wires, one green, one green/grey for the intermittant wipe unit.
On the escort stalk unit circuit board you will find two extra tags for those wires. The puma stalk circuit board does not have the tags!
Luckily the actual circuit board is a common design with changes between the two by drilling through, breaking tracks and adding tags. In essence we are going to attach the variable wipe unit to the spare pin which will go to escort relay and the intermittant wipe contact point.
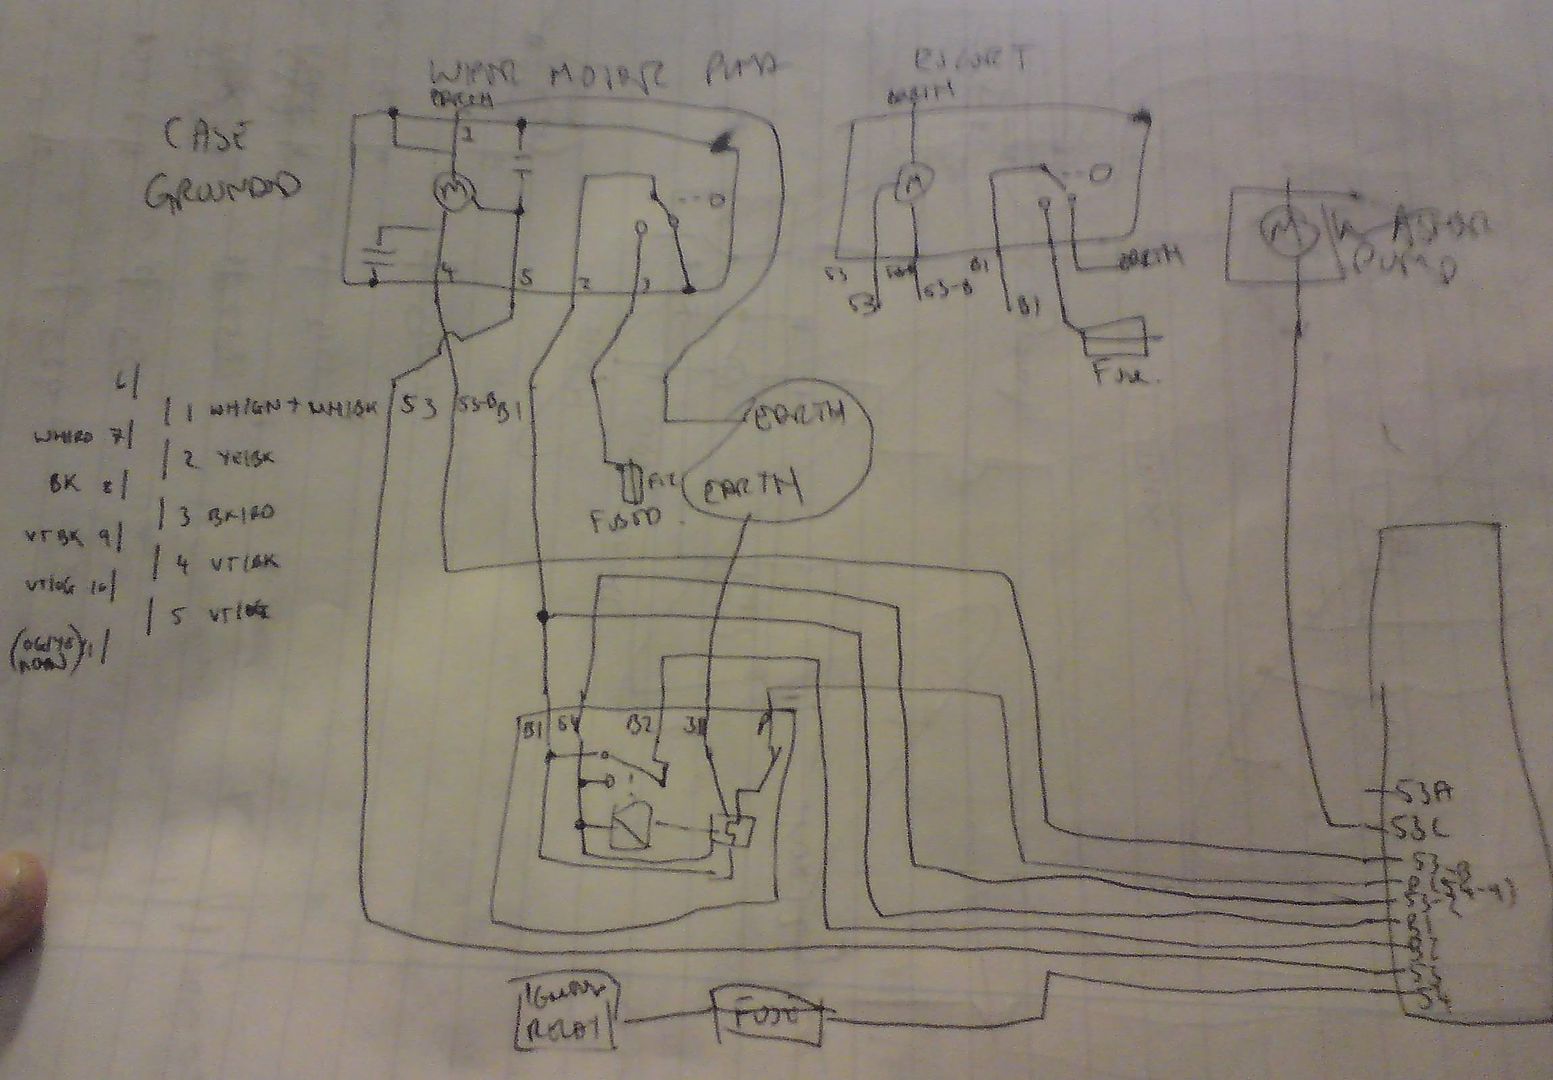
In the wiring diagram in essence we are connecting to pin connector P (54-9) and 53-2.
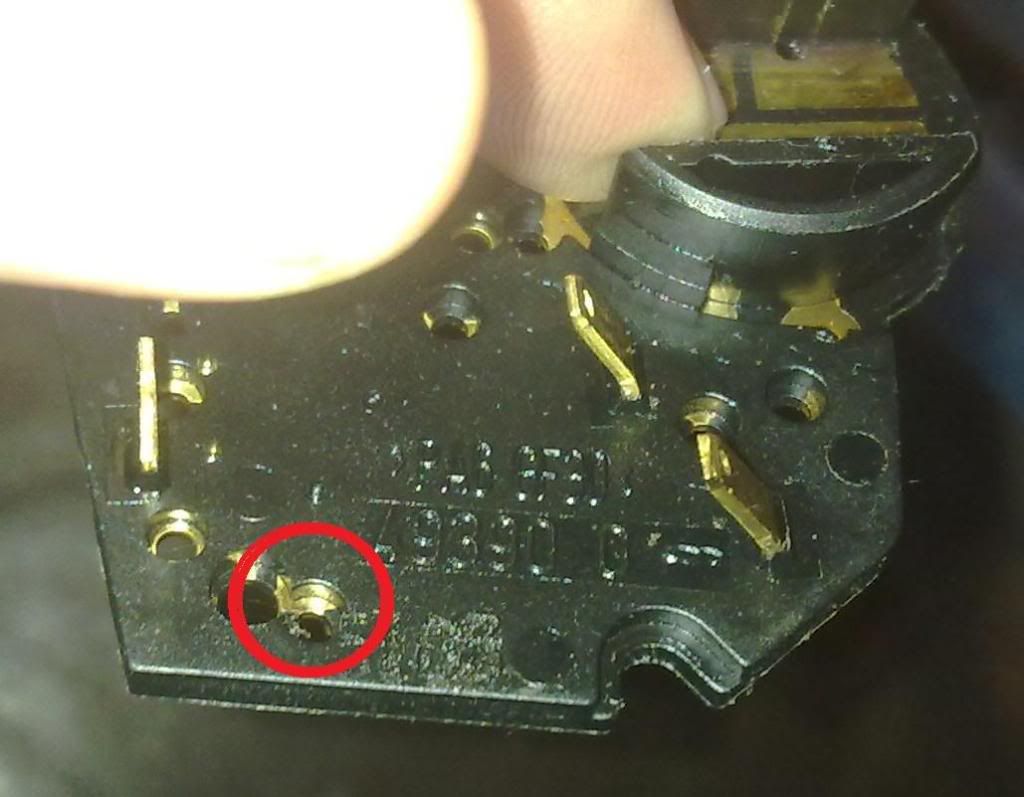
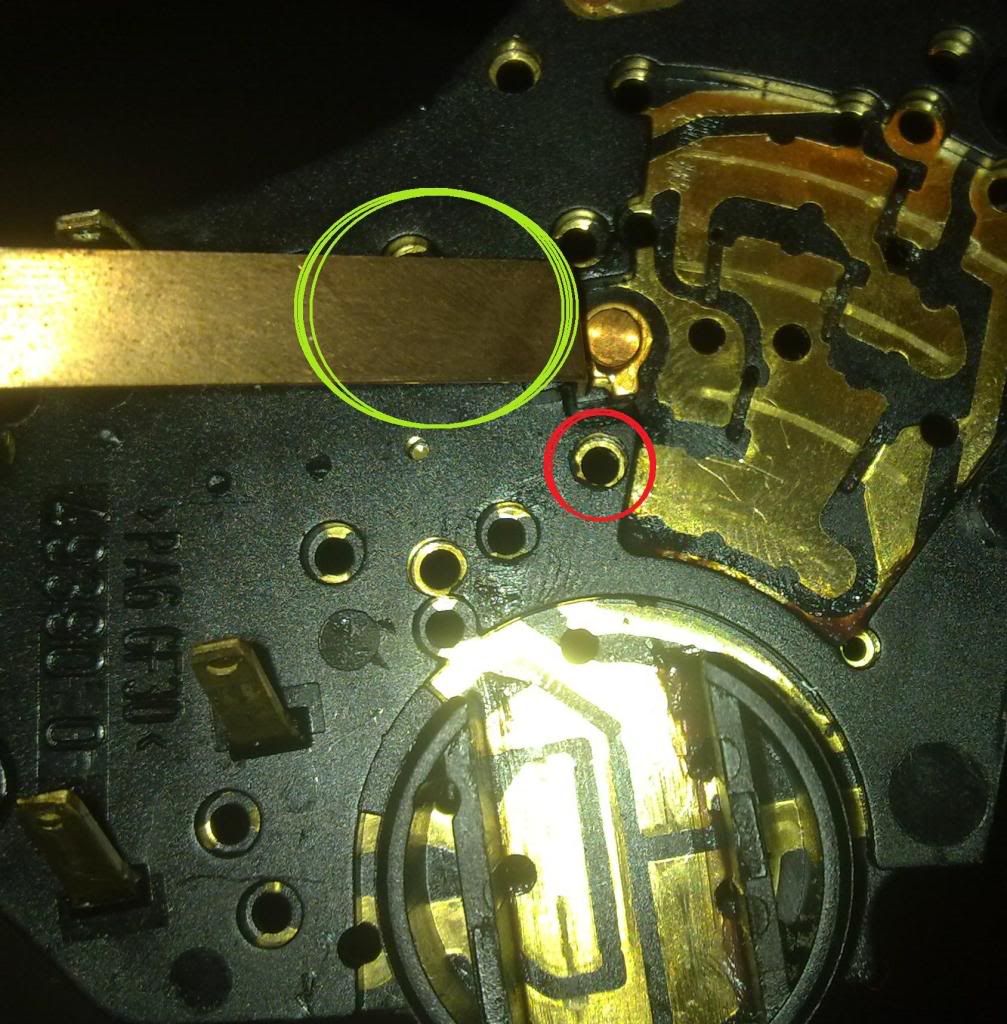
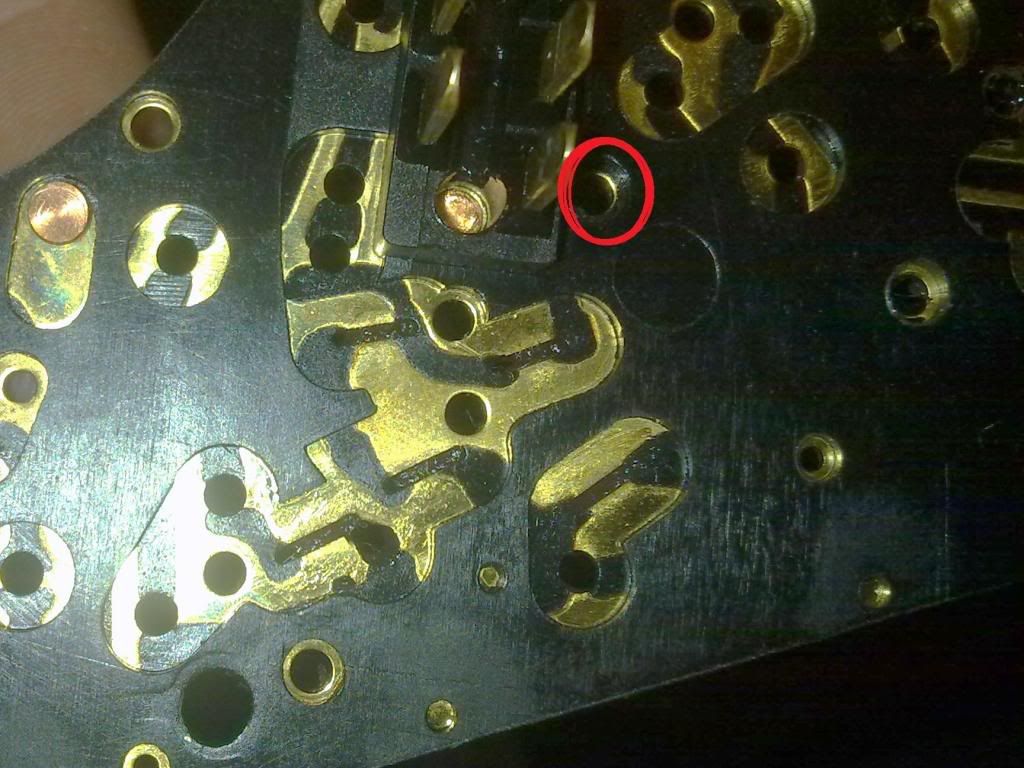
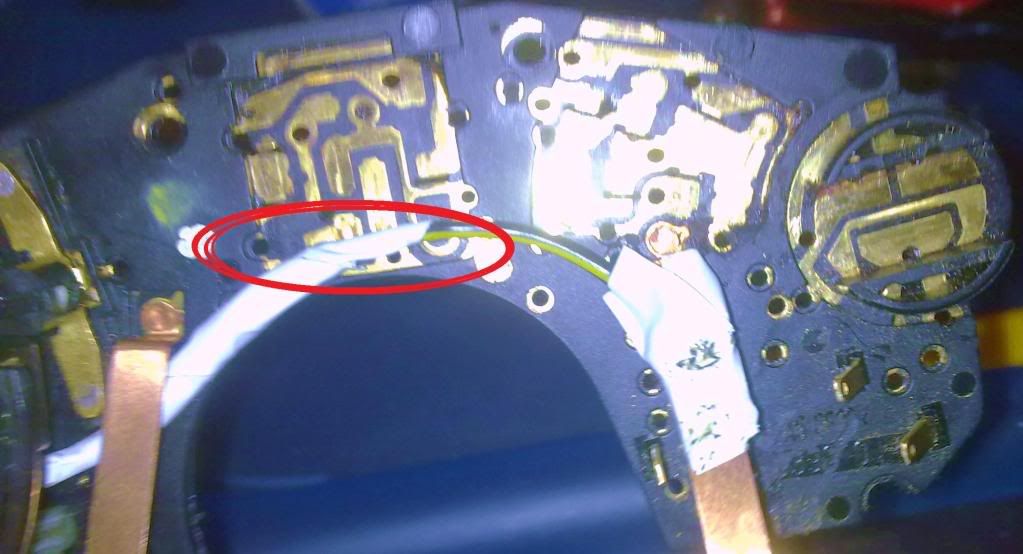
For pin connector P, check between the pin and the circuit board holes to find out which one connects to it. The area that works has been circled in red below:
Then for the other connector do the same check with a multimeter and you will find the hole we will be poking wire through in red. The green circle shows where to solder the horn wire.
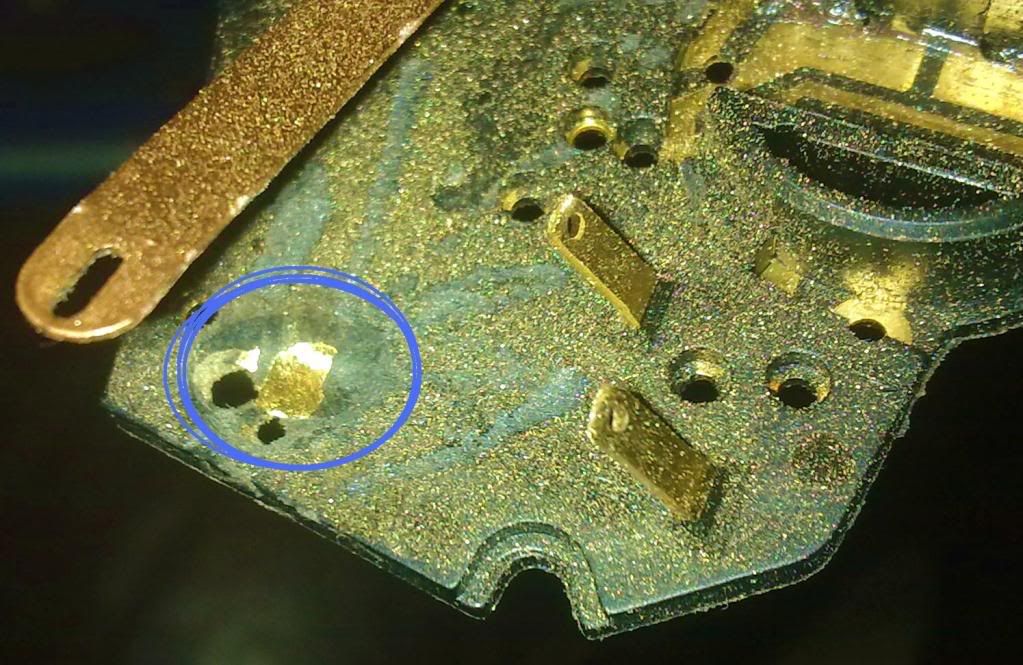
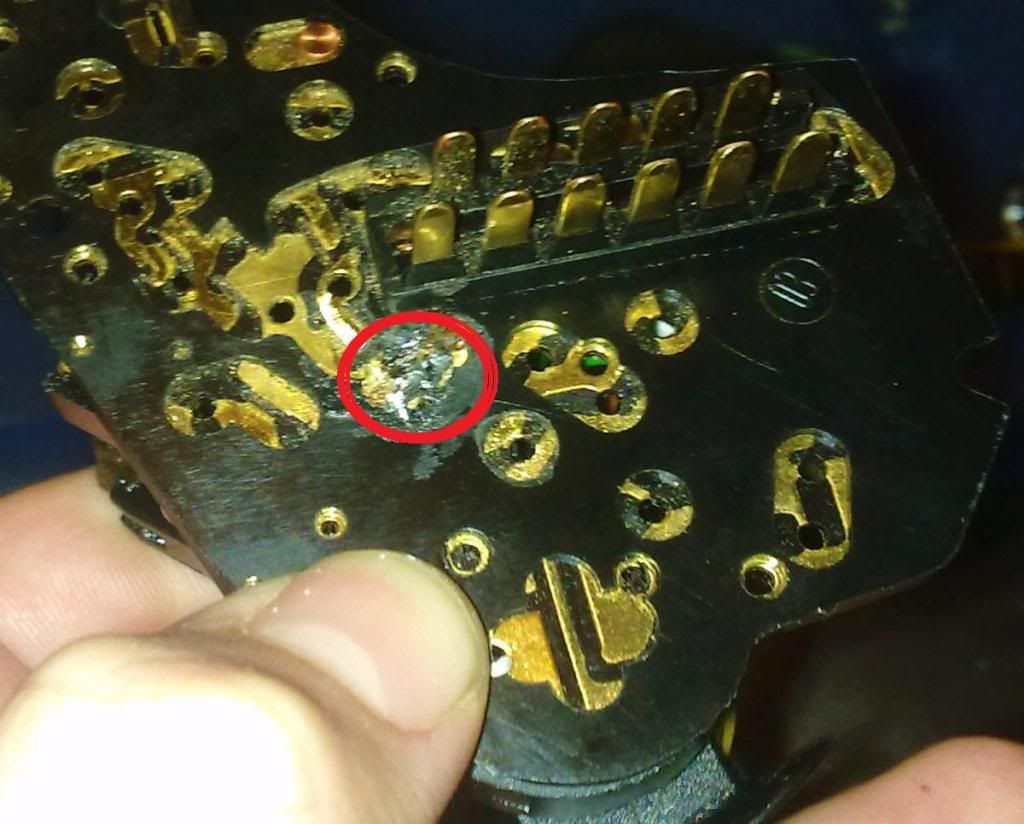
Now turn board over. There is no room on the main side to solder the wire so i intend to poke it through and solder on the reverse side of the board.
Then attack each area with a dremel tool to remove some plastic exposing enough brass board to solder the wire to:
This was done the same on the reverse:
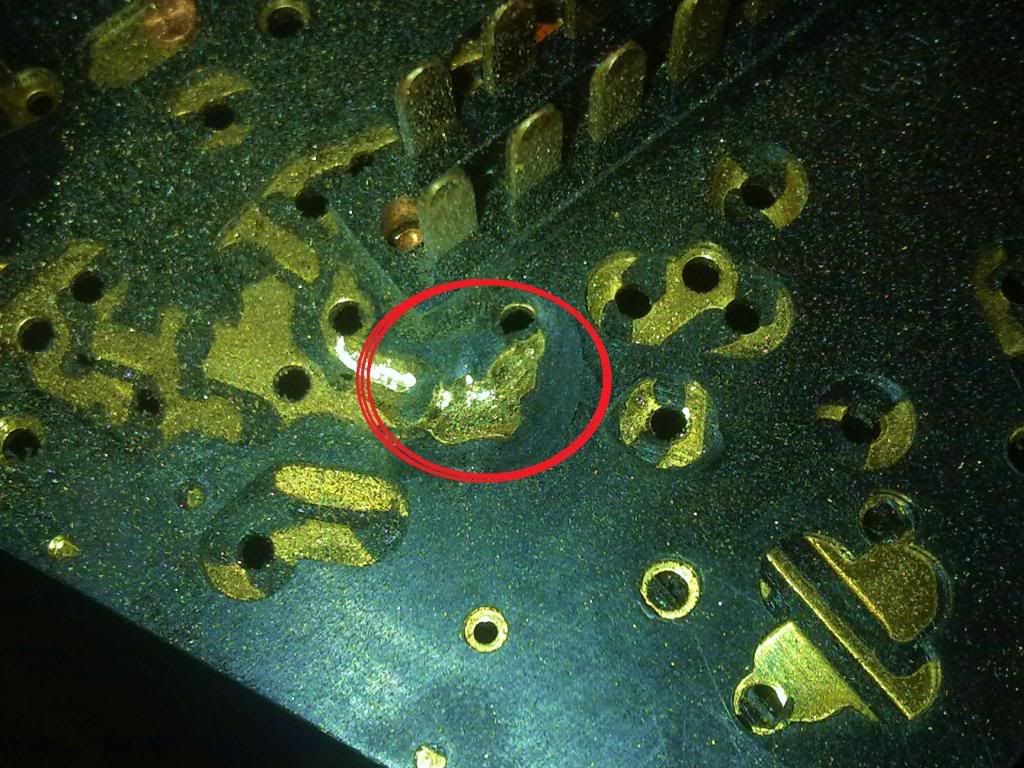
Then clean up the board and tin the brass pads and the wires with solder to make it easier to connect as its quite fiddly!
The first wire to solder is the horn wire.
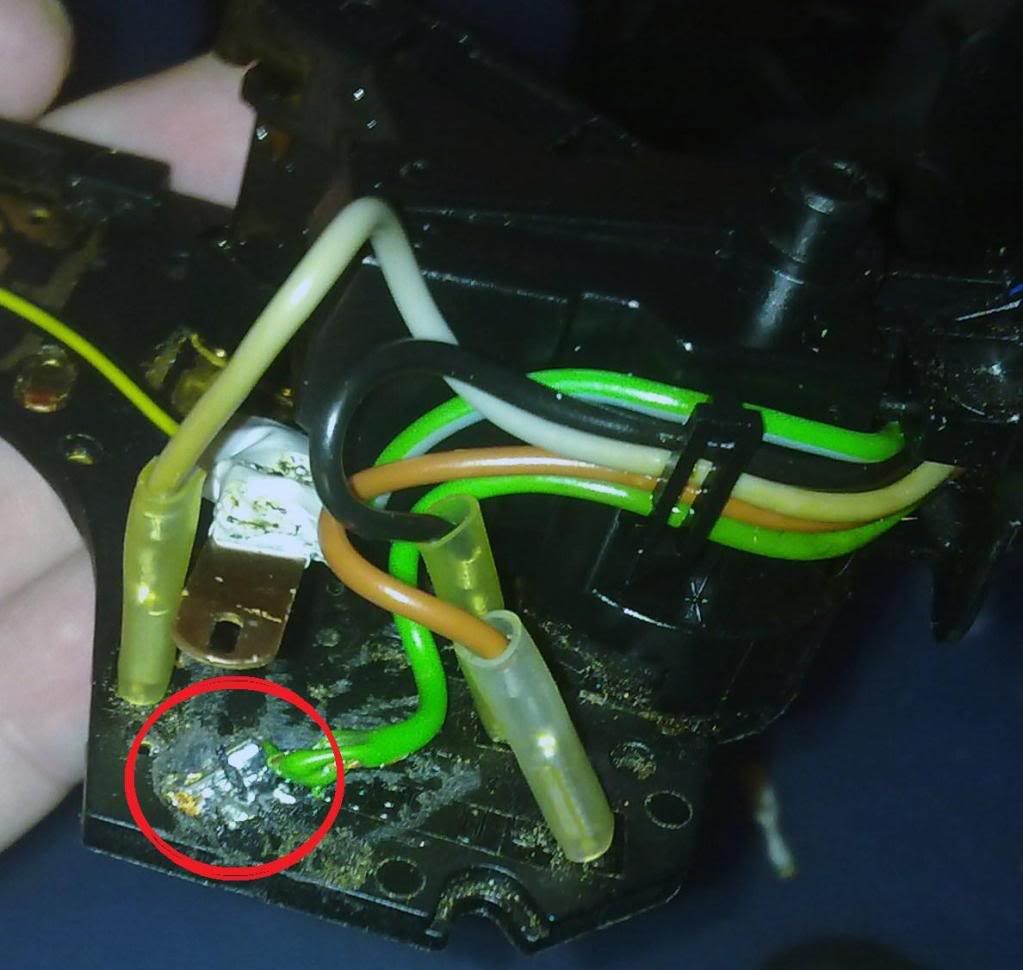
Circled in red you can see where the horn wire passes close to the hazard flasher. In hindsight i would do the solder joint in the left stalk itself but with the wire glued down there is just enough space for the flasher to work.
Then solder the wire on the rear:
If needs be file the solder level with the plastic but careful soldering and you should be fine.
Then plug in the wires on the stalk and solder the final wire:
Once the stalk is located it should look like this:
and is now ready for reassembly. You will find you need to poke a screwdriver through this gap:
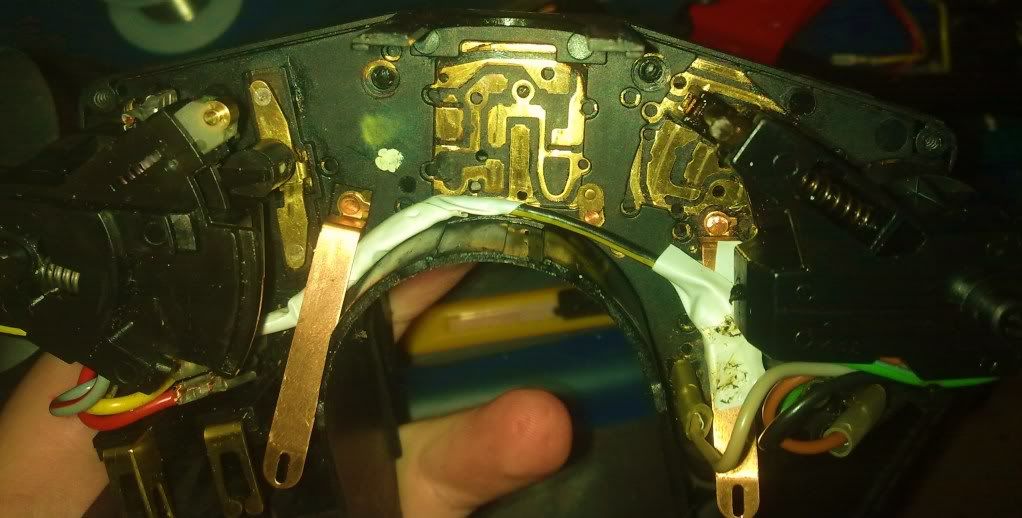
to manipulate the spring wheel on each stalk so that it can make its interferance fit with the contact point as shown below in white:
Then it should slide together although ensure the stalk studs fit into thier holes (in red):

rescrew together and the stalk is ready to fit to my car:
well ive sorted the wiring harness for the 3 button alarm conversion!
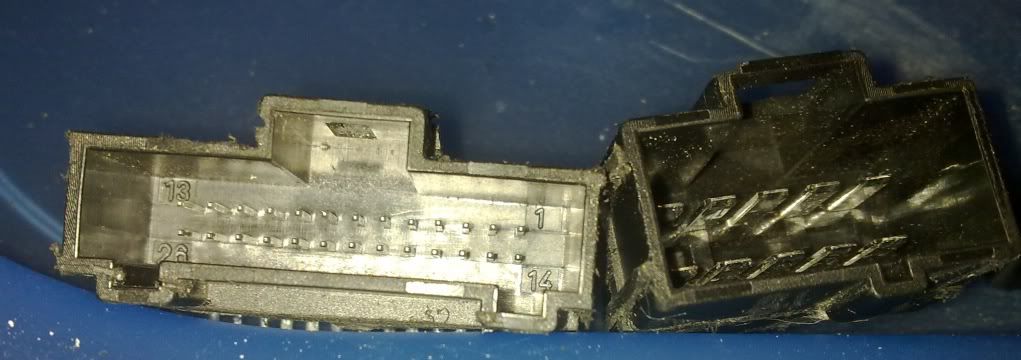
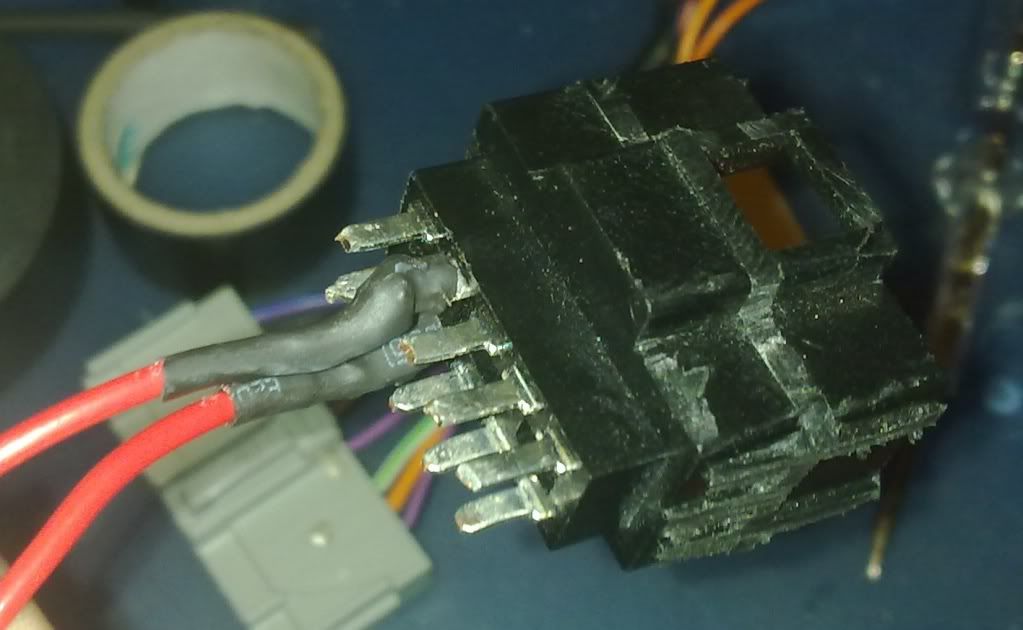
First we need some connectors to connect the loom to the car. Easiest way is to butcher a spare 2 button alarm module to get the connector blocks!
Butcher the motherboard so youve got room to access the pins:
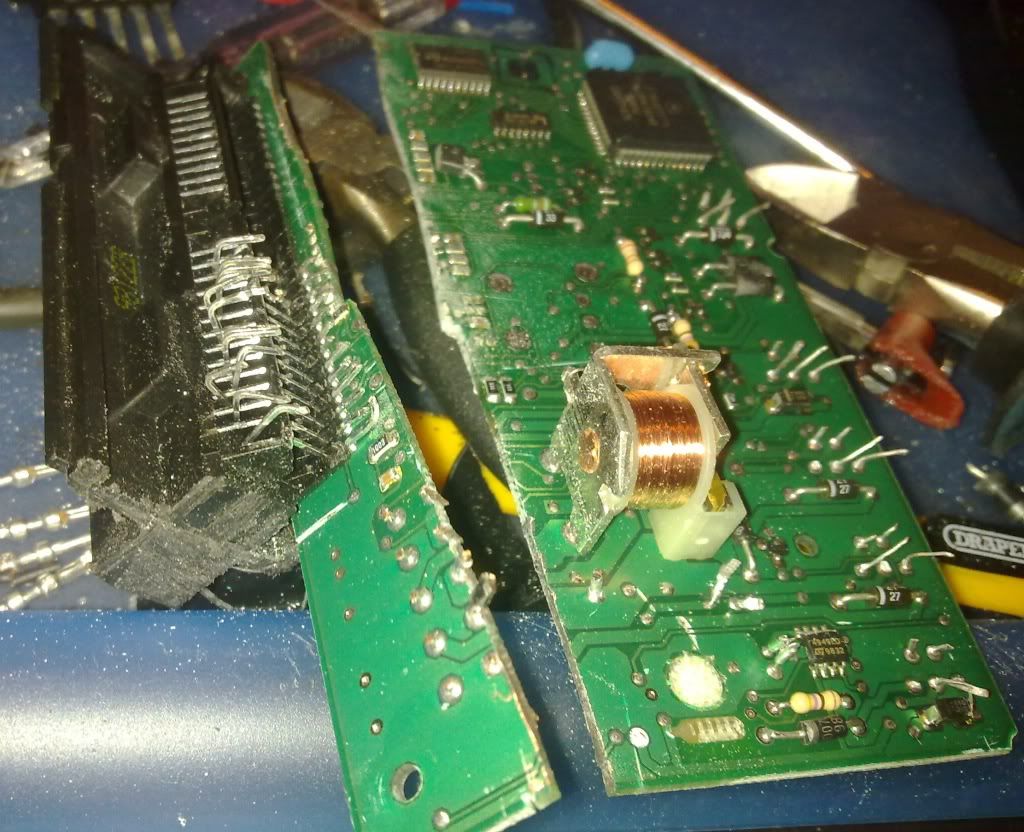
then using a hacksaw carefully chop off excess plastic then desolder the connectors:
Trim off any excess plastic to make it neat then straigten the pins on the small connector:
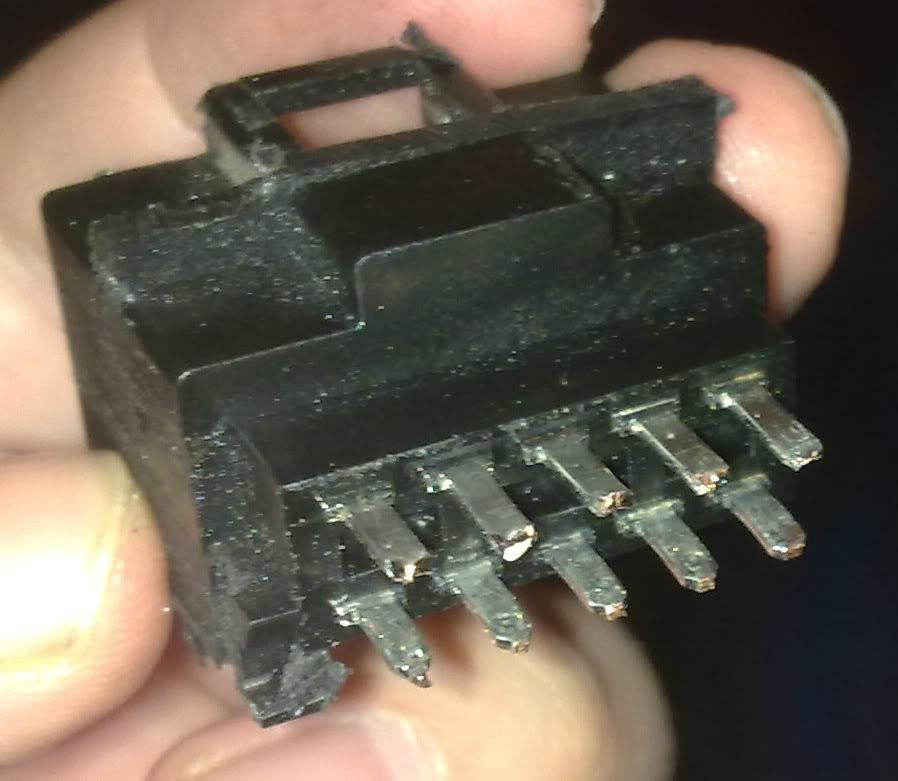
Do the same for the large connector and once tidied up you will have your two connectors ready to plug into car loom:
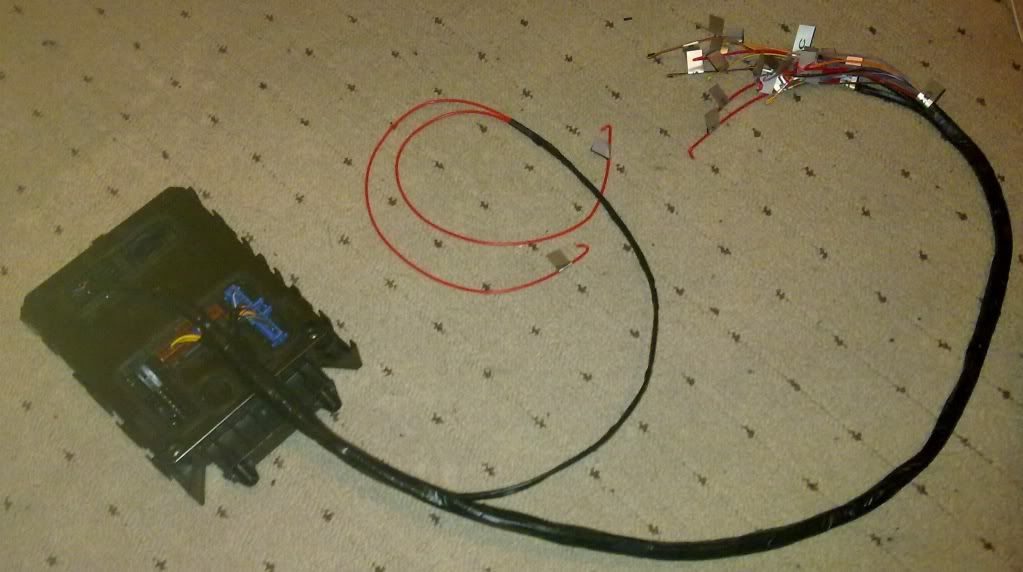
Then you need to make the harness itself. You should have kept the connectors on the 3 button alarm module. As you can see in the pics below, the alarm module is considerably bigger than the old one:
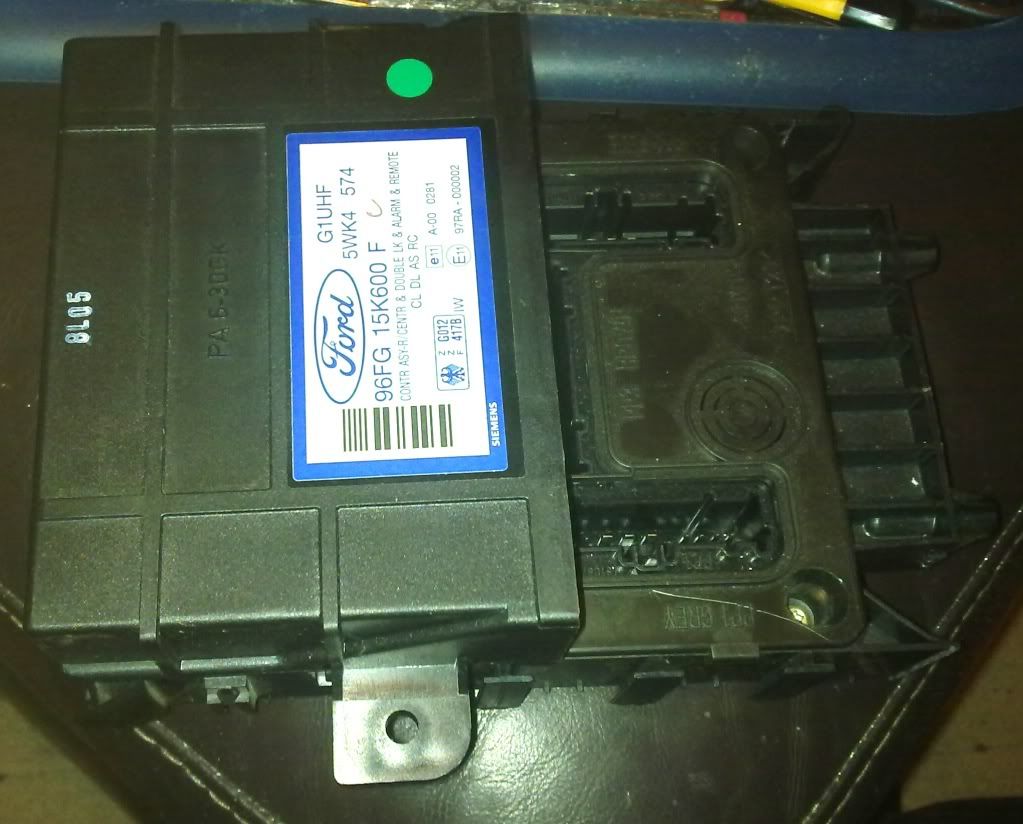
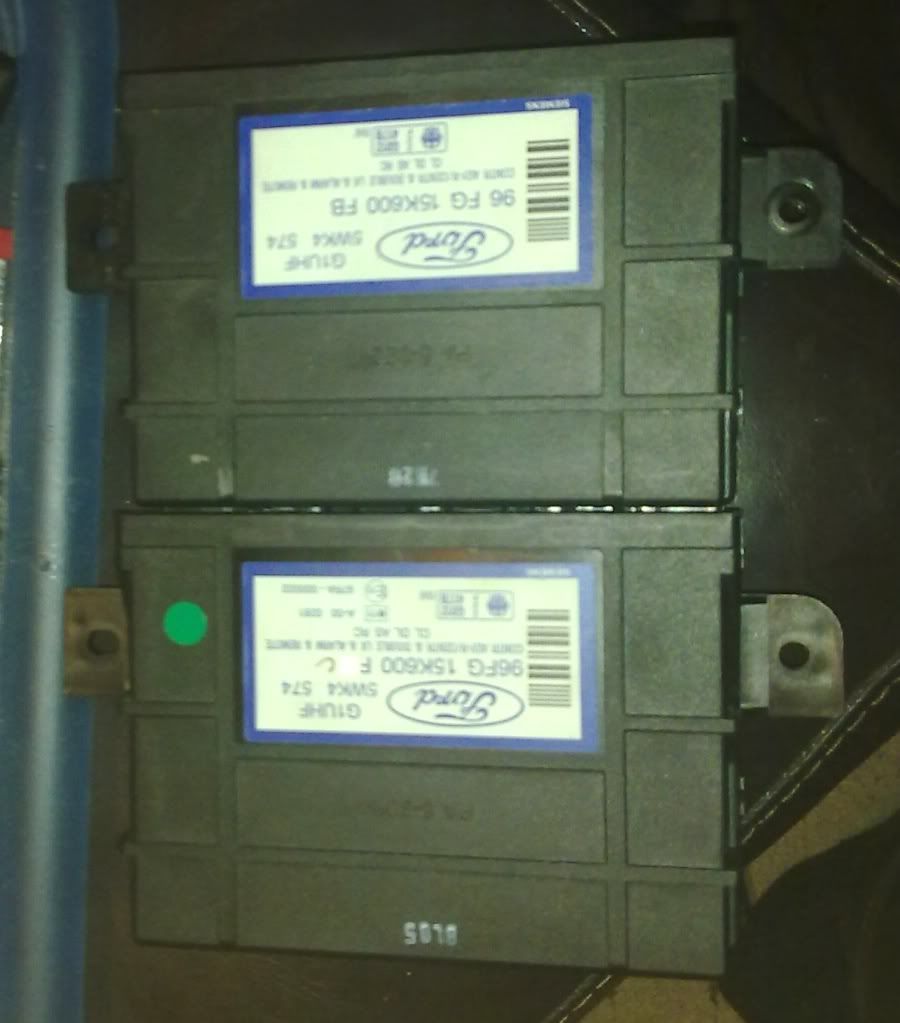
So plan to either trim off excess plastic or make loom longer to relocate the alarm module behind the dash.
I chose to extend my loom to 1m length so i can relocate the module where convenient to me. Extend wires as necessary then label them so you know which is which, then wrap up to protect. This is also done now so that all the wire lengths are the same ready for connecting the connectors at the other end!!
Then find the shortest wire. This will be the first one connected and governs the length of the loom. Its easier to cut the other wires to length than find youve a wire 2mm too short when your halfway through!!
Solder on the wires and wrap in heatshrink to protect the joints. i find tinning the contact and the wire first makes it easier to get a good joint plus it means you put less heat into the plastic so are less likely to melt it making a pin loose in the connector!
be careful to adjust the lengths to suit so you wont get strange lumps or kinks.
Once you are done you can add some braided sleeving or other protective coating to the loom. I used convoluted tubing common in ford looms. You could just double wrap in tape but if your feeding it behind dash there are some sharp bits of metal and you may not be able to see what you are doing so you dont want to risk damaging the wiring!
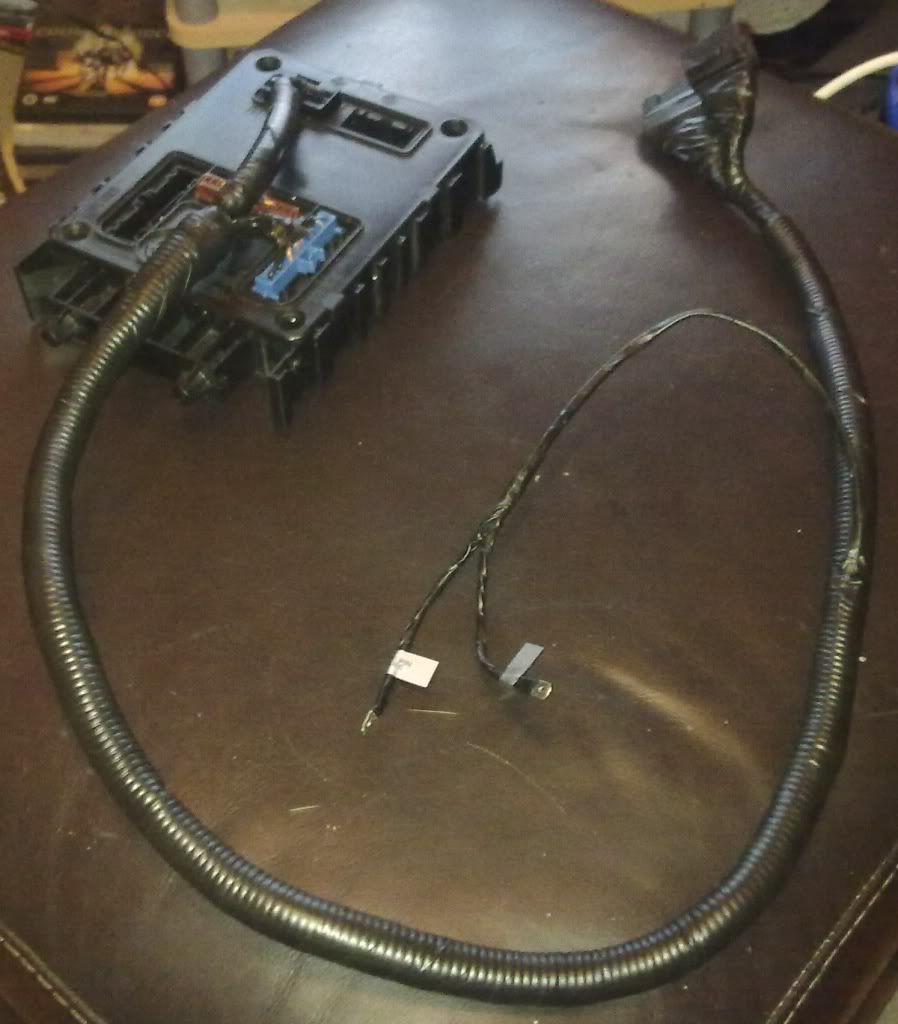
Loom now complete! the next stage is to test it which i will do soon!
Done a few more bits and bobs!
First the electrics... Started to make a subloom for the focus ST170 dash i want to try and fit.
Trimmed and labelled all the wires on the focus dash plug i aquired:
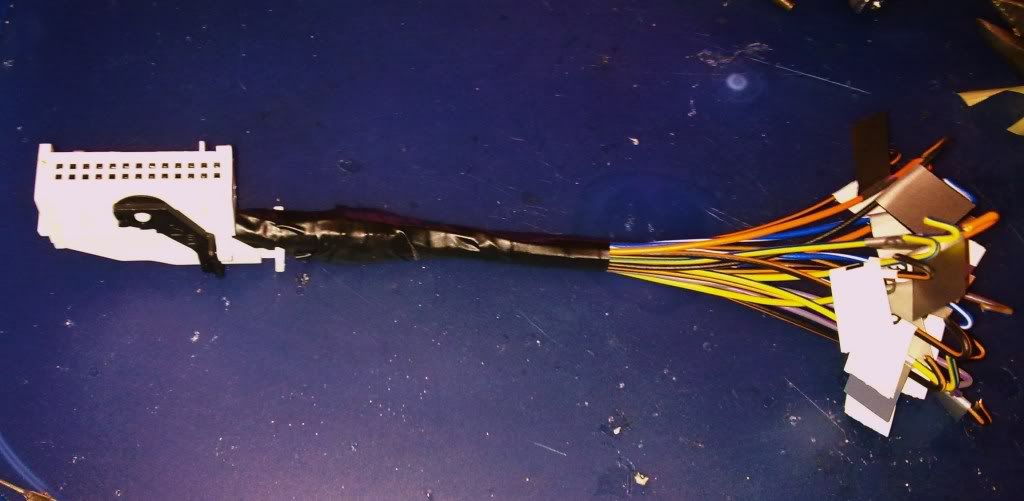
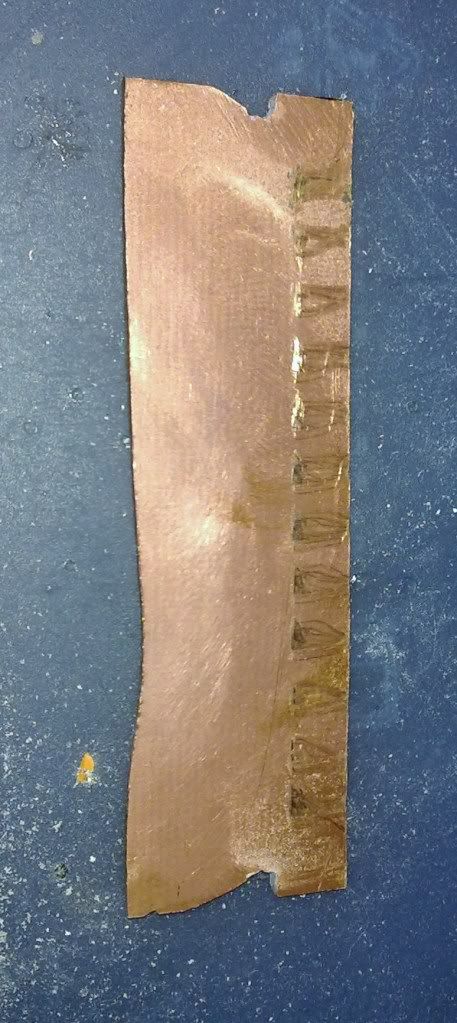
Then i had to manufacture a connector for the puma connectors. as these dont exist seperate to dash units i have had to make my own using double copper sided fibre board. First i rough cut with a hacksaw a piece of board.

Then i trimmed it precisely and notched it to lock in position on the connector! I also inserted anf removed it several times including wiggling it. The contacts left a mark on the copper which is ideal as i then take a dremel to the board to seperate each contact.
Then i mark up the board and start to solder on the wires to both sides from the focus connector.
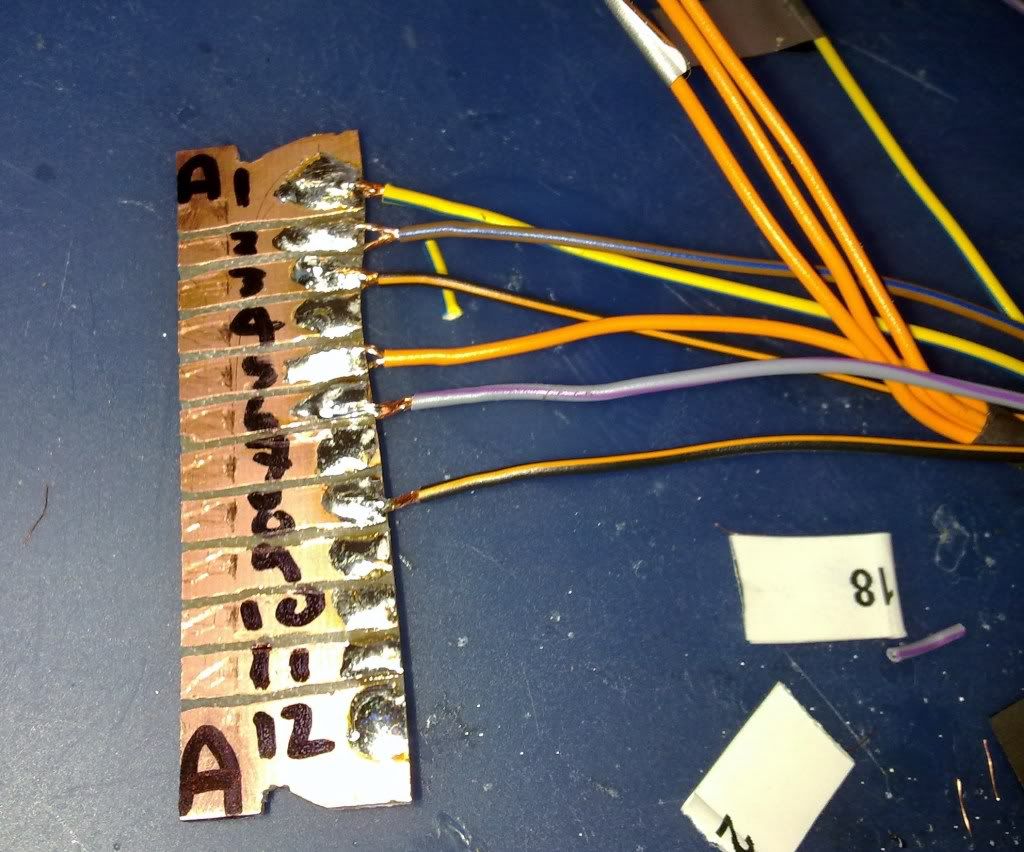
Once thats done its insulated, taped up and then marked up for its respective connector:
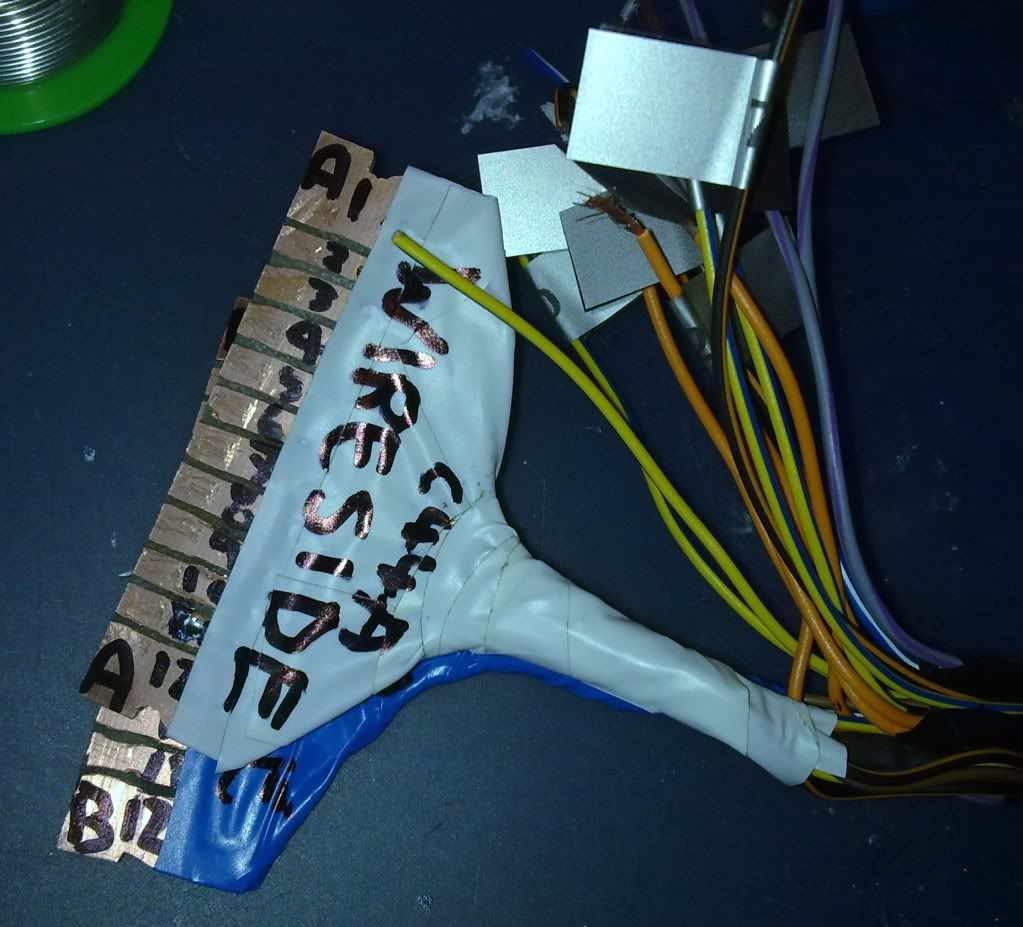
Few things i need next is to source the oil guages and connector so i can connect up the remaining wires, then source a 36-1 wheel to go on crank pulley with a zetec sensor so that i can recreate the PIP signal to my EEC V ecu. then as it has the pip signal the ECU will be alive enough for it to do databus communications with the ST170 dash! The pip signal will drive the tacho.
Also fitted a ford speed sensor to drive the speedo:
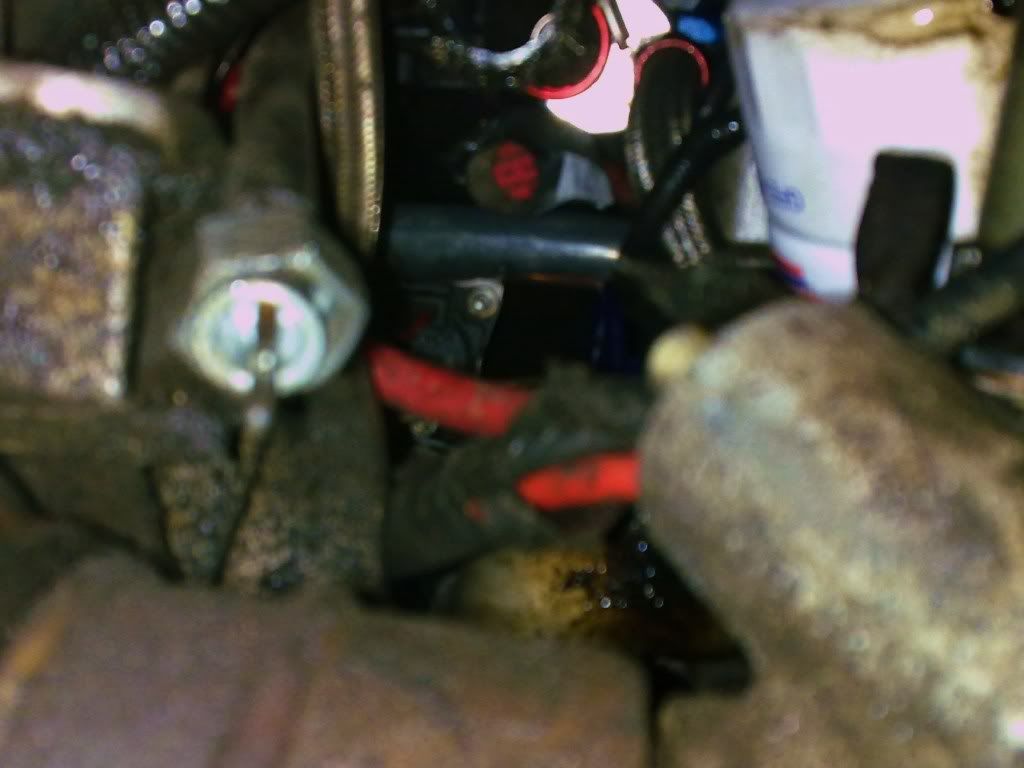
Need to finish wiring that into the puma loom!!
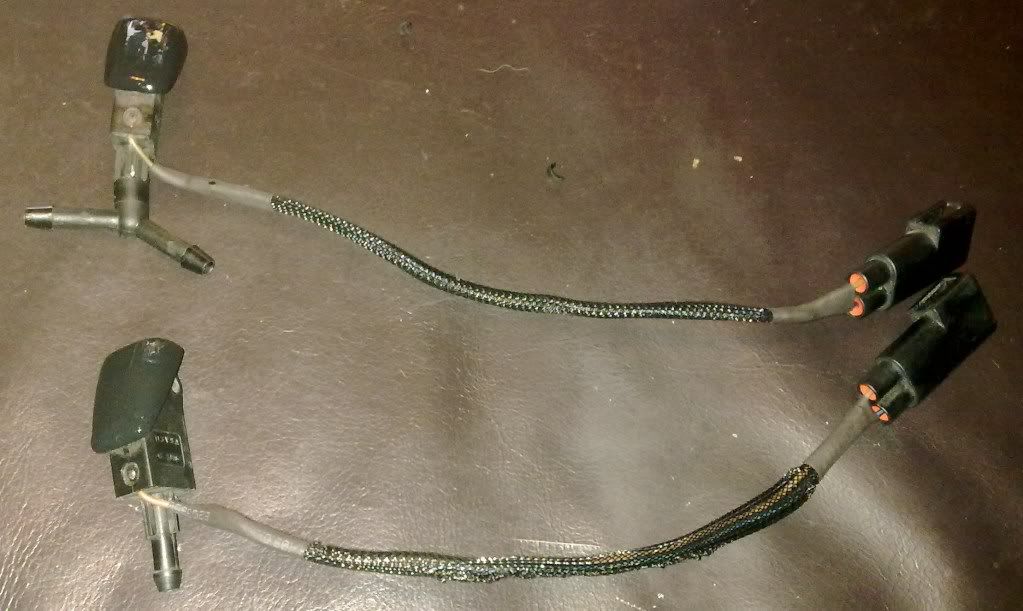
In light of the adverse weather ive decided to finally sort the heated washer jets id got off another ford! They were in good condition but the typical untidy insulating tape for wiring protection. I decided to braid the loom to make it neater and more protected.
Also finally sorted some floor mats!! Standard mats dont fit my car so i sourced some cheapo mats to cut up to fit!
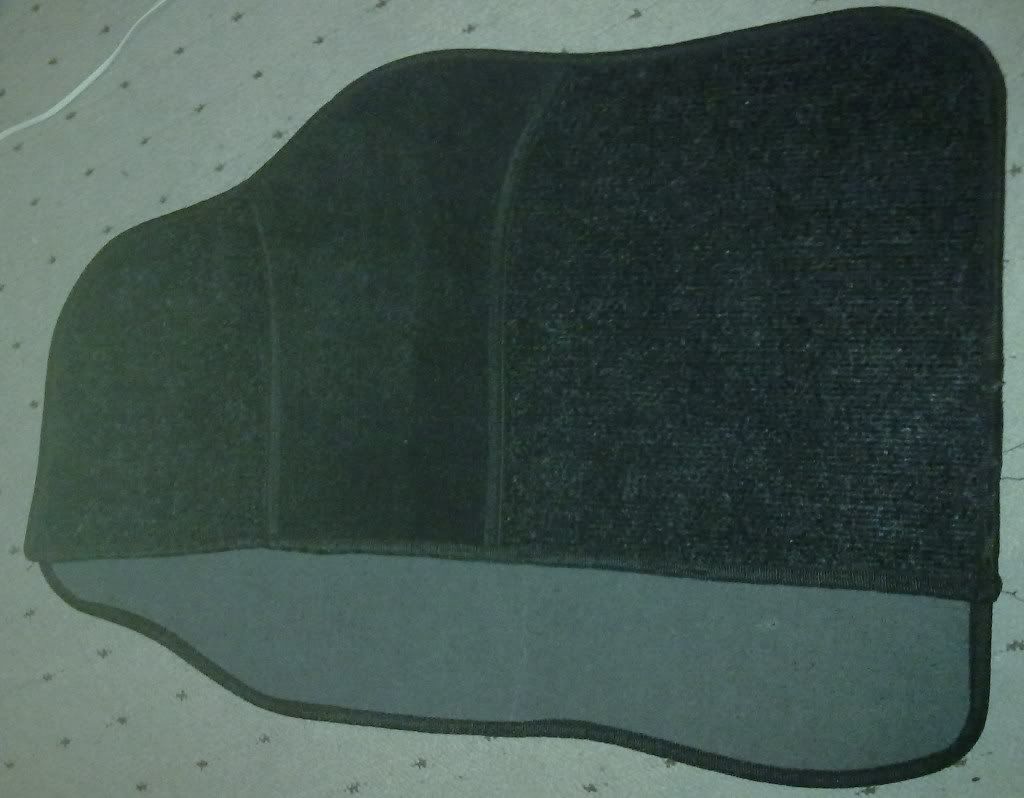
You can see how much smaller i needed to make the mat!!
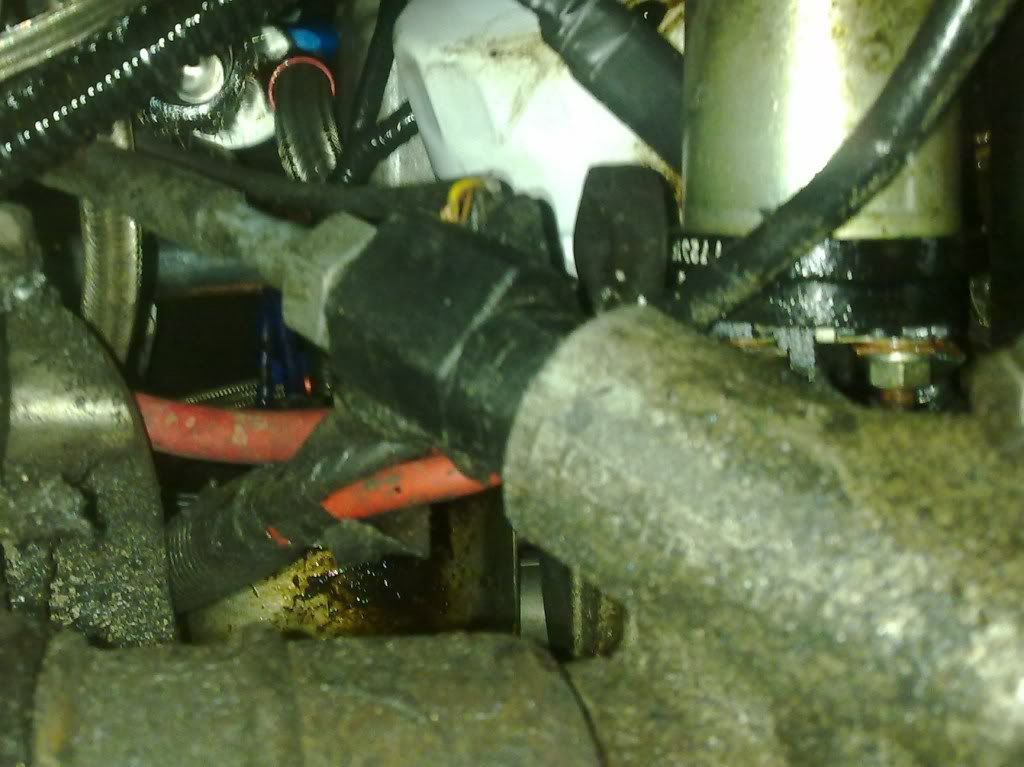
Decided to replace my front TCA to ARB bushes as they were crap and also pumaspeed had fitted too many washers to rear:
Getting them off was easy enough with a bit of hammering on the bolt!!!
Quickly fitted the new bush itself:
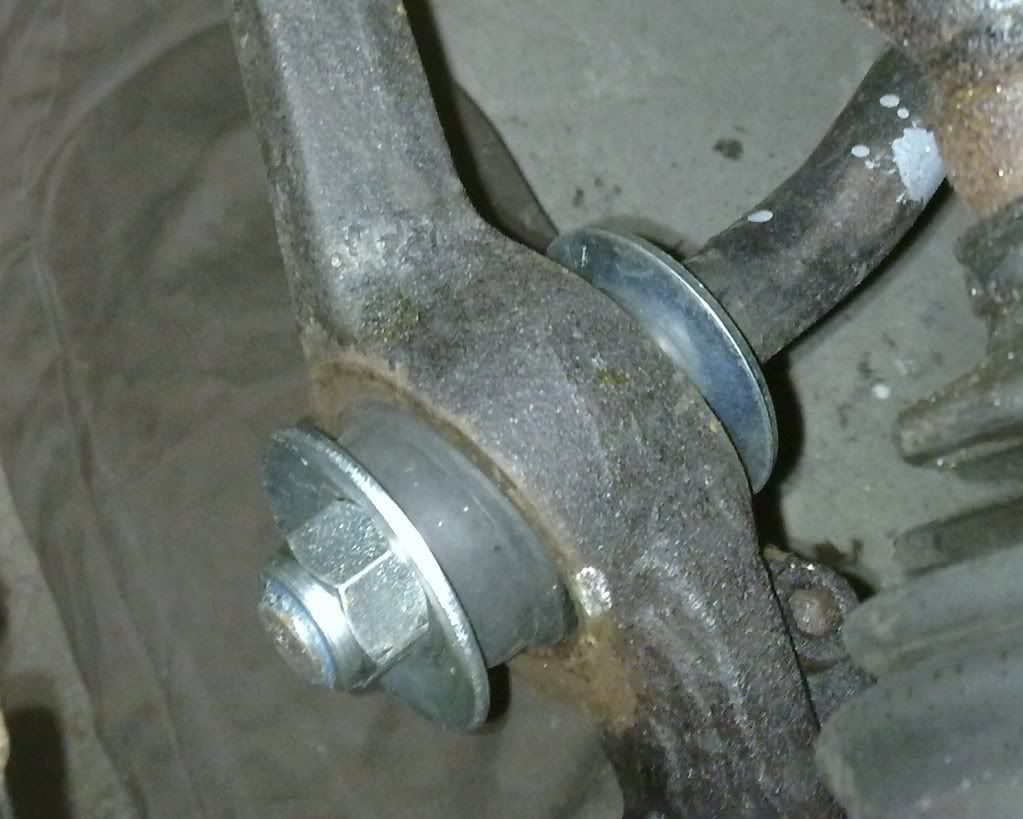
ooohhh shiney new bolt and washer!!
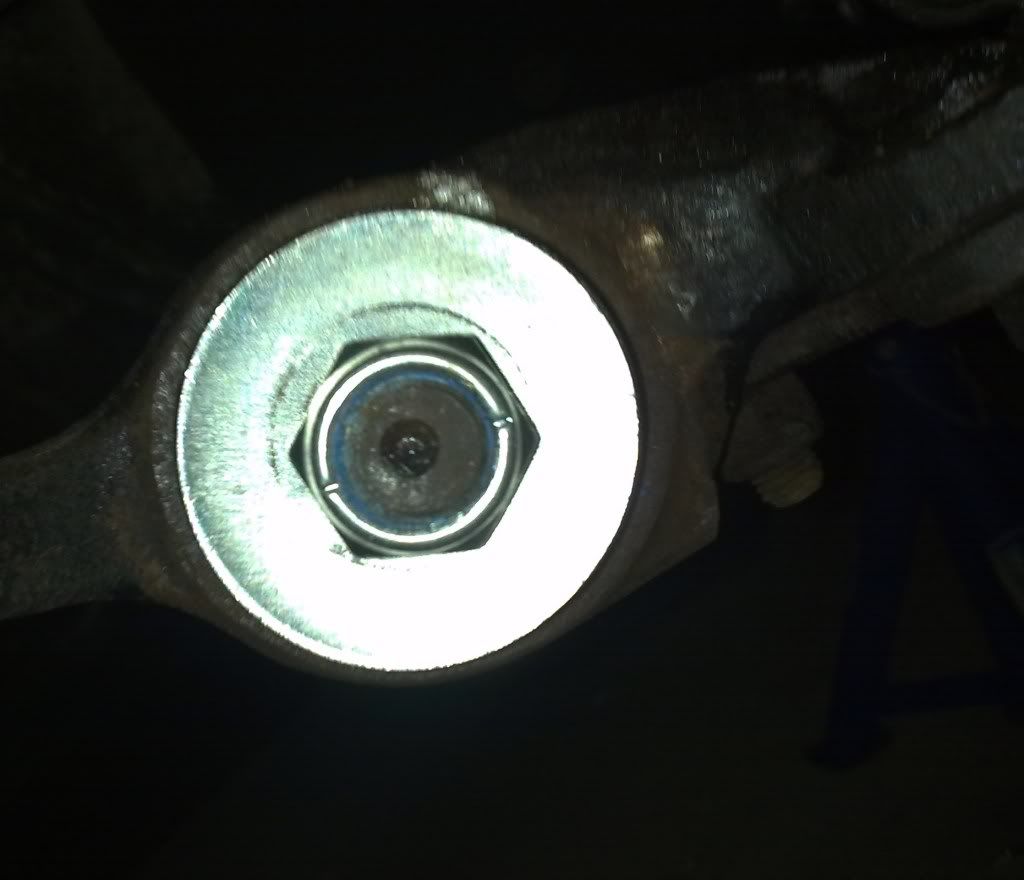
Then putting it back together is the hard bit!! The TCA wont go any further than this due to the spring tension:
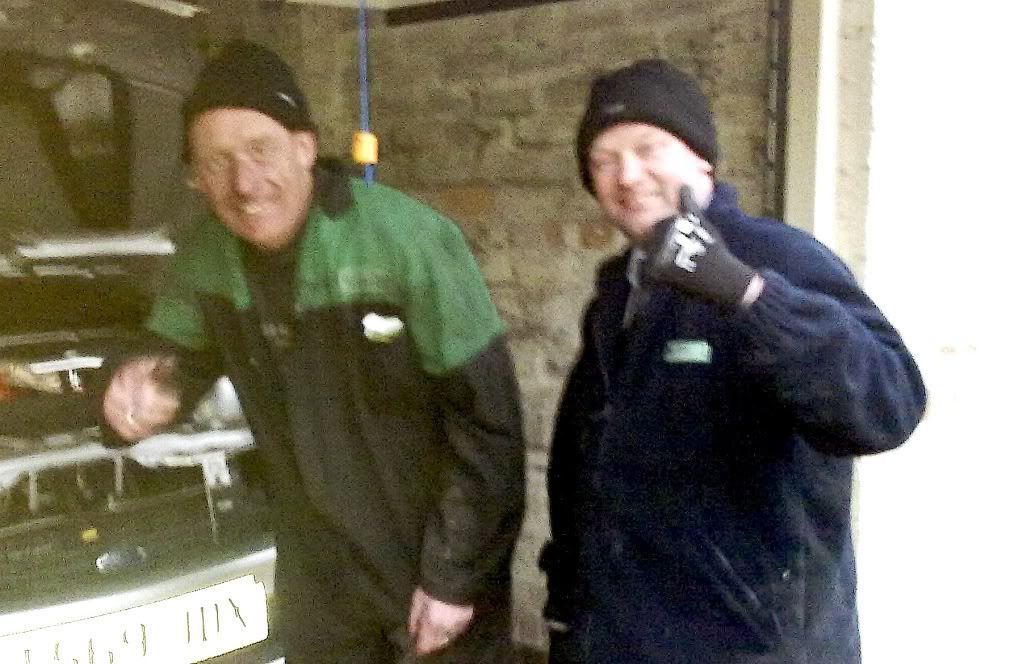
Me and my neighbour couldnt get it done so i got a cossie expert cossiecrazy and his work colleague from the garage he owns to come give a hand and in 10 minutes had the bolts back in as id pushed the wheel the wrong way
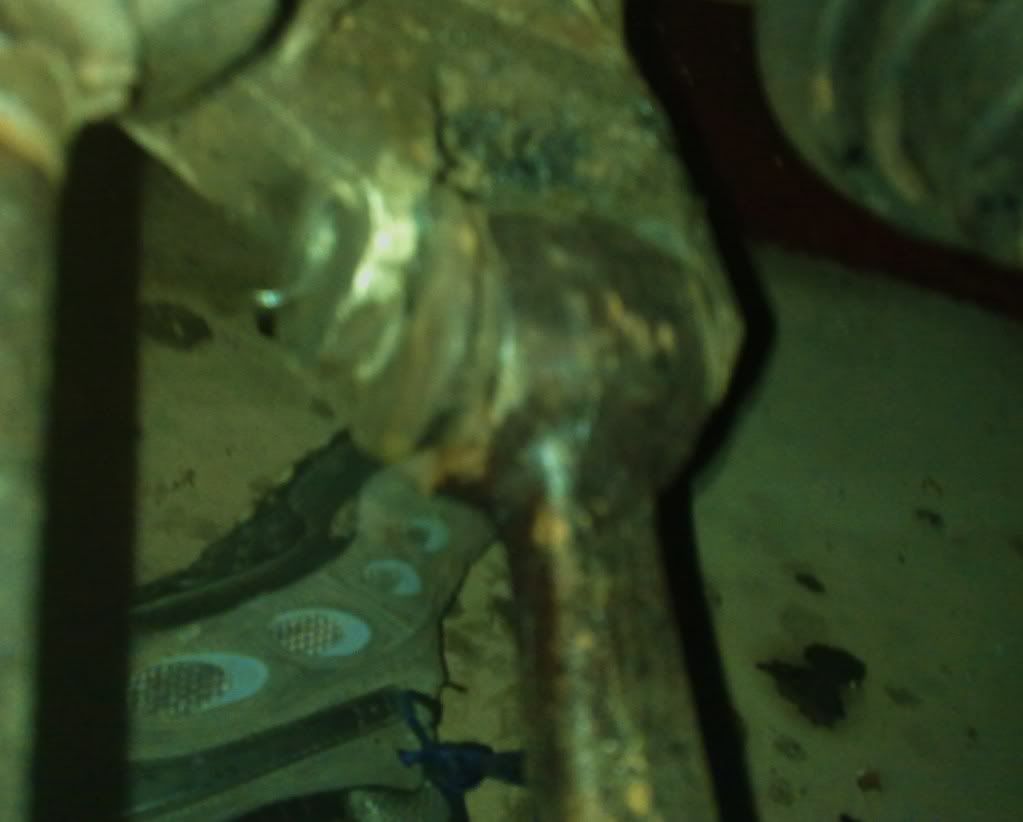
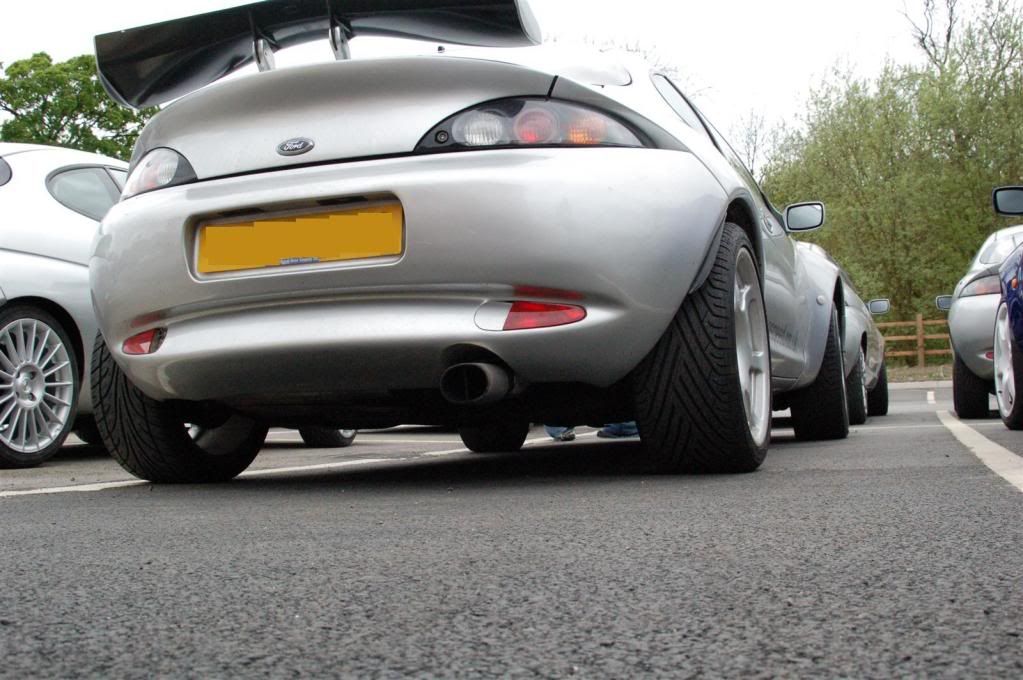
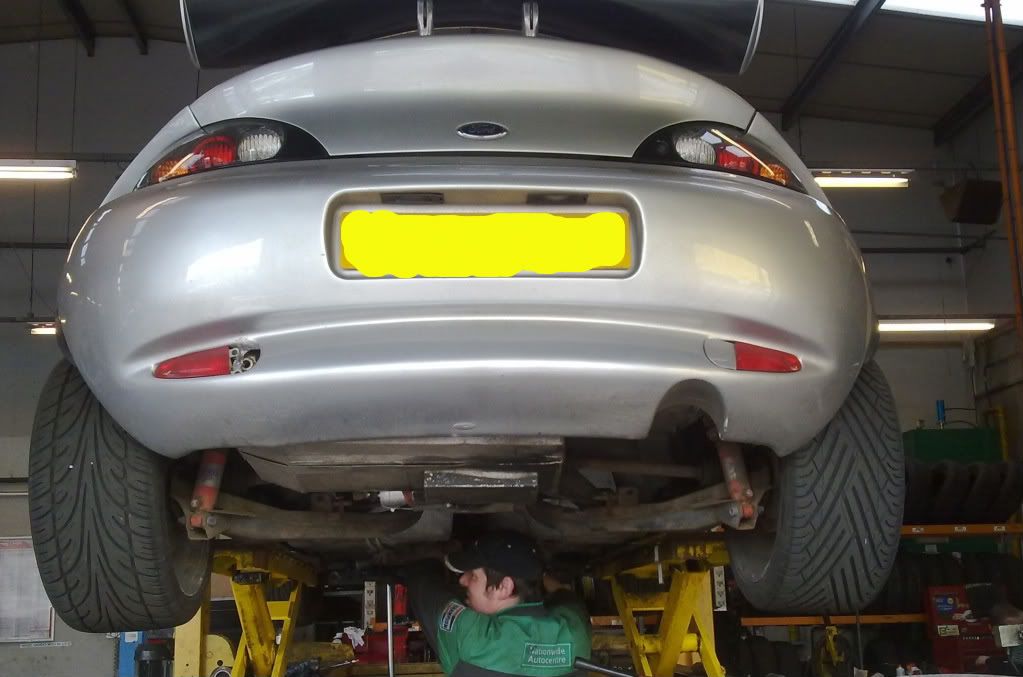
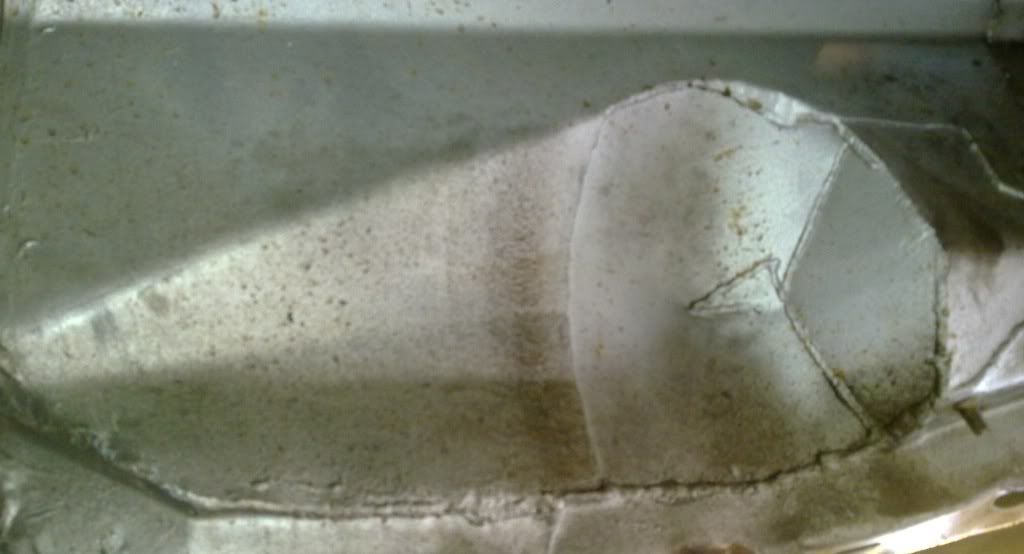
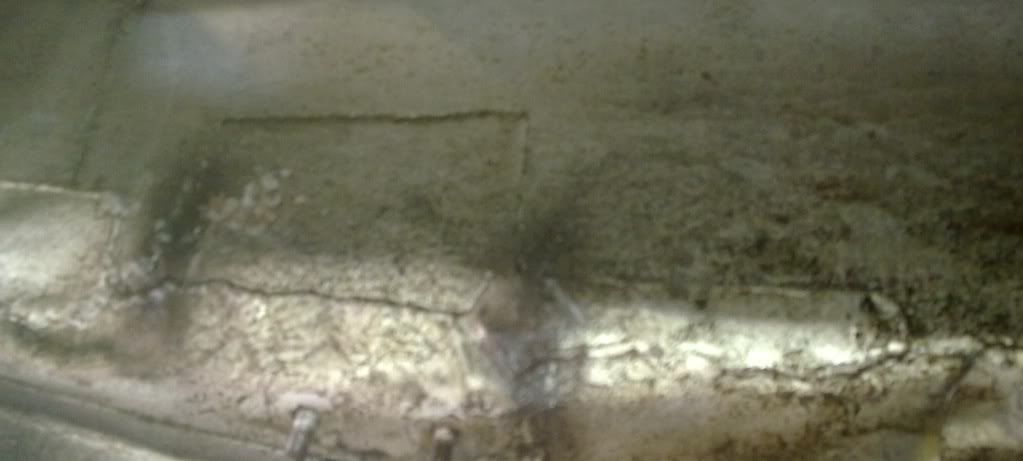
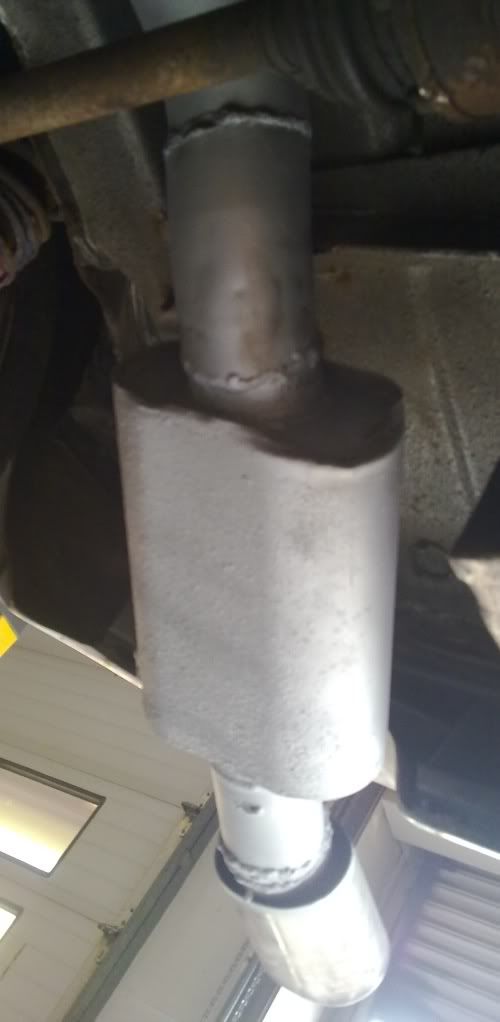
Got it back together and then went to get it tracked. decided to have a good look underneath while properly up in the air and all seems sound just needs the odd lick of paint here and there. The garage were impressed with the shell fabrication chassis points so at least i know all is good there! I did find quite a bit of rust on my backbox though:

Its a complete custom exhaust system supposedly stainless steel when quite plainly its not stainless!!!! So im going to need to grind that rust back and paint it with some high temp exhaust paint!!!
Its all running now, wheels tracking done and a couple hundred miles of trouble free running!
Carrying on with the stalk mod!
I have now fitted the horn unit to the stalk. It just slides in and you fit the retaining pin to hold it in:
At the other end i have crimped on the correct sized connectors.
Now to fit the stalk attach a wire extension onto the horn wire which is the black wire with yellow stripe. All the other wires plug onto the same connector as when you took off the the old stalk. The original black/yellow wire is now grey/red as the horn wire has taken that colour on the new stalk unit. Also the earth on the original puma stalk will sometimes be black or green/yellow.
In essence the horn stalk mod is now almost done. All that needs doing is connecting the horn wire to the horn prongs on the circuit board. in essence the extra horn switch is in parallel to the original ones. The horn prong we are connecting to, is the one on the right of the circuit board. The wire will have to be run along the edge of the circuit board below where the hazard flasher unit goes as there is just enough room!!
Mext now looking at the right hand stalk unit, we want to fit the variable intermittant wipe stalk unit. The wiring and fitting is indentical to the original stalk except with the addition of 2 extra wires, one green, one green/grey for the intermittant wipe unit.
On the escort stalk unit circuit board you will find two extra tags for those wires. The puma stalk circuit board does not have the tags!
Luckily the actual circuit board is a common design with changes between the two by drilling through, breaking tracks and adding tags. In essence we are going to attach the variable wipe unit to the spare pin which will go to escort relay and the intermittant wipe contact point.
In the wiring diagram in essence we are connecting to pin connector P (54-9) and 53-2.
For pin connector P, check between the pin and the circuit board holes to find out which one connects to it. The area that works has been circled in red below:
Then for the other connector do the same check with a multimeter and you will find the hole we will be poking wire through in red. The green circle shows where to solder the horn wire.
Now turn board over. There is no room on the main side to solder the wire so i intend to poke it through and solder on the reverse side of the board.
Then attack each area with a dremel tool to remove some plastic exposing enough brass board to solder the wire to:
This was done the same on the reverse:
Then clean up the board and tin the brass pads and the wires with solder to make it easier to connect as its quite fiddly!
The first wire to solder is the horn wire.
Circled in red you can see where the horn wire passes close to the hazard flasher. In hindsight i would do the solder joint in the left stalk itself but with the wire glued down there is just enough space for the flasher to work.
Then solder the wire on the rear:
If needs be file the solder level with the plastic but careful soldering and you should be fine.
Then plug in the wires on the stalk and solder the final wire:
Once the stalk is located it should look like this:
and is now ready for reassembly. You will find you need to poke a screwdriver through this gap:
to manipulate the spring wheel on each stalk so that it can make its interferance fit with the contact point as shown below in white:
Then it should slide together although ensure the stalk studs fit into thier holes (in red):
rescrew together and the stalk is ready to fit to my car:
well ive sorted the wiring harness for the 3 button alarm conversion!
First we need some connectors to connect the loom to the car. Easiest way is to butcher a spare 2 button alarm module to get the connector blocks!
Butcher the motherboard so youve got room to access the pins:
then using a hacksaw carefully chop off excess plastic then desolder the connectors:
Trim off any excess plastic to make it neat then straigten the pins on the small connector:
Do the same for the large connector and once tidied up you will have your two connectors ready to plug into car loom:
Then you need to make the harness itself. You should have kept the connectors on the 3 button alarm module. As you can see in the pics below, the alarm module is considerably bigger than the old one:
So plan to either trim off excess plastic or make loom longer to relocate the alarm module behind the dash.
I chose to extend my loom to 1m length so i can relocate the module where convenient to me. Extend wires as necessary then label them so you know which is which, then wrap up to protect. This is also done now so that all the wire lengths are the same ready for connecting the connectors at the other end!!
Then find the shortest wire. This will be the first one connected and governs the length of the loom. Its easier to cut the other wires to length than find youve a wire 2mm too short when your halfway through!!
Solder on the wires and wrap in heatshrink to protect the joints. i find tinning the contact and the wire first makes it easier to get a good joint plus it means you put less heat into the plastic so are less likely to melt it making a pin loose in the connector!
be careful to adjust the lengths to suit so you wont get strange lumps or kinks.
Once you are done you can add some braided sleeving or other protective coating to the loom. I used convoluted tubing common in ford looms. You could just double wrap in tape but if your feeding it behind dash there are some sharp bits of metal and you may not be able to see what you are doing so you dont want to risk damaging the wiring!
Loom now complete! the next stage is to test it which i will do soon!
Done a few more bits and bobs!
First the electrics... Started to make a subloom for the focus ST170 dash i want to try and fit.
Trimmed and labelled all the wires on the focus dash plug i aquired:
Then i had to manufacture a connector for the puma connectors. as these dont exist seperate to dash units i have had to make my own using double copper sided fibre board. First i rough cut with a hacksaw a piece of board.
Then i trimmed it precisely and notched it to lock in position on the connector! I also inserted anf removed it several times including wiggling it. The contacts left a mark on the copper which is ideal as i then take a dremel to the board to seperate each contact.
Then i mark up the board and start to solder on the wires to both sides from the focus connector.
Once thats done its insulated, taped up and then marked up for its respective connector:
Few things i need next is to source the oil guages and connector so i can connect up the remaining wires, then source a 36-1 wheel to go on crank pulley with a zetec sensor so that i can recreate the PIP signal to my EEC V ecu. then as it has the pip signal the ECU will be alive enough for it to do databus communications with the ST170 dash! The pip signal will drive the tacho.
Also fitted a ford speed sensor to drive the speedo:
Need to finish wiring that into the puma loom!!
In light of the adverse weather ive decided to finally sort the heated washer jets id got off another ford! They were in good condition but the typical untidy insulating tape for wiring protection. I decided to braid the loom to make it neater and more protected.
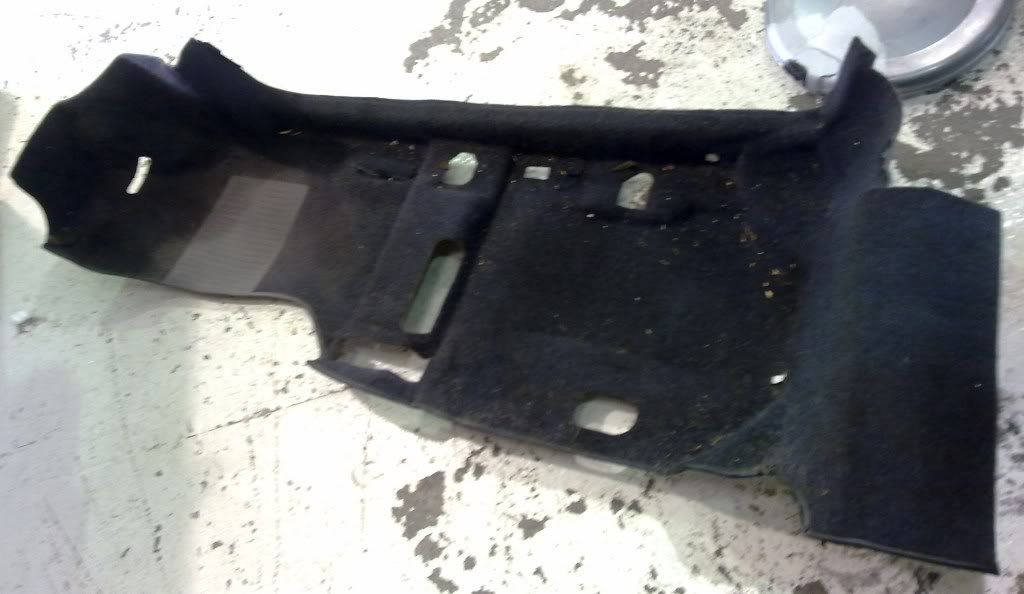
Also finally sorted some floor mats!! Standard mats dont fit my car so i sourced some cheapo mats to cut up to fit!
You can see how much smaller i needed to make the mat!!
Decided to replace my front TCA to ARB bushes as they were crap and also pumaspeed had fitted too many washers to rear:
Getting them off was easy enough with a bit of hammering on the bolt!!!
Quickly fitted the new bush itself:
ooohhh shiney new bolt and washer!!
Then putting it back together is the hard bit!! The TCA wont go any further than this due to the spring tension:
Me and my neighbour couldnt get it done so i got a cossie expert cossiecrazy and his work colleague from the garage he owns to come give a hand and in 10 minutes had the bolts back in as id pushed the wheel the wrong way
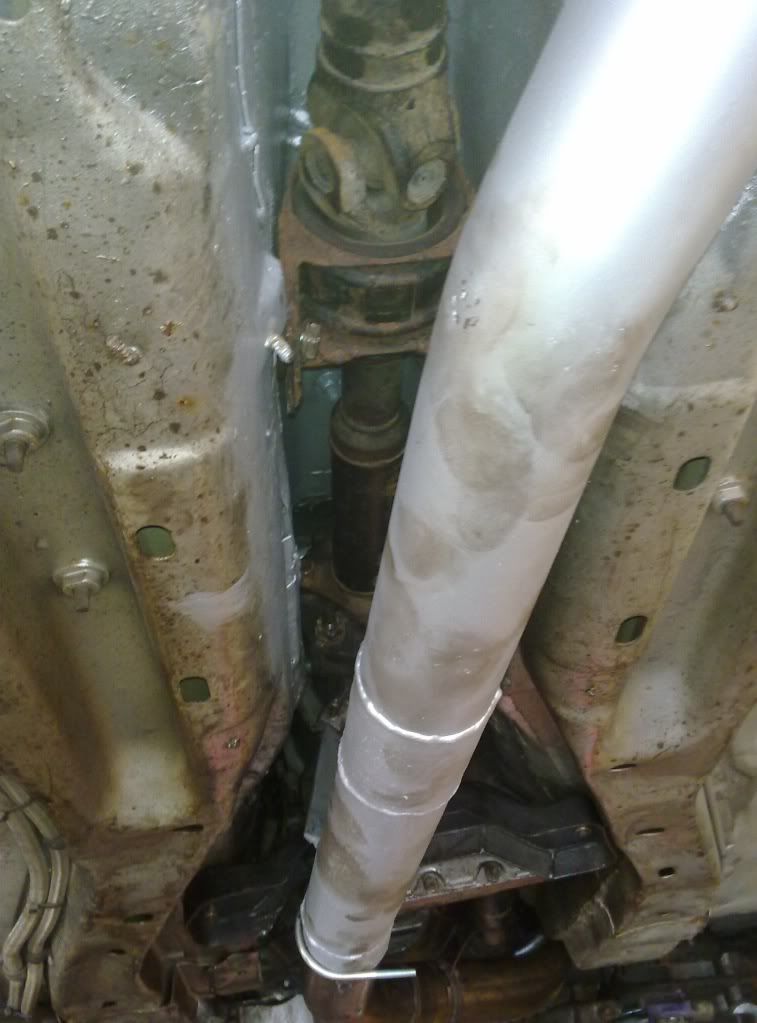
Got it back together and then went to get it tracked. decided to have a good look underneath while properly up in the air and all seems sound just needs the odd lick of paint here and there. The garage were impressed with the shell fabrication chassis points so at least i know all is good there! I did find quite a bit of rust on my backbox though:
Its a complete custom exhaust system supposedly stainless steel when quite plainly its not stainless!!!! So im going to need to grind that rust back and paint it with some high temp exhaust paint!!!


Lost for words??

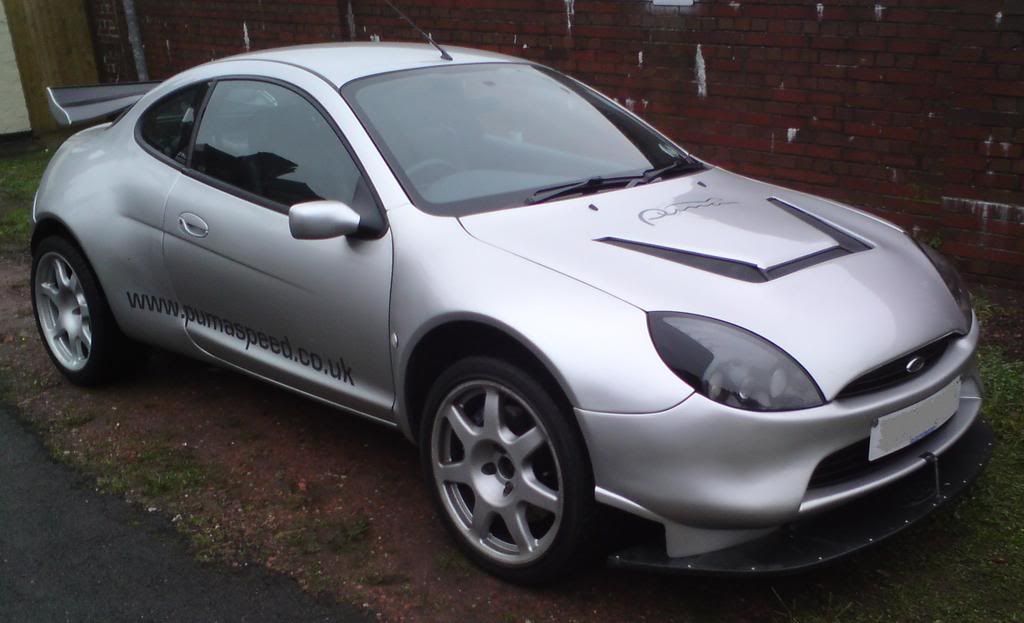
 It is gorgeous!
ah cool lol
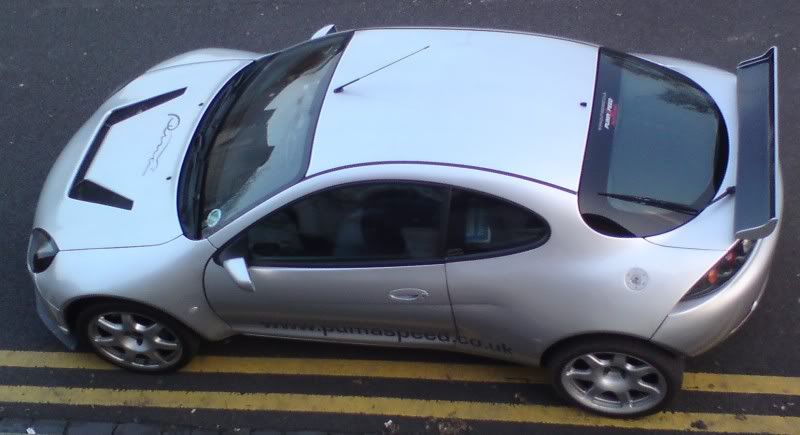
Removed all the annoying stickers from the side:
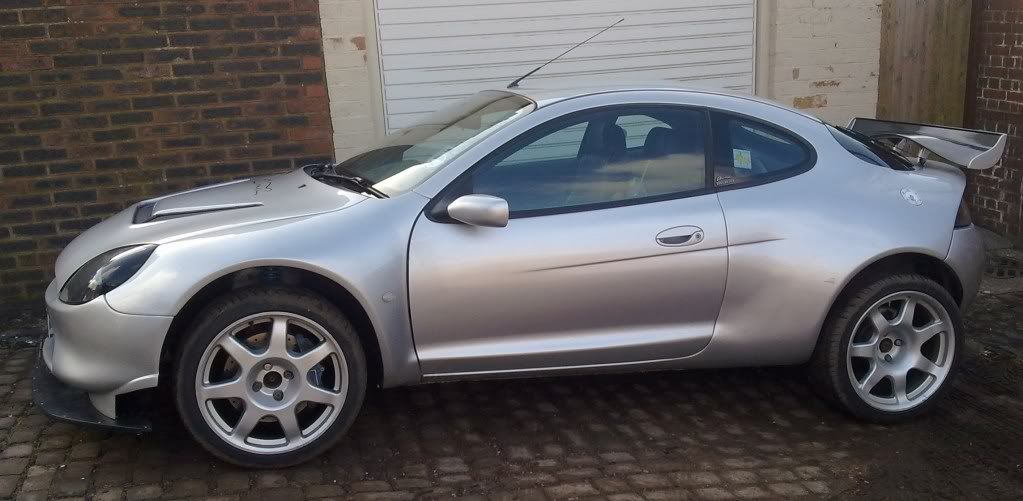
and the rear window.
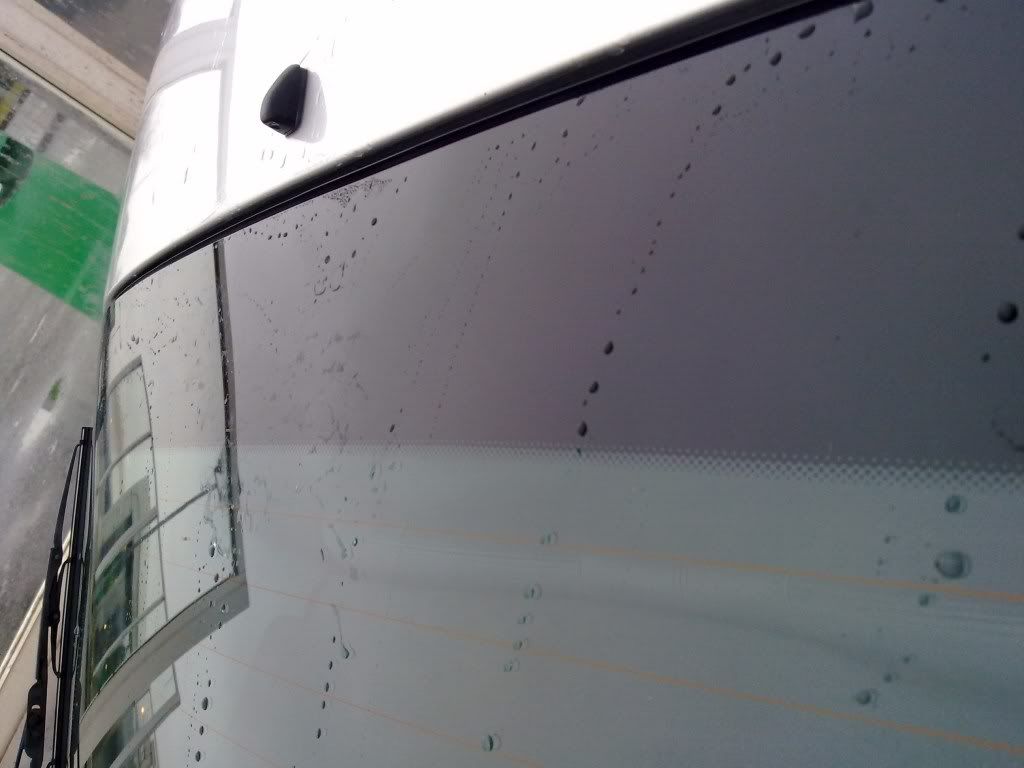
looks much better now its not a pumaspeed moving advertisement!!! Just need to polish out the edge marks.
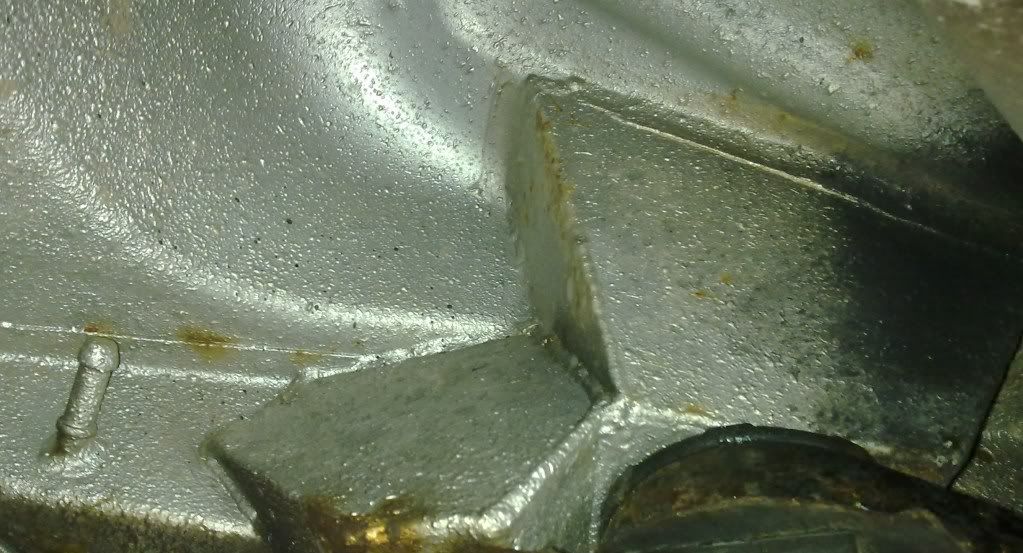
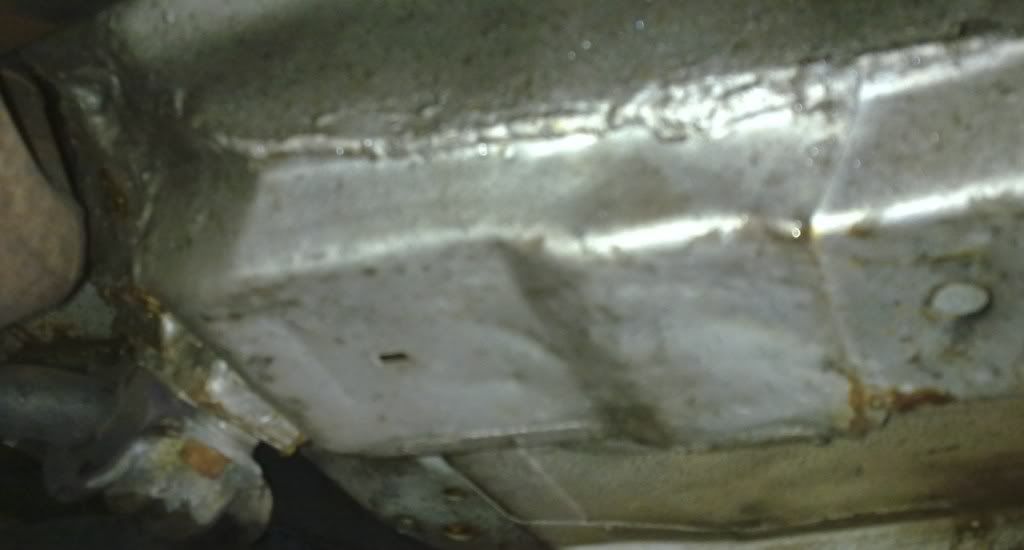
Also had the tracking done and while it was in the air took a few photos! This is of the rear beam box mounts which you can see have been totally fabricated from scratch!!
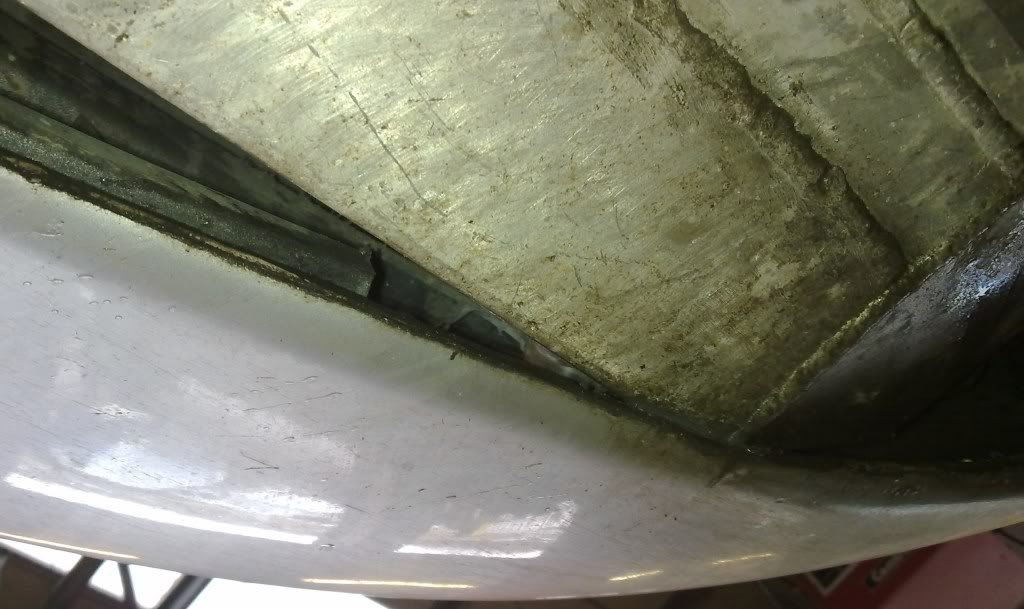
You can see here how far back the tank extends and the fact it needs a clean and polish!! there is a bit of bufty in me yet!!
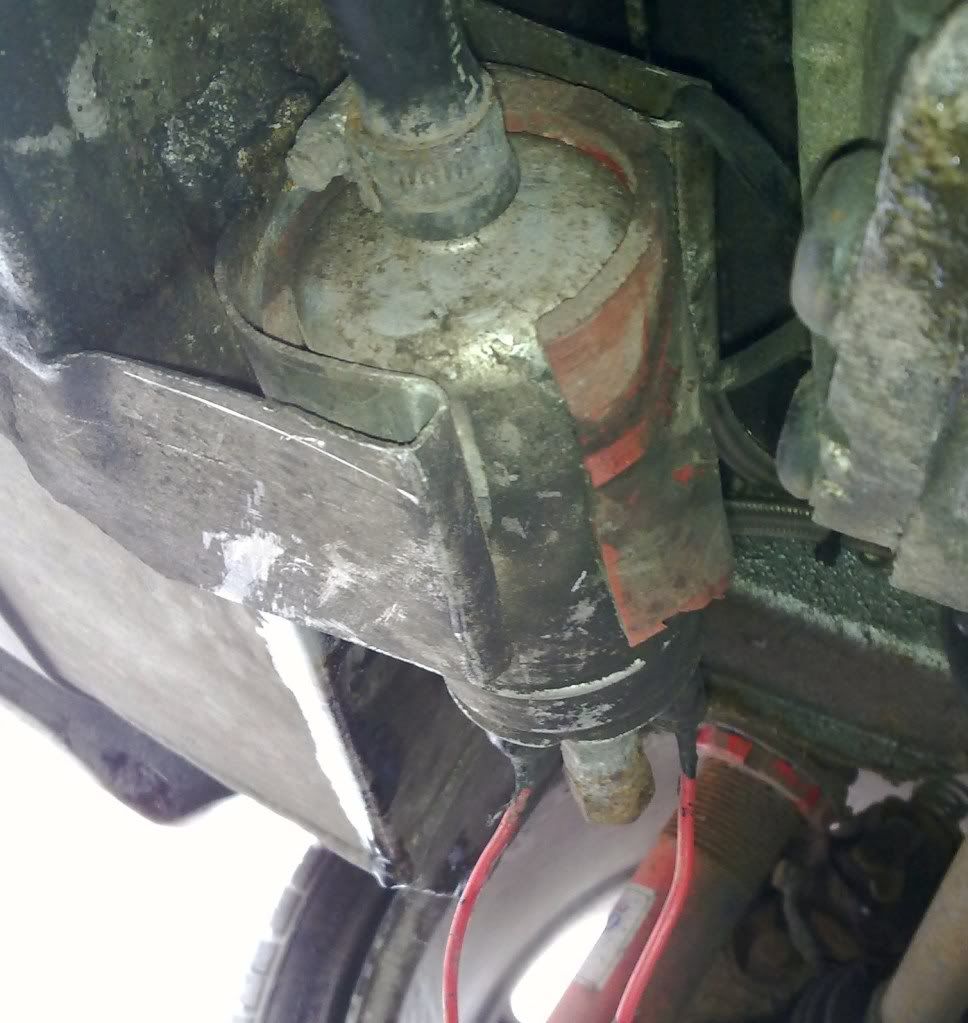
And here is the front anti-roll bar mounts which have been modified and strengthened as its just the rear of the subframe on a normal puma.
once the weathers a bit better i shall wire wheel the underside and redo the paint and under seal so it does rust away over next few years!!
been really busy of late with moving house, uni and breaking down!! LOL!! So not done much really.
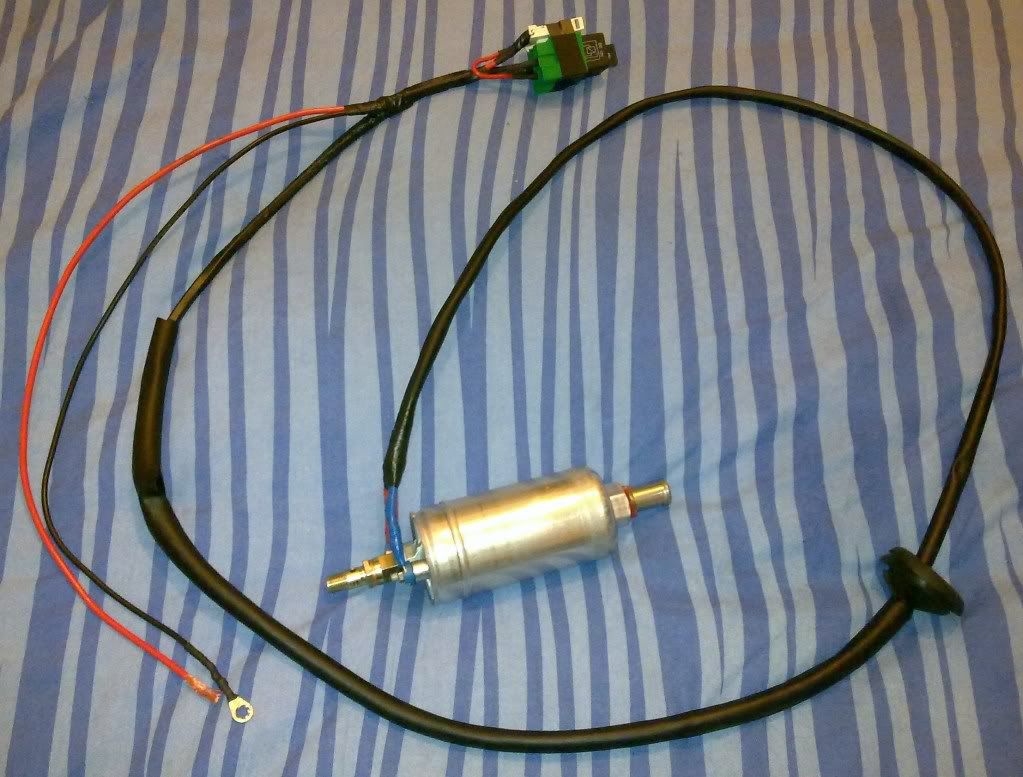
Fuel pump died so replaced that and decided to cut out the old wiring and wire in a new fuel pump wiring loom complete from battery to pump.
Cutting out the grotty old stuff:
Made up my own new loom and luckily had a new uprated pump to be fitted eventually anyway so this repair has cost me nothing but time:
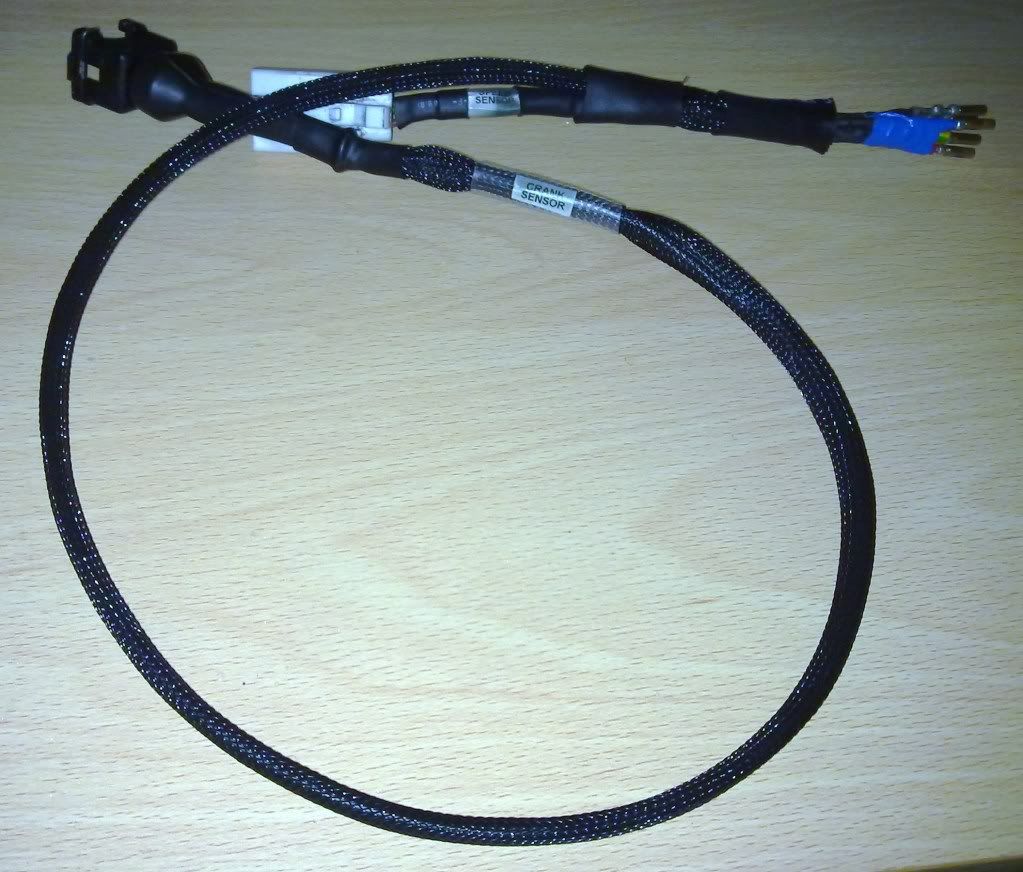
Also been manufacturing a couple more loom bits and bobs. This loom is for fitting my speed sensor and refitting the ford crank sensor ready for my focus dash:
Unfortunately 3rd gear has died and my box sounds like a bag of spanners!!! So over next week or so i need to pull it out and send it off to a guy i know for a strip down and rebuild (if worth it).
While its out i think i shall do some underside painting. I'll have access to the tunnel so will paint that and also heat wrap the exhaust down pipe while its off and if i can find some heat proof tape, may fit some to the footwell where the exhaust goes by.
I wanted a bit more flexibility on my alarm wiring so i can feed it through the dash better. The ford convoluted tubing i was using before was too rigid so ive stripped the loom down to wires and replaced it with braiding and heatshrink so ive now got more flexibility.
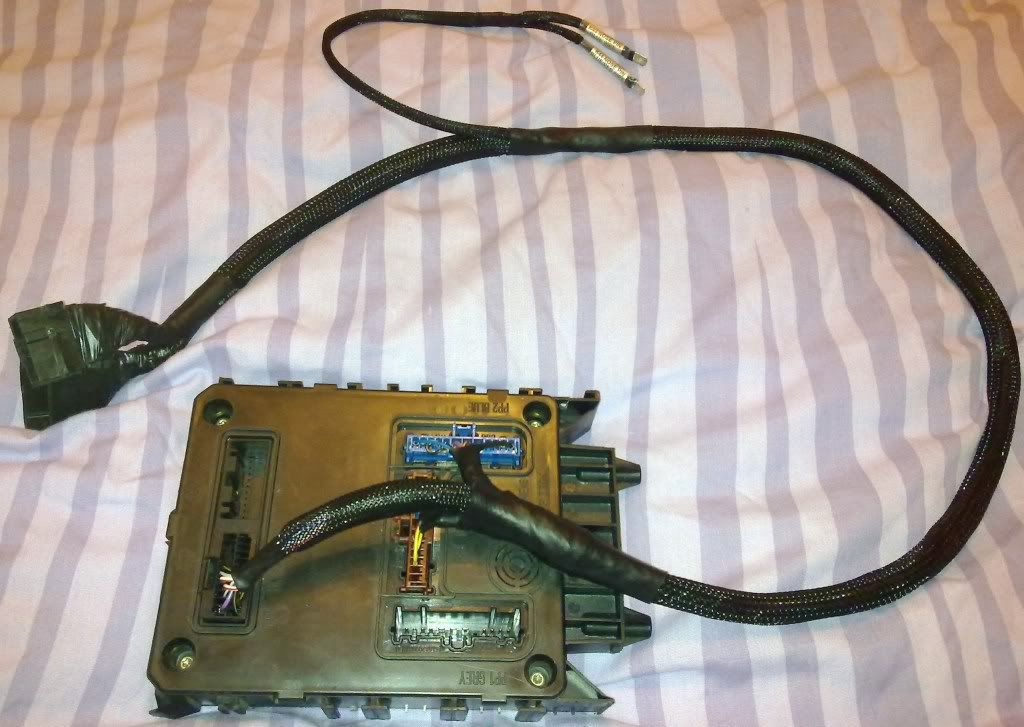
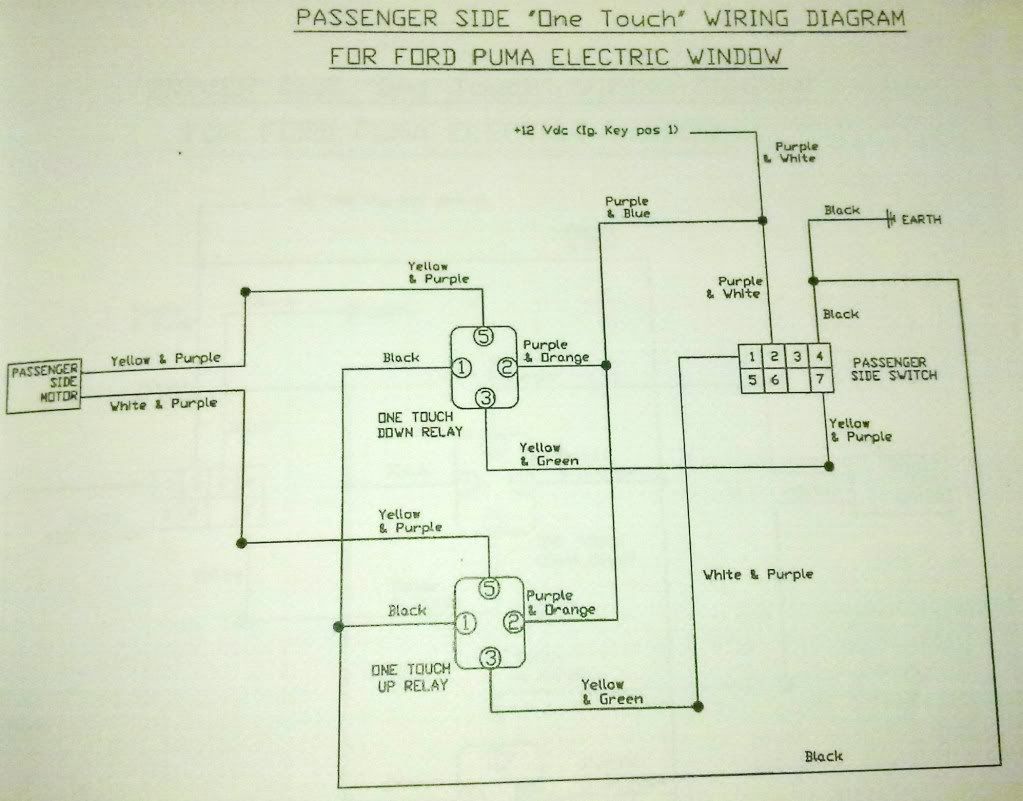
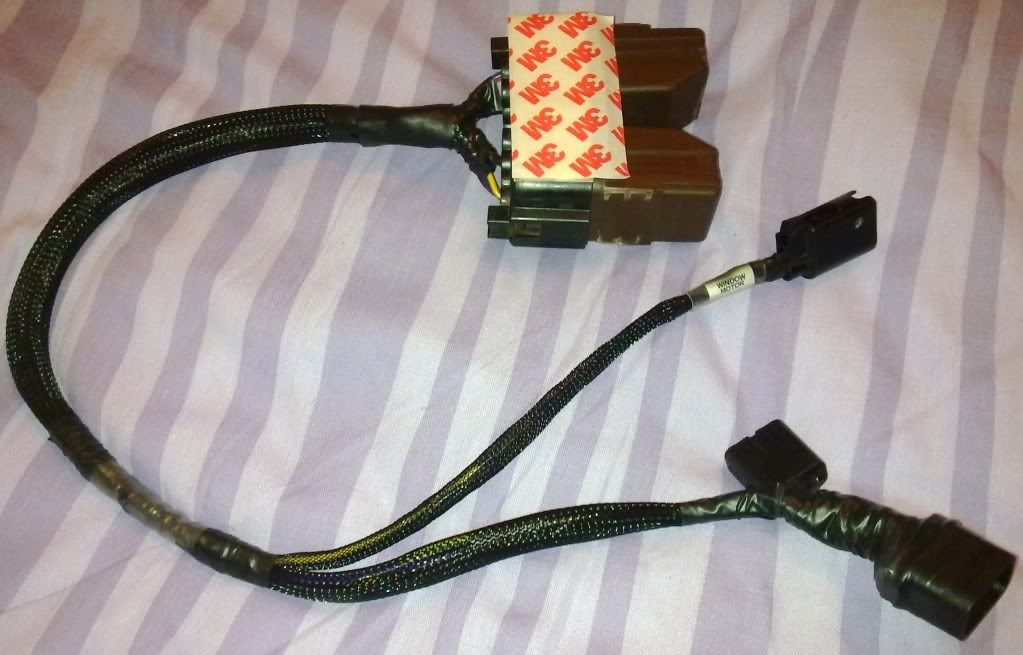
Ive also decided to refit one touch windows which i did for my previous pumas, so have got hold of the relays off a mondeo and started to prepare sublooms for that.
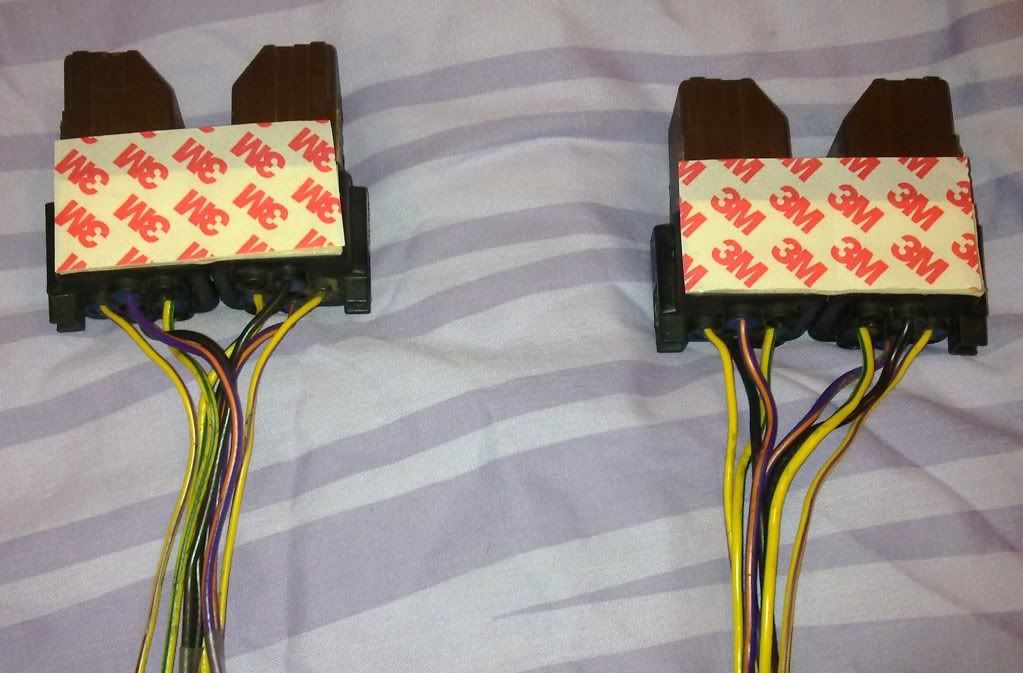
Each relay pair has been bonded together and 3m tape attached so they can be fitted behind the door card in the space that already exists.
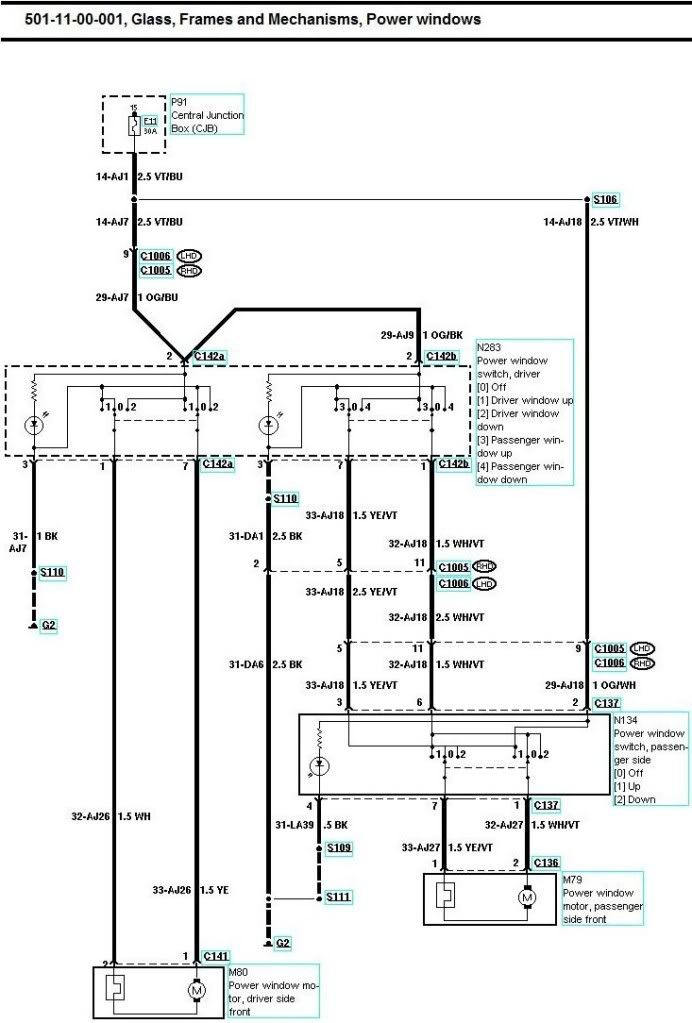
In effect if you look in the puma wiring diagram above, all that is being done is to put the relay into the motor wires, one relay for up and one for down and then a power feed taken for the relay and an earth using existing power supply and earth.
You have to do this for each side of the car:

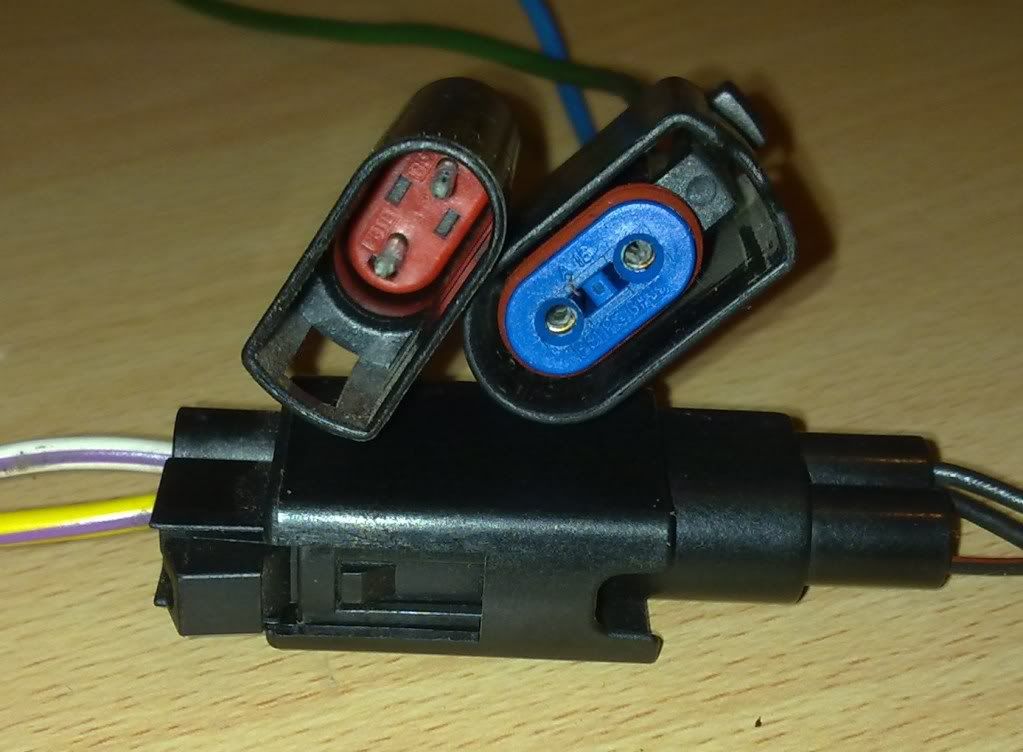
Ive decided to do this loom as a plug and play loom so no cutting the car loom and less hassle down the road so ive needed to get some connectors so ive got these:
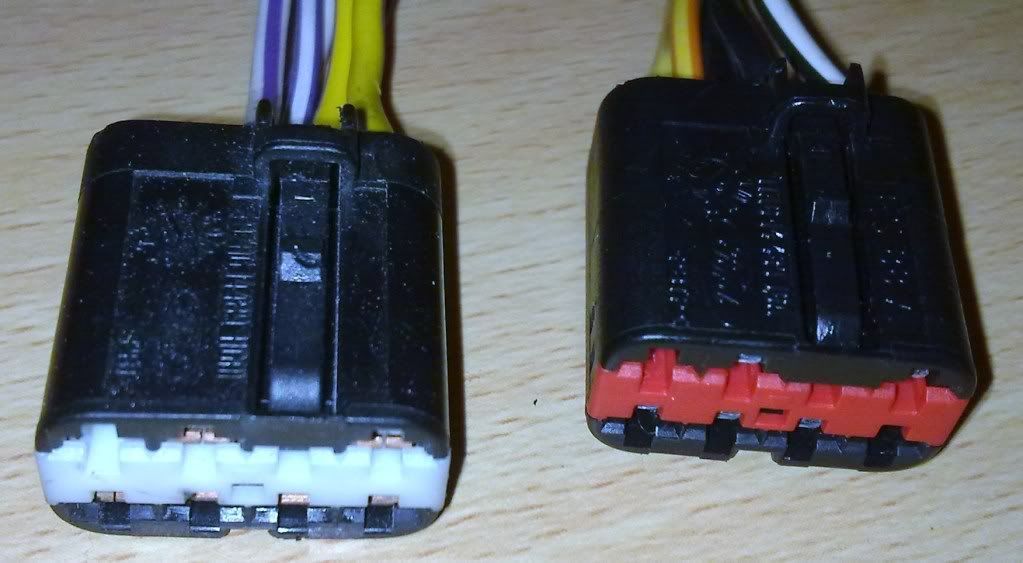
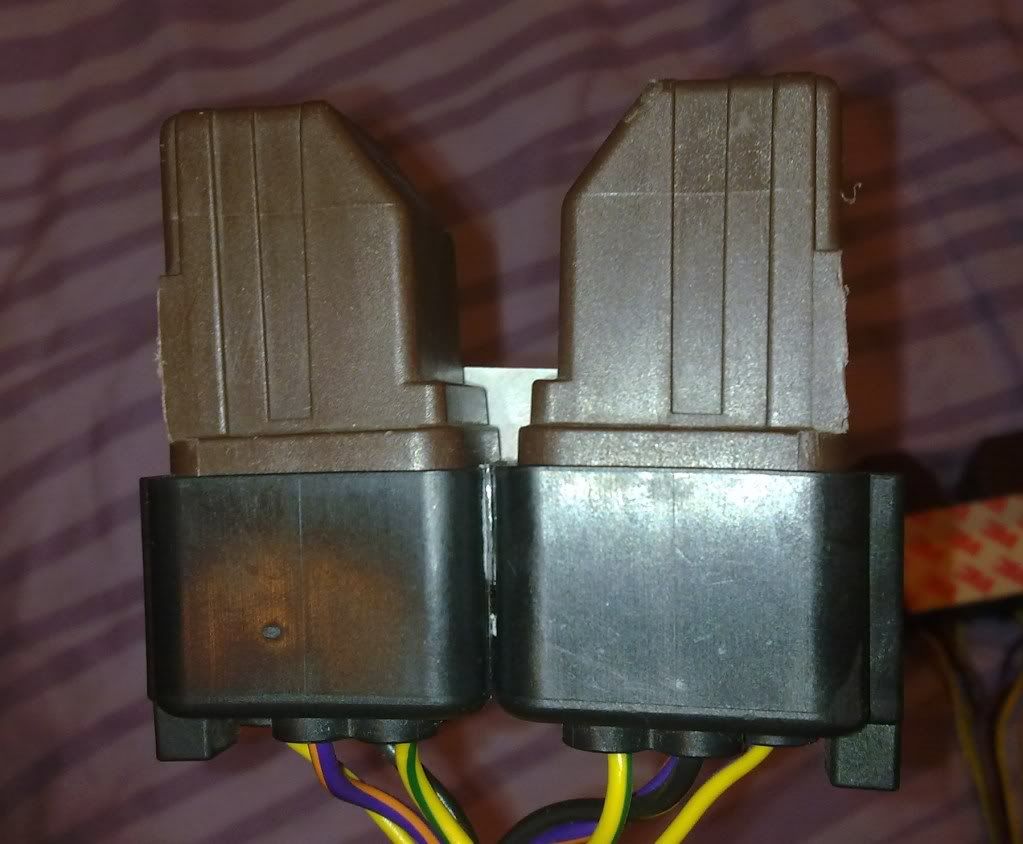
Also the male connectors i need for the window switch plugs are not available as seperate connectors so ive got two old window switches from the scrappy to strip down and use as connectors.
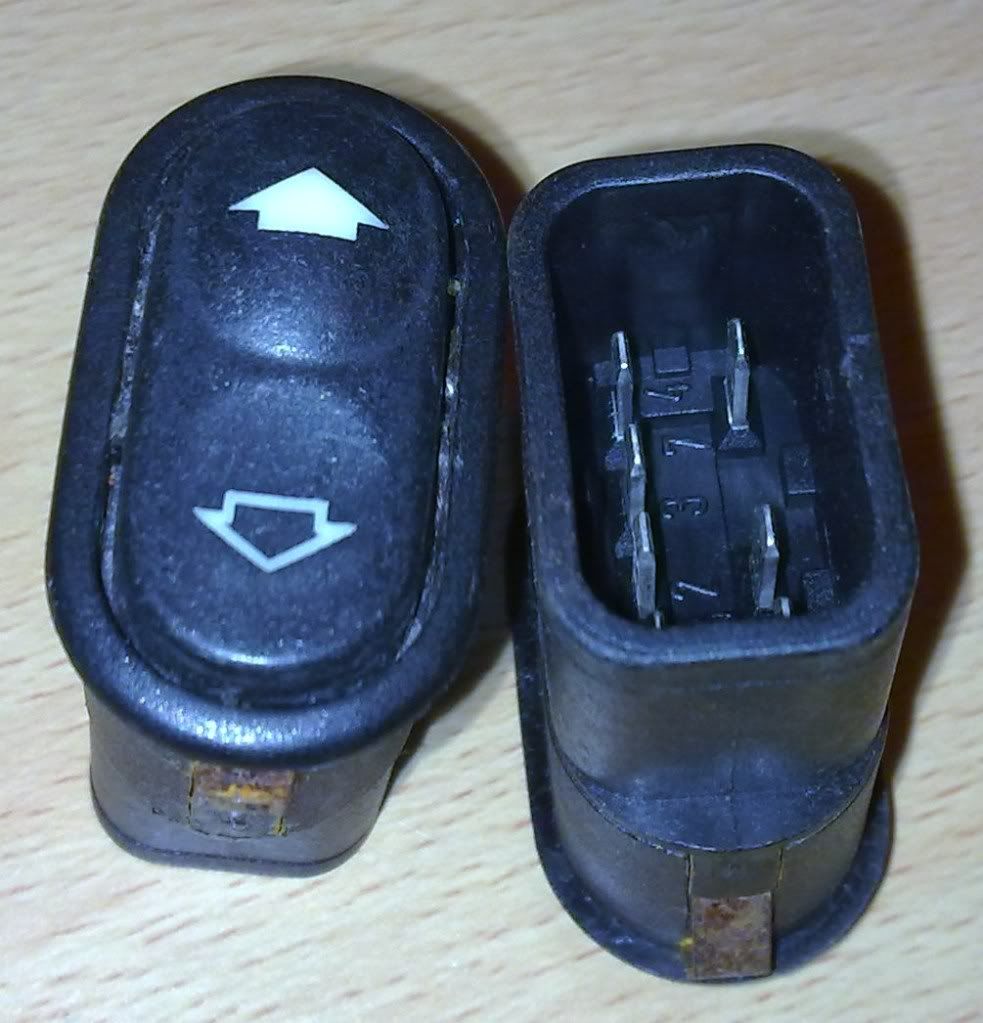
Strip the innards of the switches down to access the contacts which will be soldered to later on.
Made the looms up using the wiring diagrams above:
Im sure it could be easily adapted to fit other fords as all it needs is power supply and earth and to feed into the motor wiring.
and the rear window.
looks much better now its not a pumaspeed moving advertisement!!! Just need to polish out the edge marks.
Also had the tracking done and while it was in the air took a few photos! This is of the rear beam box mounts which you can see have been totally fabricated from scratch!!
You can see here how far back the tank extends and the fact it needs a clean and polish!! there is a bit of bufty in me yet!!
And here is the front anti-roll bar mounts which have been modified and strengthened as its just the rear of the subframe on a normal puma.
once the weathers a bit better i shall wire wheel the underside and redo the paint and under seal so it does rust away over next few years!!
been really busy of late with moving house, uni and breaking down!! LOL!! So not done much really.
Fuel pump died so replaced that and decided to cut out the old wiring and wire in a new fuel pump wiring loom complete from battery to pump.
Cutting out the grotty old stuff:
Made up my own new loom and luckily had a new uprated pump to be fitted eventually anyway so this repair has cost me nothing but time:
Also been manufacturing a couple more loom bits and bobs. This loom is for fitting my speed sensor and refitting the ford crank sensor ready for my focus dash:
Unfortunately 3rd gear has died and my box sounds like a bag of spanners!!! So over next week or so i need to pull it out and send it off to a guy i know for a strip down and rebuild (if worth it).
While its out i think i shall do some underside painting. I'll have access to the tunnel so will paint that and also heat wrap the exhaust down pipe while its off and if i can find some heat proof tape, may fit some to the footwell where the exhaust goes by.
I wanted a bit more flexibility on my alarm wiring so i can feed it through the dash better. The ford convoluted tubing i was using before was too rigid so ive stripped the loom down to wires and replaced it with braiding and heatshrink so ive now got more flexibility.
Ive also decided to refit one touch windows which i did for my previous pumas, so have got hold of the relays off a mondeo and started to prepare sublooms for that.
Each relay pair has been bonded together and 3m tape attached so they can be fitted behind the door card in the space that already exists.
In effect if you look in the puma wiring diagram above, all that is being done is to put the relay into the motor wires, one relay for up and one for down and then a power feed taken for the relay and an earth using existing power supply and earth.
You have to do this for each side of the car:
Ive decided to do this loom as a plug and play loom so no cutting the car loom and less hassle down the road so ive needed to get some connectors so ive got these:
Also the male connectors i need for the window switch plugs are not available as seperate connectors so ive got two old window switches from the scrappy to strip down and use as connectors.
Strip the innards of the switches down to access the contacts which will be soldered to later on.
Made the looms up using the wiring diagrams above:
Im sure it could be easily adapted to fit other fords as all it needs is power supply and earth and to feed into the motor wiring.
both. strip down, retreat, paint, underseal and waxoil all the box sections.
Well finally got round to sorting the gearbox!
First was the nightmare of removing the old box, which included total removal of exhaust, seats, lowering subframe amongst others
Finally it was off so could compare to the new box:
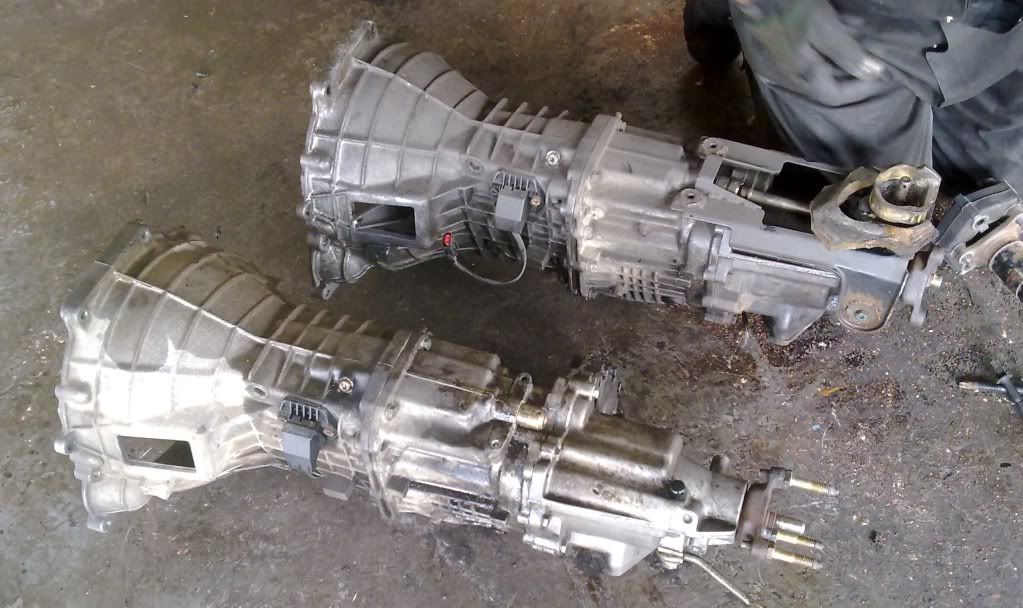
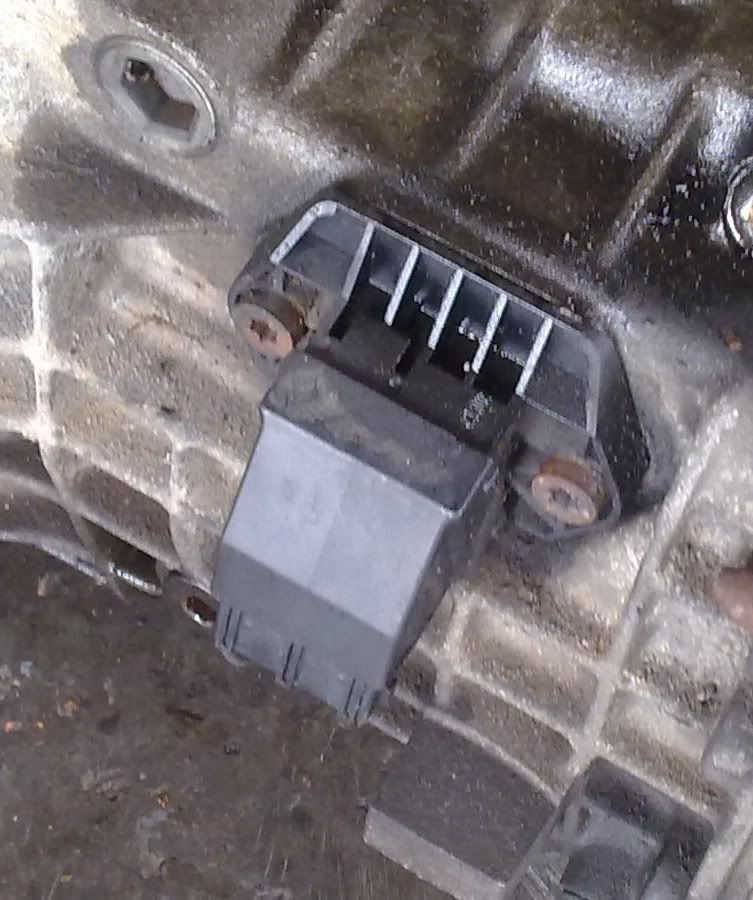
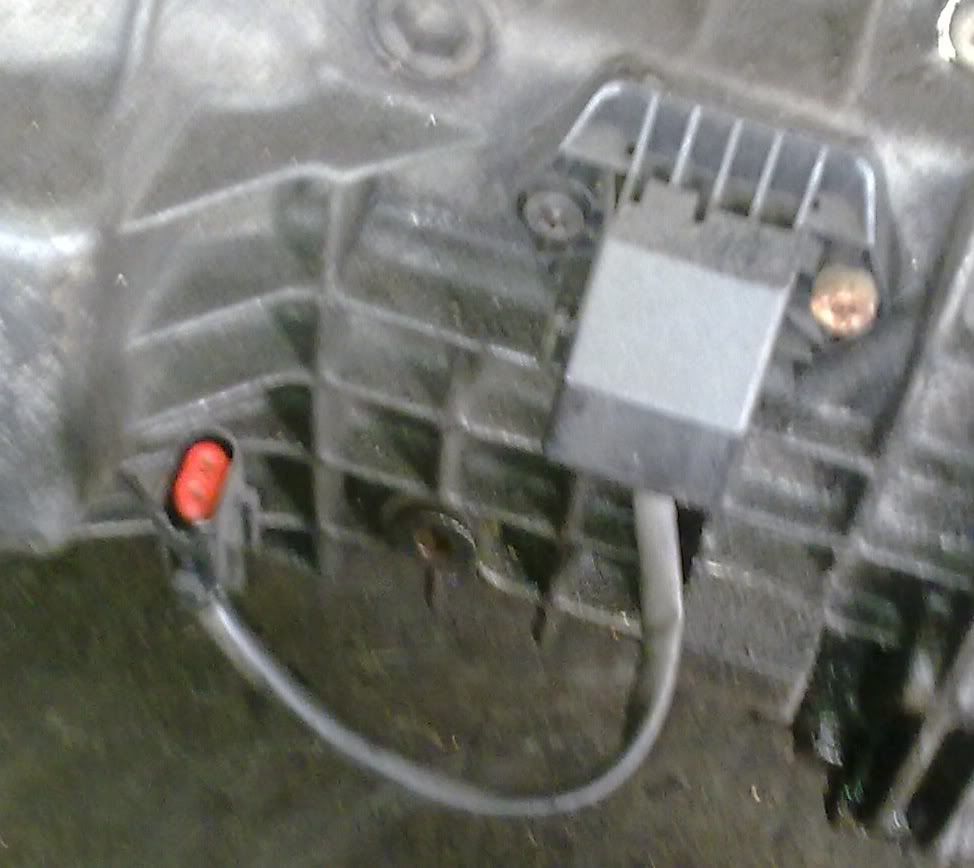
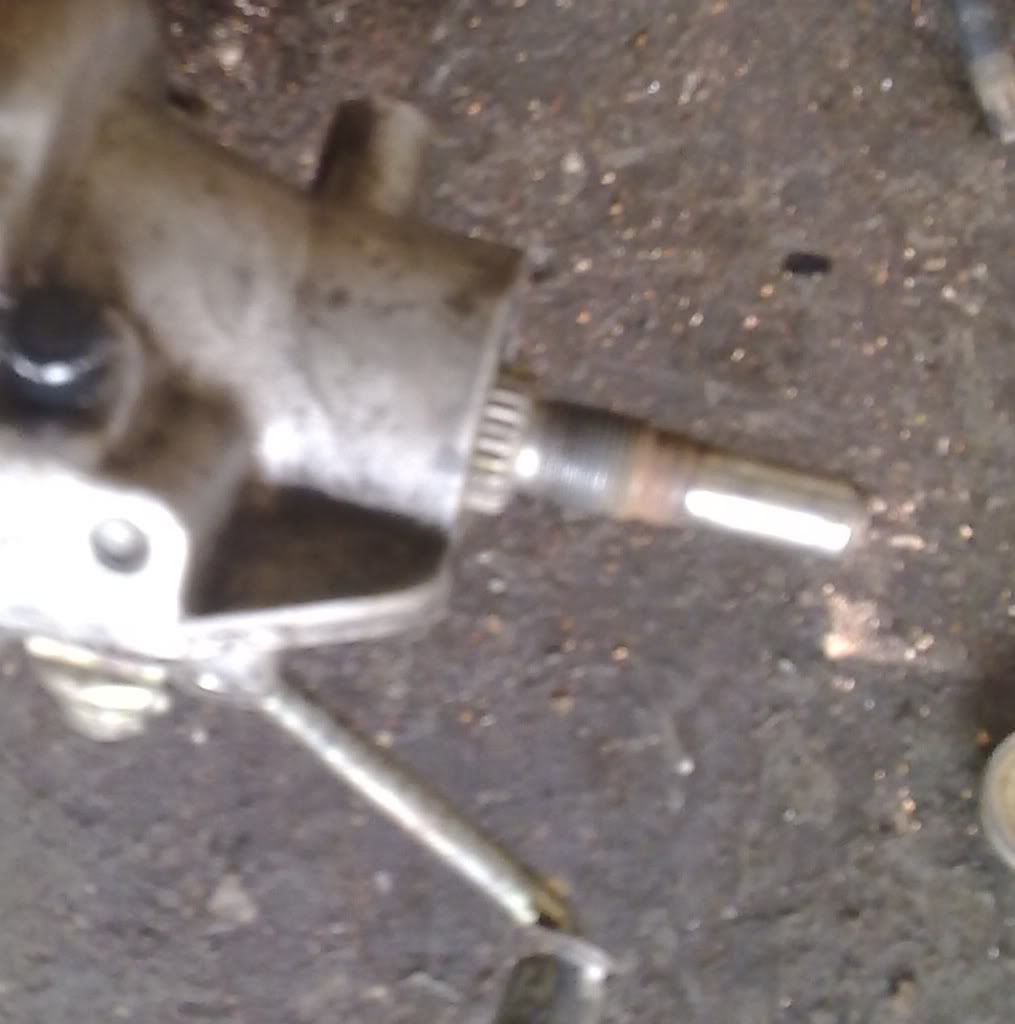
First obvious difference is the reverse switch:
The second was on the bit that attaches to the prop:
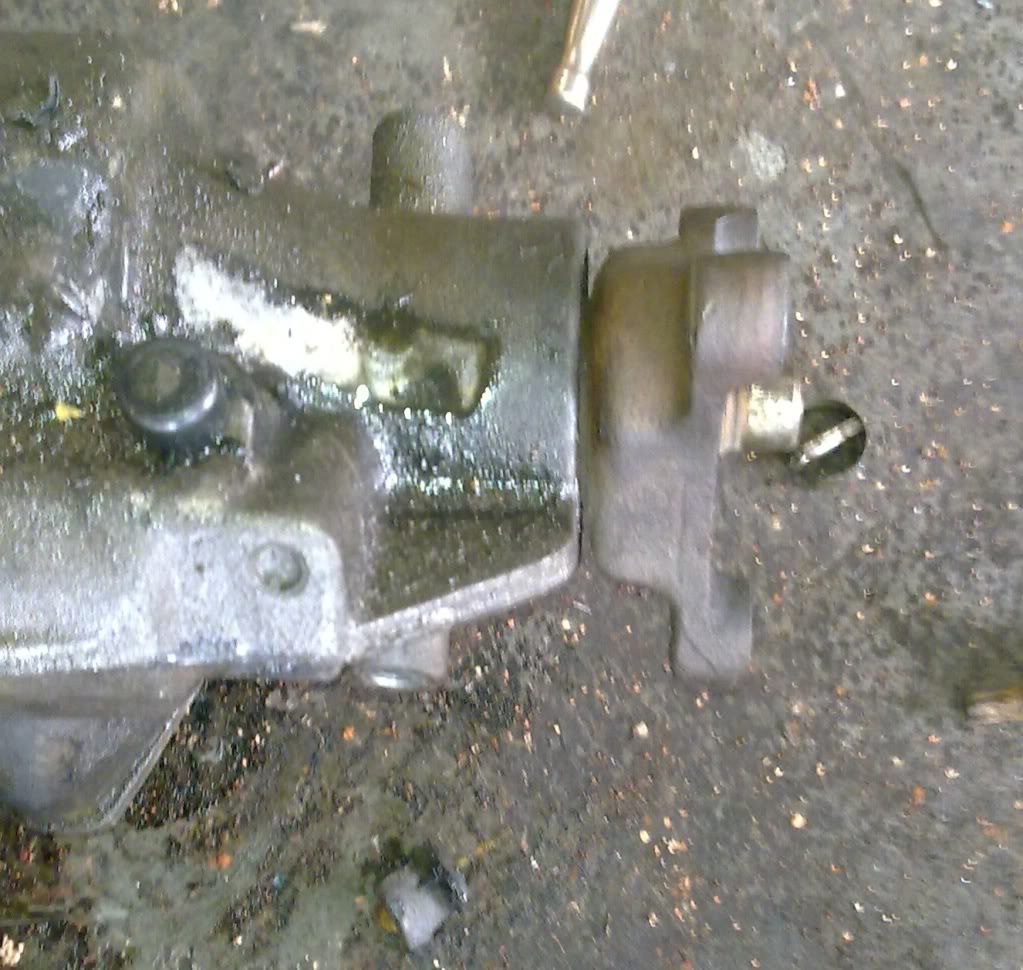
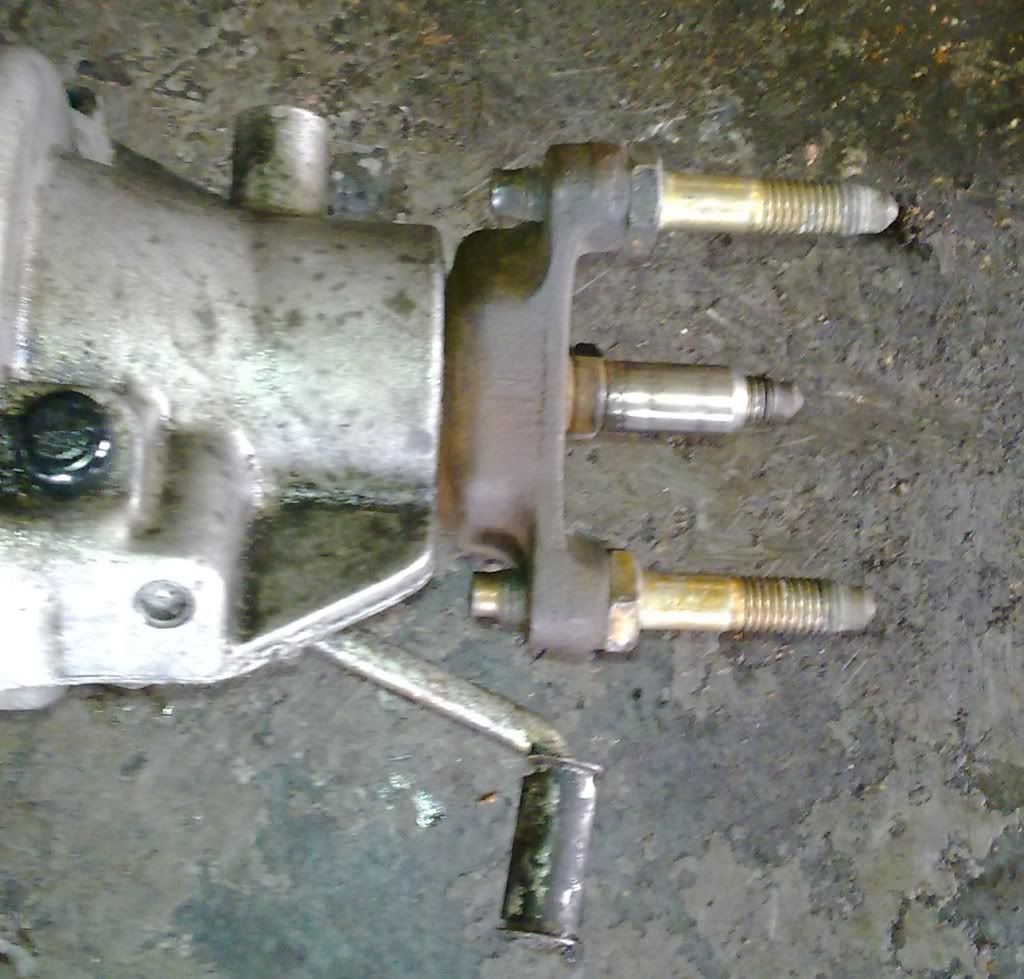
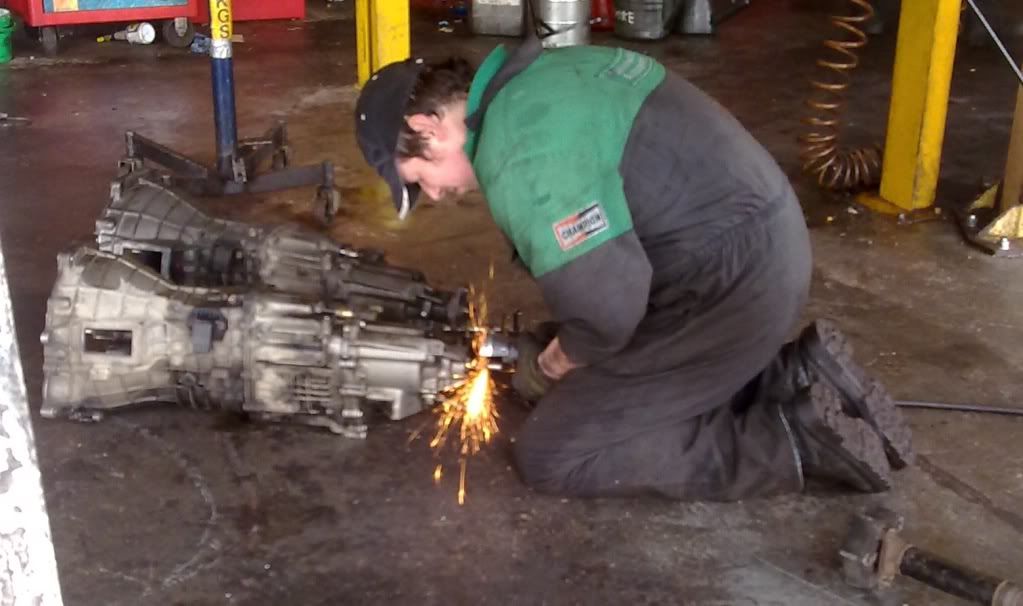
So the bolt frame had to be removed:
Then it was cut to length:
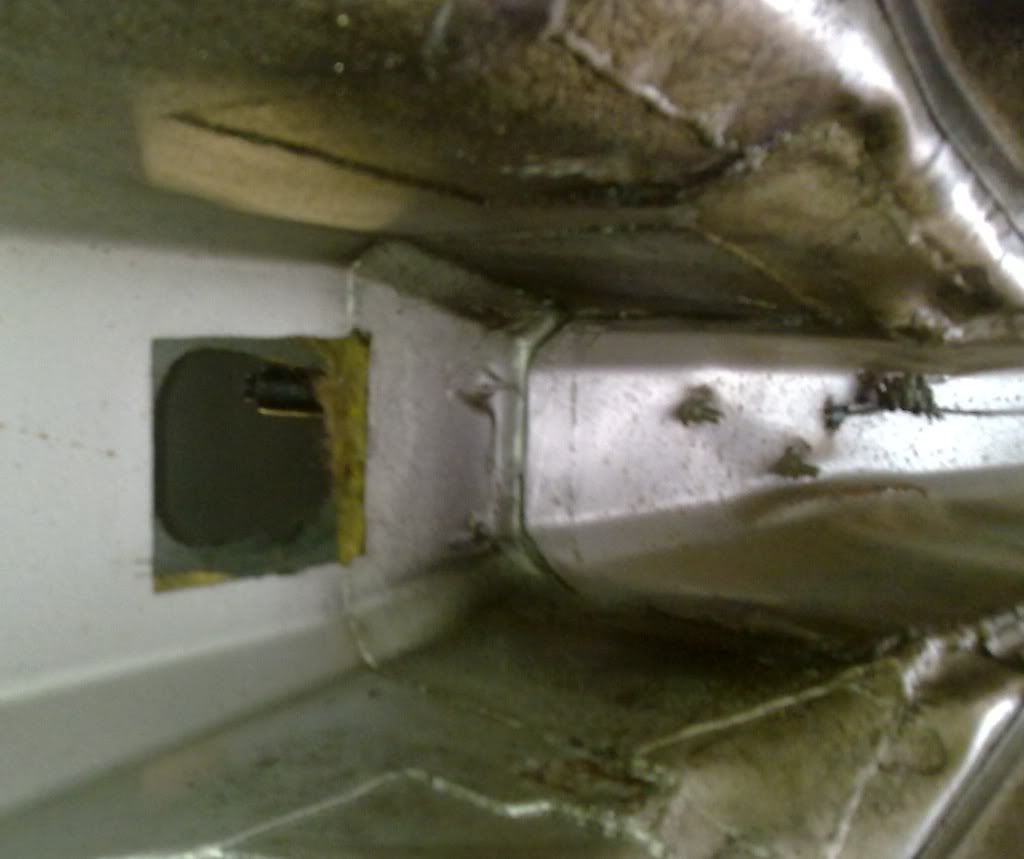
While the box was out, it made sense to inspect the tunnel to see if it needed painting:
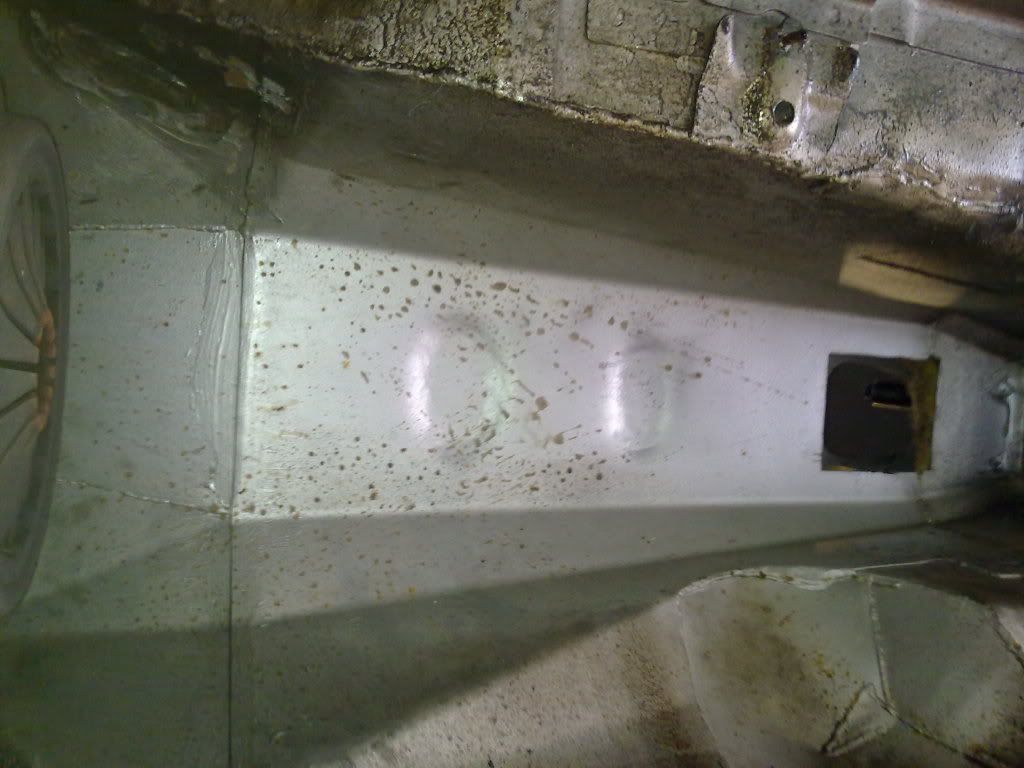
The tunnel was then derusted, primed with anti-rust primer and then painted!

Decided to do the same to the exhaust with high temp exhaust paint!
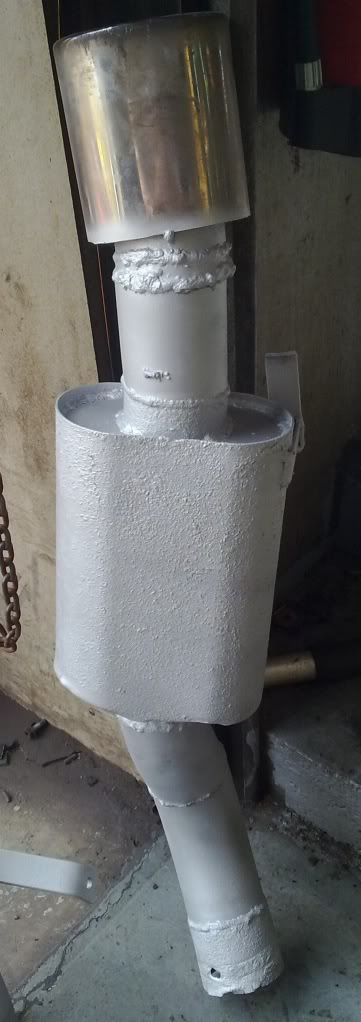
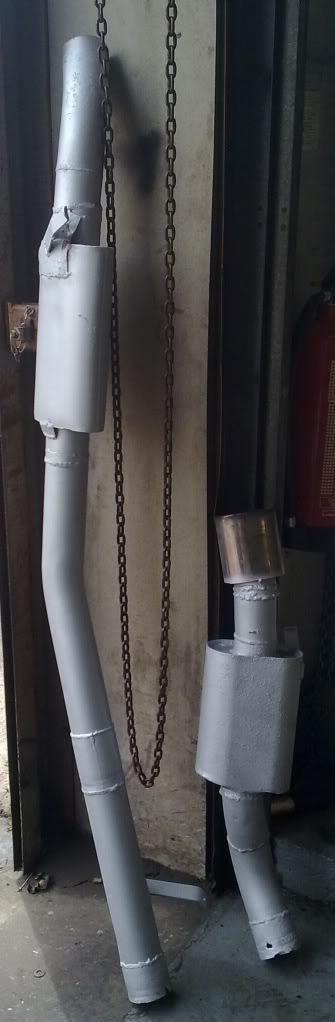
The exhaust was then refitted!
All tested and gearbox seems to be fine!!
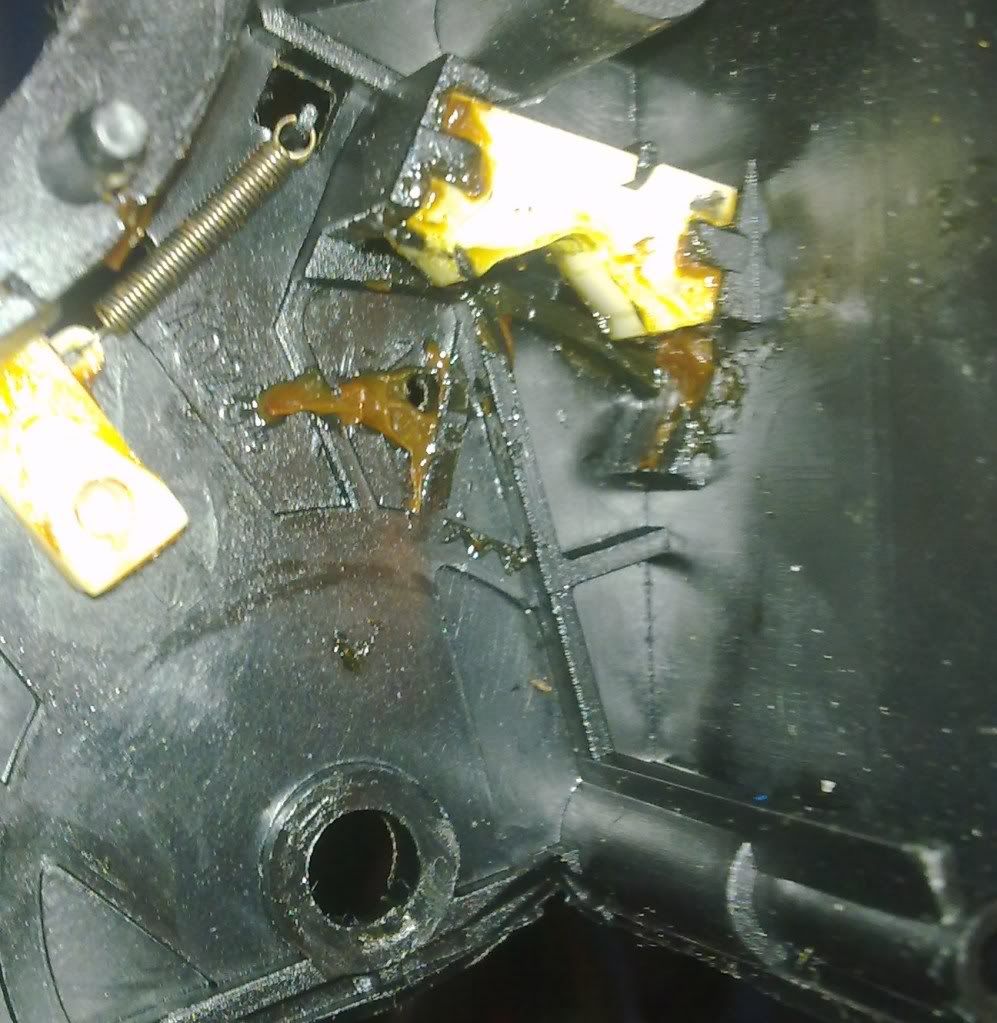
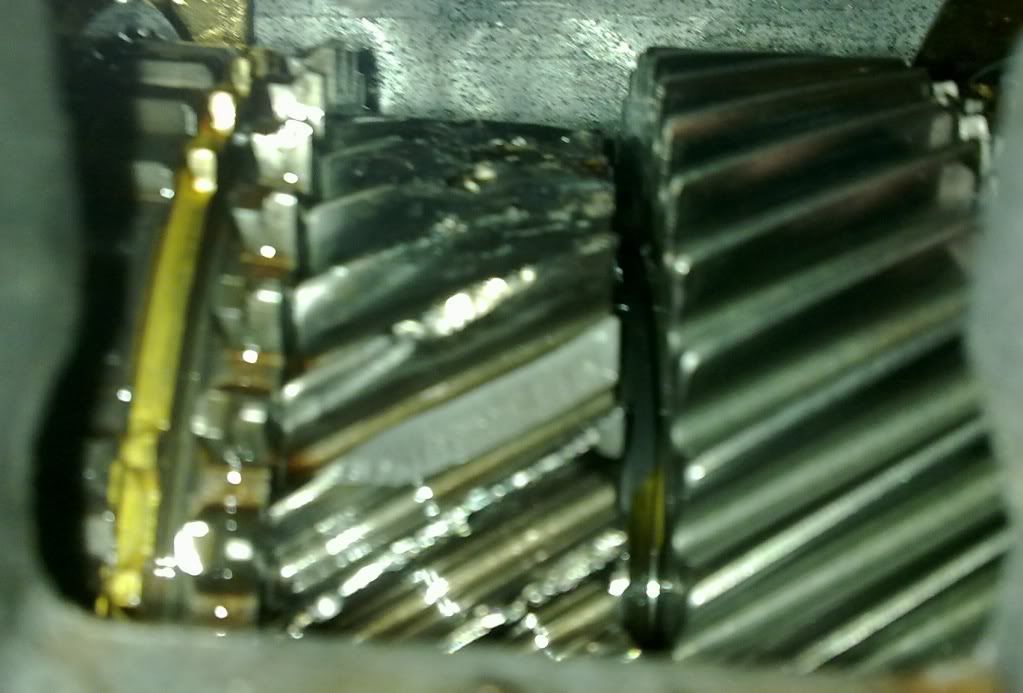
Now for the juicy pic! Heres the damage inside the old gearbox:

First was the nightmare of removing the old box, which included total removal of exhaust, seats, lowering subframe amongst others
Finally it was off so could compare to the new box:
First obvious difference is the reverse switch:
The second was on the bit that attaches to the prop:
So the bolt frame had to be removed:
Then it was cut to length:
While the box was out, it made sense to inspect the tunnel to see if it needed painting:
The tunnel was then derusted, primed with anti-rust primer and then painted!
Decided to do the same to the exhaust with high temp exhaust paint!
The exhaust was then refitted!
All tested and gearbox seems to be fine!!
Now for the juicy pic! Heres the damage inside the old gearbox:
Nah pure torque combined with shock loading peaks during doing dohnuts, standing starts, rev limiter gear changes etc!! It got thrashed loads before i had it!
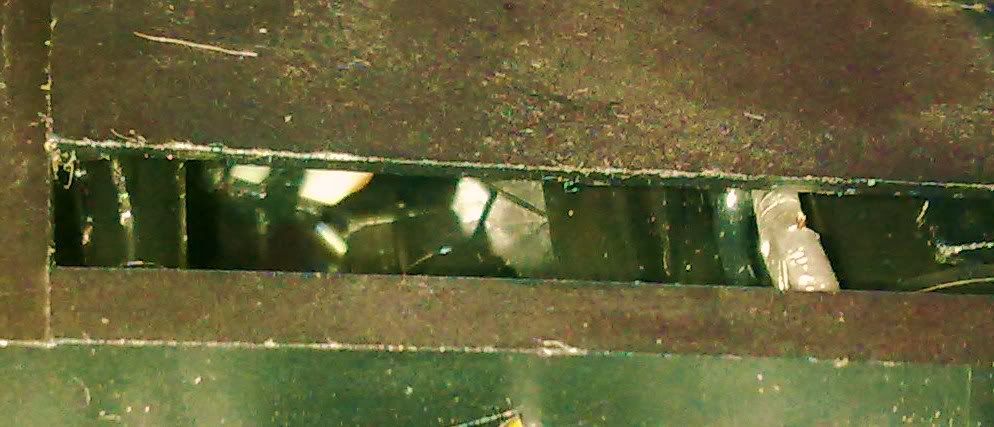
Left the car at K&M acoustic place for some security work. And by mid morning it looked like this:
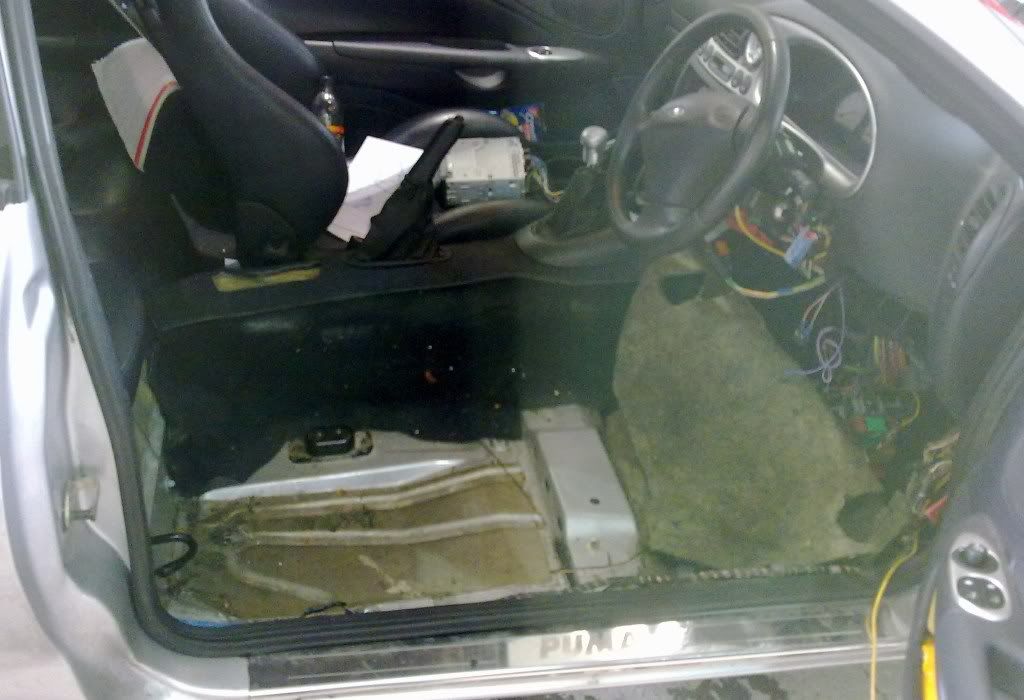
And you can see how much my carpets been cut down when you consider the original is a one piece carpet!
One thing slightly worrying in the loo though:
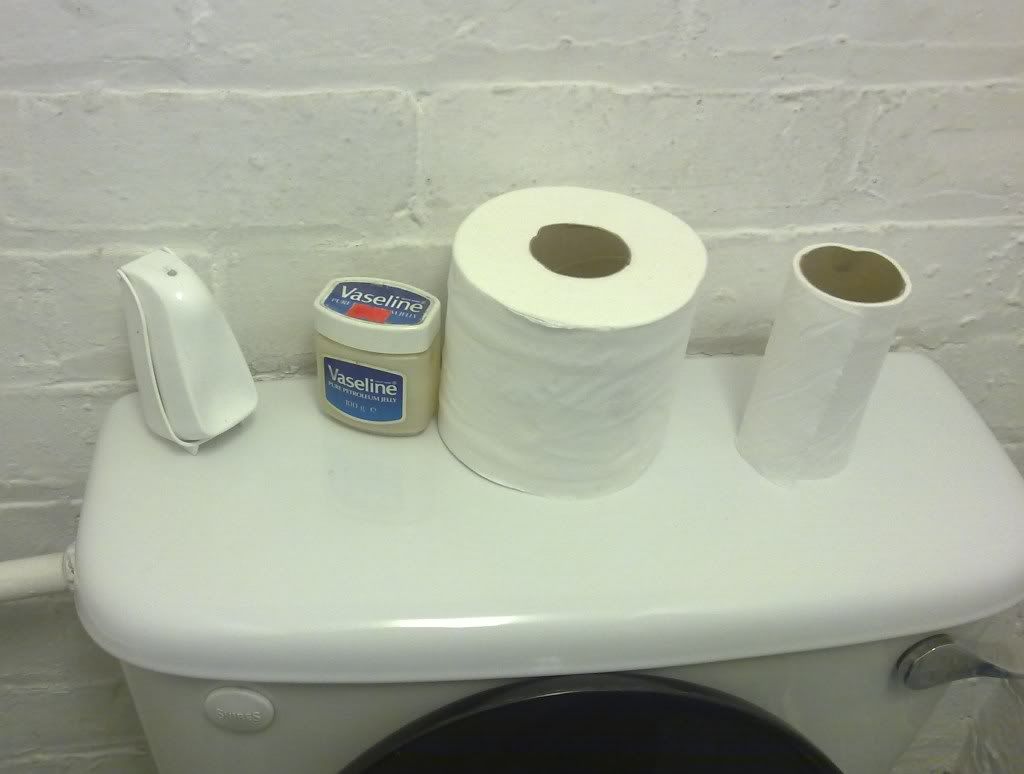
I presume thats the solution for non-payers!
Left the car at K&M acoustic place for some security work. And by mid morning it looked like this:
And you can see how much my carpets been cut down when you consider the original is a one piece carpet!
One thing slightly worrying in the loo though:
I presume thats the solution for non-payers!
yep i am broke needs must with all the scum about but now got top of the range system plus tracker, mobile alarm control etc etc.
needs must with all the scum about but now got top of the range system plus tracker, mobile alarm control etc etc.Not much of a Ford fan, but that is a pretty decent project. props.
Quick Reply
Related discussions
- Car Leasing
- What do you think of HS2 only going to Birmingham
- What is your favourite modern classic?
- Starting sixth form, how can I get into Cambridge computer science?
- WORK EXPERIENCE!! engineering, physics, compsci, economics
- Will I get fired?
- Asma's student blog | from Nepal to Bradford, postgraduate study & career ambitions
- Help for EPQ about CRISPR
- Computer science gap year - Need help
- real estate
- Peter Vardy Shutting Down, Got 2 Years Left On Warranty??
- What is the biggest prize you have ever won?
- What is DNA repair
- Can my insurance pay for repairs or the AA (require ECU)
- Head gasket and cylinder head advise needed please
- Car hit my door as I opened it.
- Best watch repair service in Essex
- Unit 7 Business decision making exam January 2023
- Phone repair places
- Ford Ka failed MOT due to rust- repair or scrap
Latest
Trending
Last reply 5 months ago
Where is my car parked during the day? Advice for first car insuranceLast reply 7 months ago
Will paying £1,900 a year for insurance as a new 21 year old driver be a lot?Trending
Last reply 5 months ago
Where is my car parked during the day? Advice for first car insuranceLast reply 7 months ago
Will paying £1,900 a year for insurance as a new 21 year old driver be a lot?


